VitOS Orbiter
User Operation Manual
Basic Functions and Local Music
June 5th, 2023
Content
3.4.1. Reselect device control
3.5.1.1. M1 Device Audio Output Description
3.5.1.2. M1T Device Audio Output Description
3.5.3.1.1.3.2. External USB DAC
3.5.3.1.2.1. Streaming Music login
3.5.3.1.2.2. Streaming Music Logout
3.5.3.1.3. Internal DAC & Digital Output
3.5.3.1.3.1. Digital Audio Details
3.5.3.1.3.2. Internal Decoding And Digital Output Settings
3.5.3.1.3.2.1. DSD Playback Strategy
3.5.3.1.3.2.2. Max. DSD PCM Sample Rate
3.5.3.1.3.2.3. Max. PCM Bits Per Sample
3.5.3.1.3.2.4. Max. DSD Format
3.5.3.1.3.2.5. Roon Ready DSP Volume
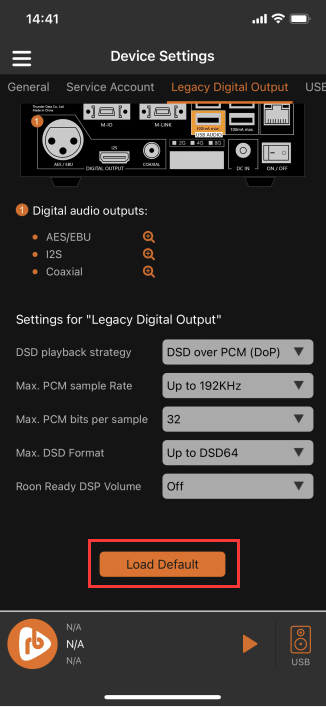
3.5.3.1.4. Legacy Digital Output
3.5.3.1.4.1. Digital Audio Details
3.5.3.1.4.2. Traditional Digital Outputs
3.5.3.1.4.2.1. DSD Playback Strategy
3.5.3.1.4.2.2. Max. PCM Sample Rate
3.5.3.1.4.2.3. Max. PCM Bits Per Sample
3.5.3.1.4.2.4. Max. DSD Format
3.5.3.1.4.2.5. Roon Ready DSP Volume
3.5.3.1.5.1. DSD Playback Strategy
3.5.3.1.5.2. Max. PCM Sample Rate
3.5.3.1.5.3. Max. PCM Bits Per Sample
3.5.3.1.5.6. Roon Ready DSP Volume
3.5.3.1.5.7. Auto.detection of MQA Capabilities
3.6.1.2. Clean And Rescan The Database
3.6.2.1. Network Storage Management
3.6.2.1.1. Remove Network Storage
3.6.2.1.2. Disable Network Storage
3.6.2.1.3. Enable Network Storage
3.6.2.2. Go To Network Storage
3.6.2.3.1. How To Connect Network Storage
3.6.2.3.1.1. Automatically Scan Network Storage
3.6.2.3.1.2. Manually Set Up Network Storage
3.6.2.3.1.3. Error Code Parsing
3.6.2.3.2. Establish Connection
3.6.2.3.2.3. Return To The Previous Folder
3.6.3. USB Storage(You can view the connected E1)
3.6.3.1. USB Storage Management
3.6.3.2. Enter The Storage Partition
3.6.4.1. Folder Display Description
3.6.4.2. Return To The Specified Folder
3.6.4.3. Rescan Current Folder
3.6.4.4.2.1. Play This Album From This Track
3.6.4.4.2.2. Play this Folder from this Track
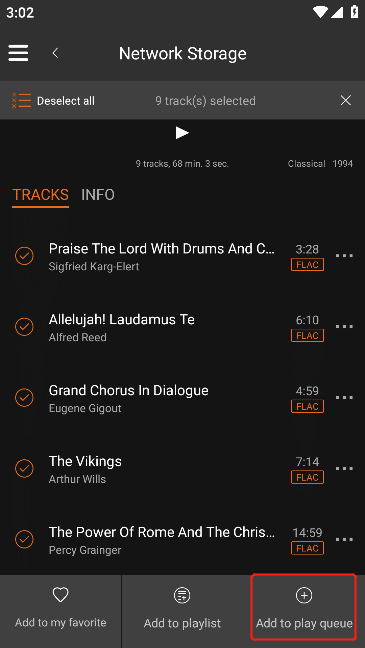
3.6.4.4.2.5. Add to Play Queue
3.6.4.4.2.6. Add to My Favorite
3.6.4.4.2.7. Remove From My Favorite
3.6.4.4.2.8.1. Create Playlist
3.6.4.4.2.10.1. Favorite Release Albums/Remove Favorite Release Albums
3.6.4.4.2.11.1. Favorite Artists/Remove Favorite Artists
3.6.4.4.2.12. Set As Default Action When Click On Track
3.6.4.4.2.13. View Song Information
3.6.4.4.3. Song Tick Operation
3.6.4.4.3.1. Select All/Deselect All
3.6.4.4.3.2. Select Some Songs
3.6.4.4.3.3. Add to My Favorite
3.6.4.4.3.5. Add to Play Queue
3.6.5.1. Rescan the Current Folder
3.6.7.2.3. Remove this Playlist
3.7.2.7.1. Play Queue Operation
1. Software Overview
1.1. Overview
VitOS Orbiter is mainly a professional music control software, which can be used for iOS \ Android devices (including mobile phones and tablets),It is the key to execute Silent Angel-M1 and Silent Angel- Z1, efficiently operate playback and access music data, freely Wandering in Hi-Fi music, you deserve better music and better life! And can open the door of Hi-Fi music life .
2. Operating Environment
This software can run on Android and iOS mobile phones.
3. Instructions
3.1. Software Installation
Android users can download and install by searching for " VitOS Orbiter " in the Google Play;
Apple users can search for "VitOS Orbiter" in the APP Store to download and install.
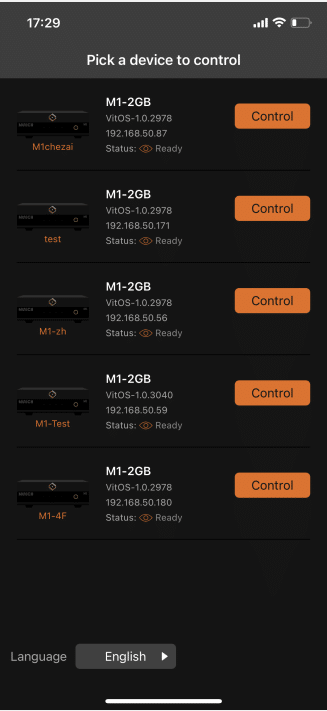
3.2. Software Running
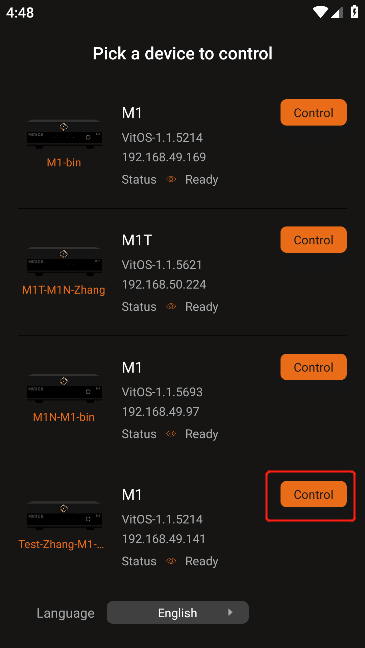
After the installation is complete, the user can click the desktop icon to enter the APP Device Dicovery interface, as shown in the figure below.
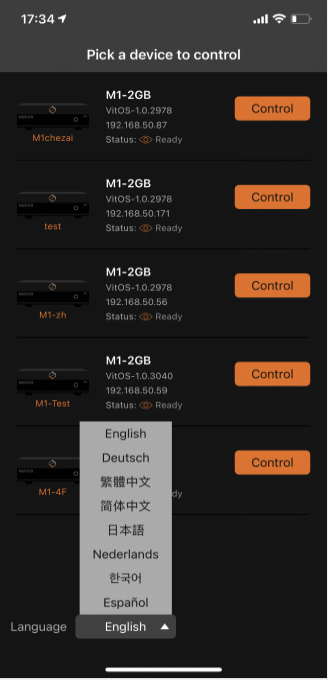
3.3. Software Language
In the Device Dicovery interface click the "Language" option in the lower left corner to select the language used by the APP.
3.4. Device Control
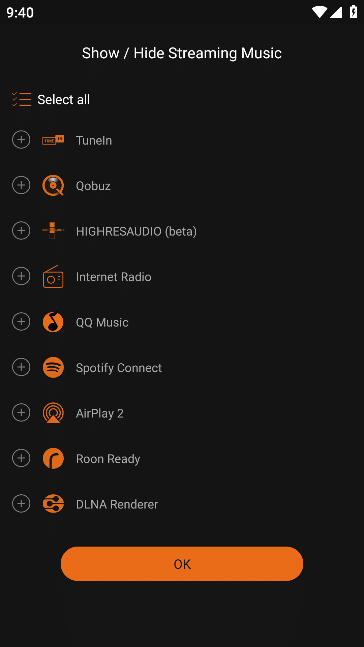
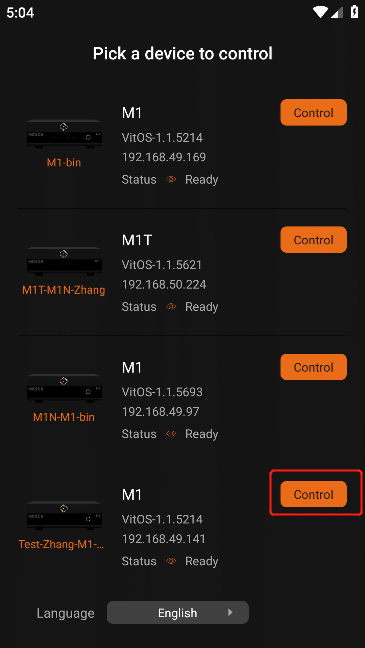
Select the device to be controlled, and click the "Control" button next to the device to enter the APP. For the first connection to the device, you need to select the display/hide of the streaming music in the sidebar menu. You can select the menu or click to select all Check all menus, and then click "OK".
3.4.1. Reselect device control
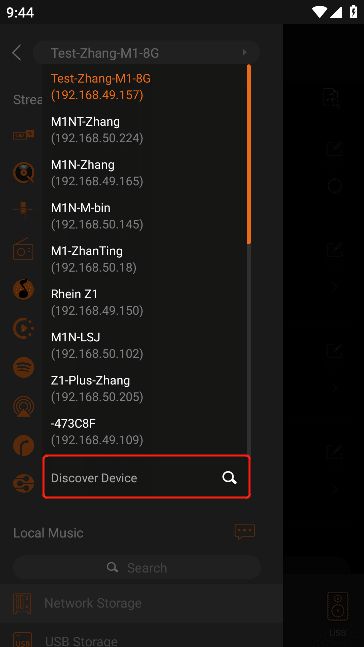
Click the menu button in the upper left corner to open the side menu and click the marked device name.
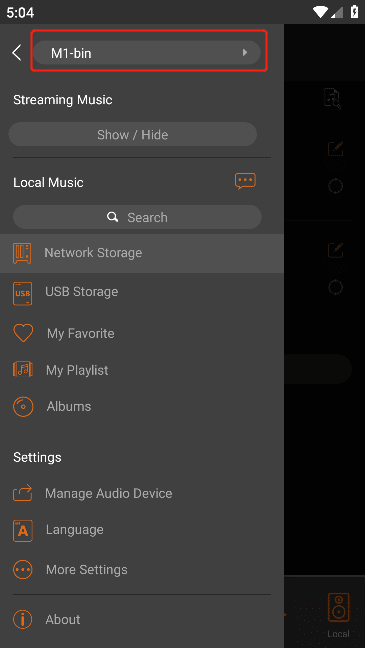
Click "Find Device" in the drop-down list to enter the device selection interface, where you can select a new device for control.
3.5. Settings
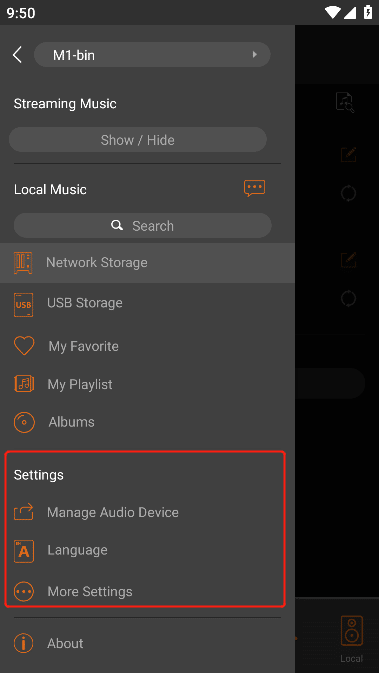
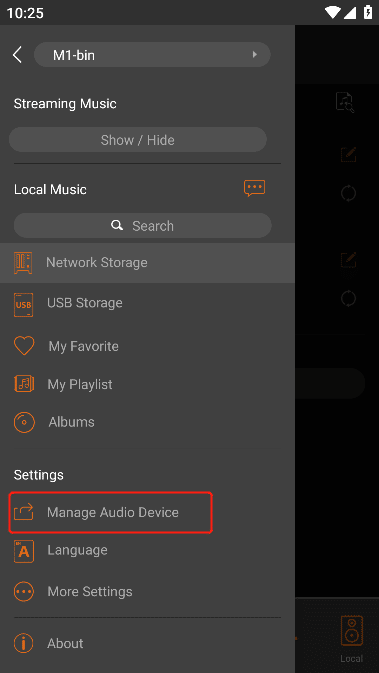
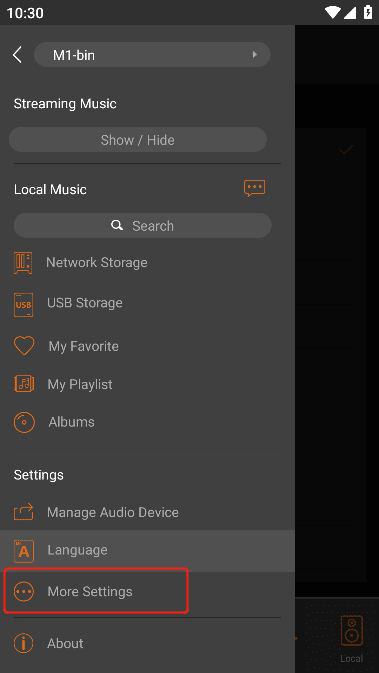
Click the menu button in the upper left corner to see the "Settings" menu list .
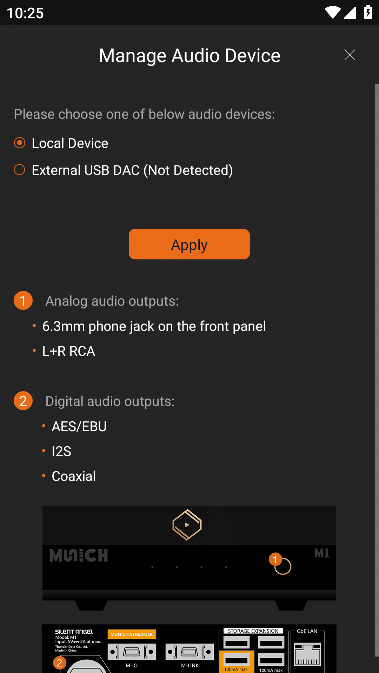
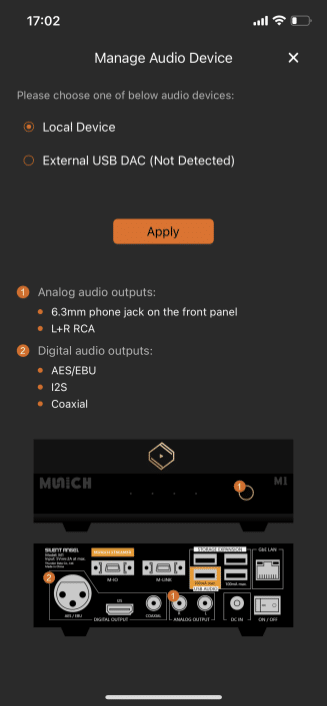
3.5.1. Manage Audio Device
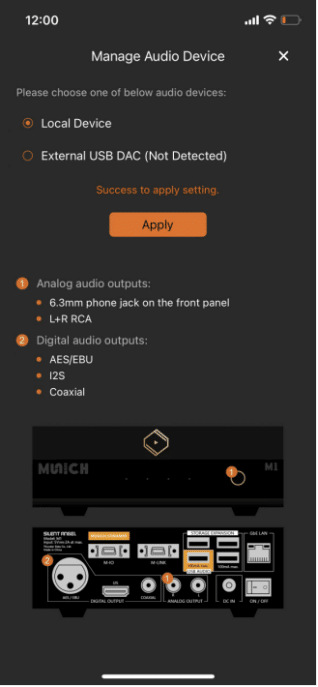
In this interface, you can select the audio output mode of the VitOS device, and select "Local Device" or "External USB DAC" .
If your VitOS device is "M1", proceed as follows:
1. There are five audio access ports when you select "Local Device". Connect different ports according to your needs." Step 3.5.1.3 " Set the data for the "Local Device" audio output .
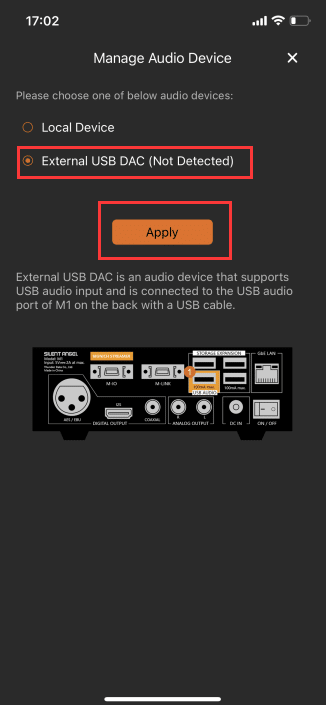
2. When "External USB DAC" is selected, connect the device to the corresponding "USB Audio" port, you can go to " Step 3.5.1.5 "Set the data for the audio output of "External USB DAC", and the audio data level is set higher than that of "Local Device" .
If your VitOS device is "M1T", do as follows:
1. There are three audio access ports when you select "Local Device". Connect different ports according to your needs." Step 3.5.1.4 " Set the data for the "Local device" audio output .
2. When "External USB DAC" is selected, connect the device to the corresponding "USB Audio" port, you can go to " Step 3.5.1.5 " Set the data for the audio output of "External USB DAC", and the audio data level is set higher than that of "Local Device" .
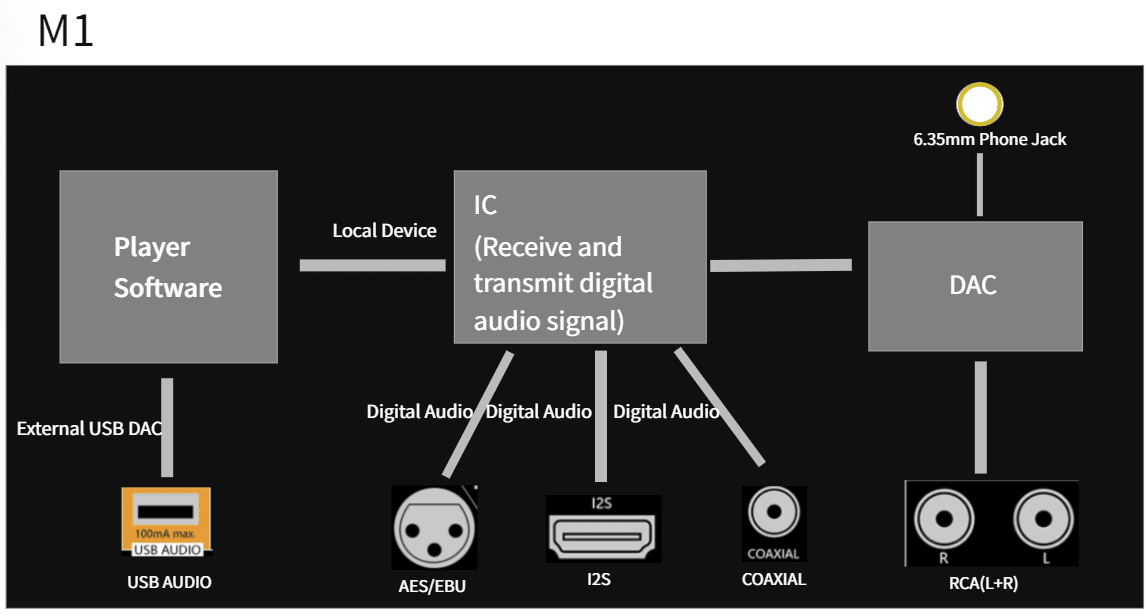
3.5.1.1. M1 Device Audio Output Description
The following figure shows the internal environment description of the "M1 device" output audio :
Player Software : The software is placed inside the device, which is mainly used for seamless connection with the VitOS Orbiter to quickly transmit digital audio according to the connected audio equipment.
IC : The hardware is inside the device and is mainly used to receive digital audio and transmit it to the output port when using the "local device" to output audio.
DAC : The hardware is placed inside the device, which mainly converts the digital audio transmitted from the "chip" into analog signal.
USB AUDIO : Located on the rear panel of the device, it is a digital audio output port. When selecting "External USB DAC" in "Manage Audio Output Devices",it can be used to connect to a decoder or audio device that supports USB digital audio input.
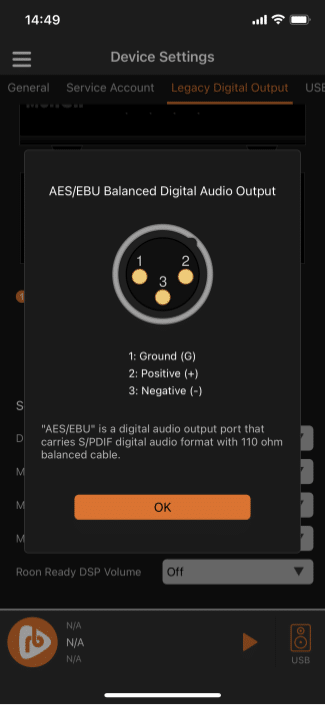
AES/EBU : Located on the rear panel of the unit, it is a digital audio output port that can use a 110 ohm balanced digital audio cable to transmit S/PDIF format digital audio signal, balanced signal design makes it have better anti-interference ability.
I2S : Located on the rear panel of the device, is a digital audio output port that transmits the element's differential digital audio signal over an HDMI cable.
COAXIAL : Located on the rear panel of the device, it is a digital audio output port that transmits digital audio signals in S/PDIF format through a coaxial cable with 75 ohm impedance
RCA(L+R) : Located on the rear panel of the device, it is an audio line access port, which can be used to transmit analog audio signals. Generally speaking, the right channel (R) uses a red line.Use the white wire for the left channel (L).
6.35mm Headphone Jack : It is a 6.35mm phone jack that can transmit analog audio signals to the connected headphone amplifier.
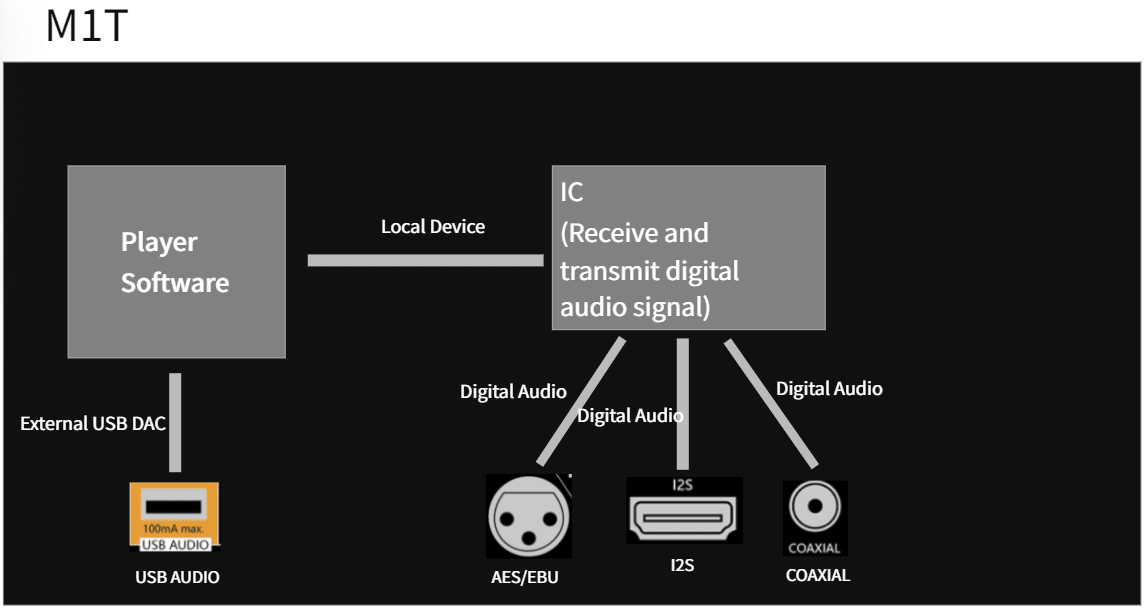
3.5.1.2. M1T Device Audio Output Description
The following picture shows the internal environment description of "M1 T device" output audio :
Player Software : The software is placed inside the device, which is mainly used for seamless connection with the VitOS Orbiter to quickly transmit digital audio according to the connected audio equipment.
IC : The hardware is inside the device and is mainly used to receive digital audio and transmit it to the output port when using the "Local Device" to output audio.
DAC : The hardware is placed inside the Device, which mainly converts the digital audio transmitted from the "chip" into analog signal.
USB AUDIO : Located on the rear panel of the device, it is a digital audio output port. When selecting "External USB DAC" in "Manage Audio Output Devices",it can be used to connect to a decoder or audio device that supports USB digital audio input.
AES/EBU : Located on the rear panel of the unit, it is a digital audio output port that can use a 110 ohm balanced digital audio cable to transmit S/PDIF format digital audio signal, balanced signal design makes it have better anti-interference ability.
I2S : Located on the rear panel of the device, is a digital audio output port that transmits the element's differential digital audio signal over an HDMI cable.
COAXIAL : Located on the rear panel of the device, it is a digital audio output port that transmits digital audio signals in S/PDIF format through a coaxial cable with 75 ohm impedance.
Click "Manage Audio Device" in Settings to enter the "Manage Audio Device" interface.
3.5.1.3. Local Device
Click "Local Device", you can view the analysis of the audio output and the corresponding output port of the device at the bottom of the interface, and confirm that it has been connected
After the "Local device" is output to the device, click the "Apply" button, and a prompt "Apply successful" will appear above the button before it can be used normally .

3.5.1.4. External USB DAC
Click "External USB DAC (Not Detected)", you can view the audio output analysis and the corresponding output port of the device at the bottom of the interface.After confirming that the "External USB DAC" output device has been connected, click the "Apply" button, and a prompt "Apply successful" will appear above the button before it can be used normally .
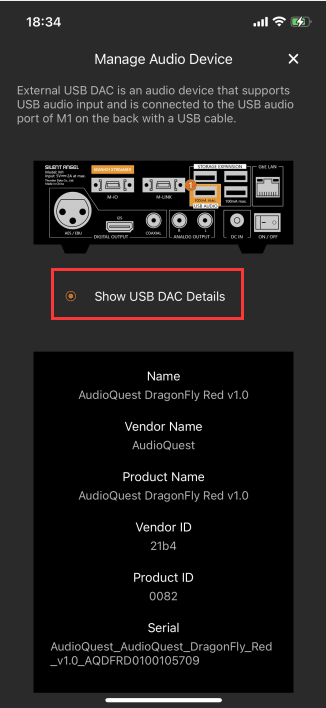
If the VitOS device is successfully connected to the "USB DAC " , the content in the brackets of "External USB DAC (****)" is the name of the USB decoder.And "Show USB DAC Details" is displayed at the bottom, click to find the details of the USB DAC .

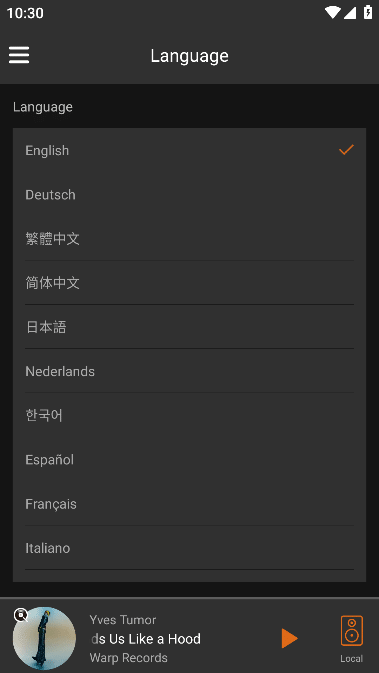
3.5.2. Language
Click the "Language" option to enter the "Language" interface to switch the language used by the APP.

3.5.3. More Settings
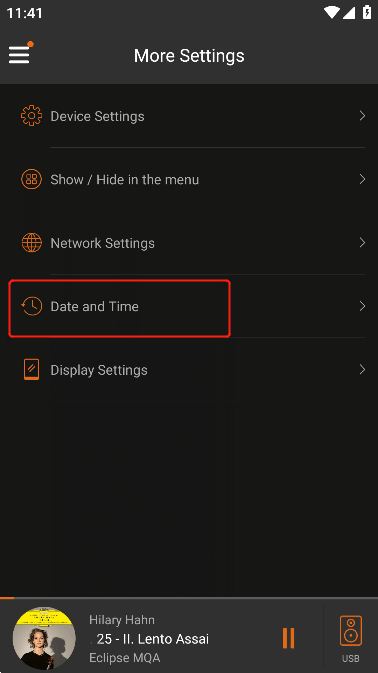
Click the "More Settings" option to enter the "More Settings" interface to set the device.
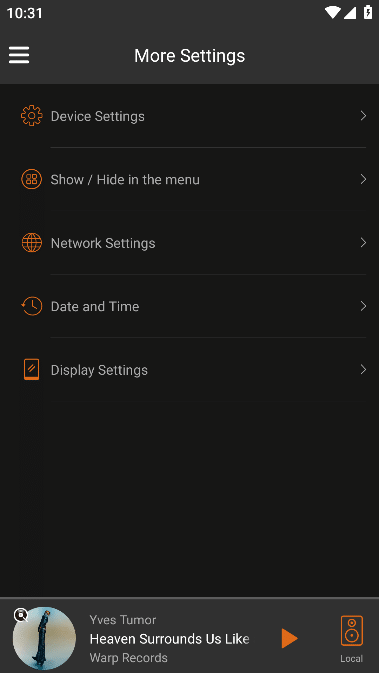
3.5.3.1. Device Settings
3.5.3.1.1. General
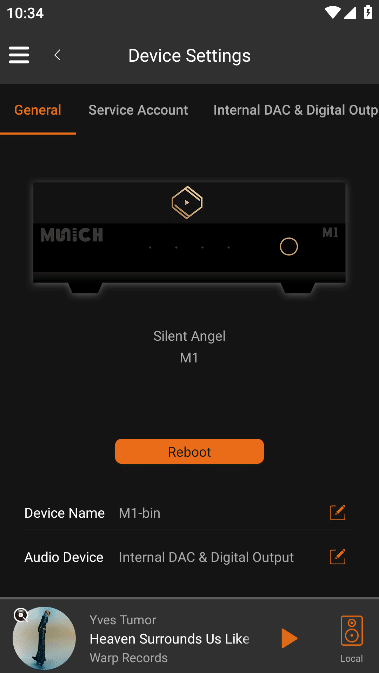
Click "Device Settings " to enter the "General" interface, or click "General" in the upper menu to enter this interface .

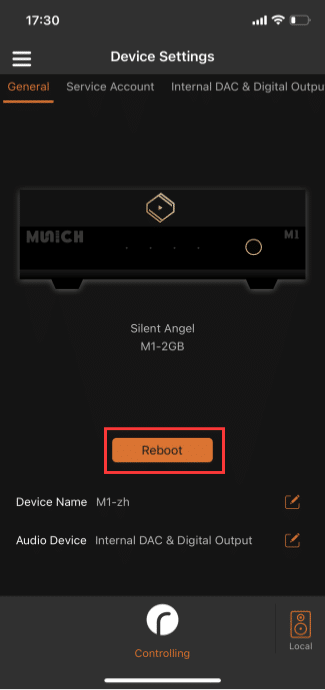
3.5.3.1.1.1. Reboot Device
In the "General" settings interface, click the "Reboot" button to control the currently connected VitOS device to restart .
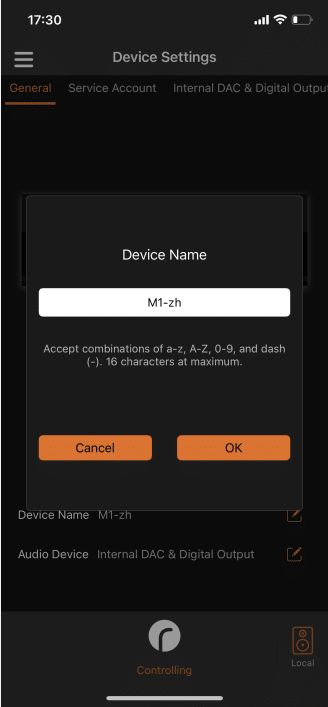
3.5.3.1.1.2. Edit Device Name
Click the "Edit" icon to the right of the device name, the "Device Name" interface will pop up, enter the new device name,Click "OK" to change the device name to the new device name .
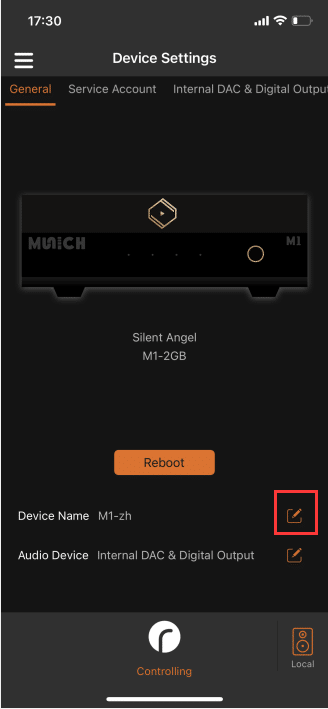
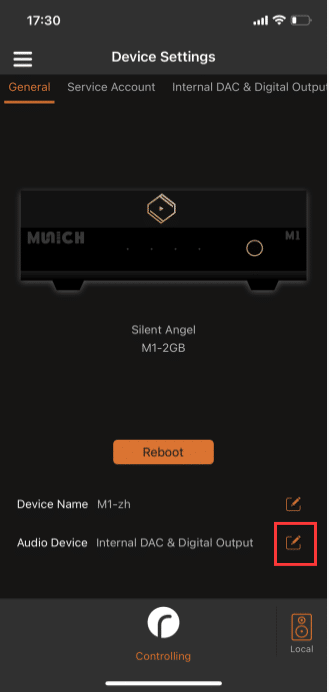
3.5.3.1.1.3. Audio Device
Click the "Edit" icon on the right side of the audio output device to enter the "Audio Device" interface .

3.5.3.1.1.3.1. Local Device
Click "Local Device", you can view the analysis of the audio output and the corresponding output port of the device at the bottom of the interface, and confirm that it has been connected
After the "Local device" is output to the device, click the "Apply" button, and a prompt "Apply successful" will appear above the button before it can be used normally .
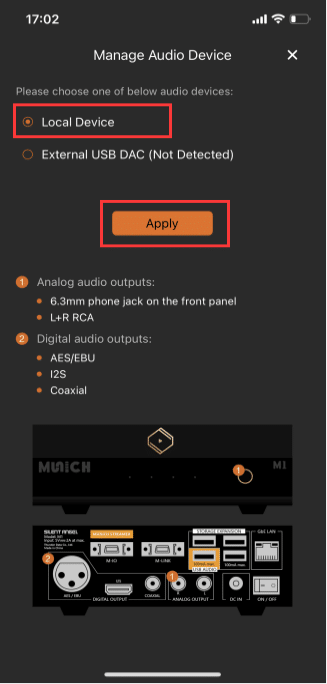

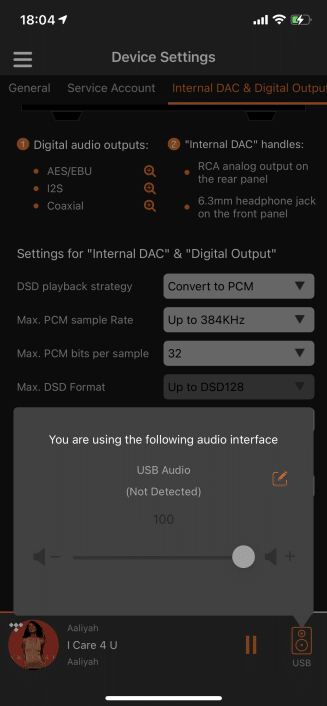
3.5.3.1.1.3.2. External USB DAC
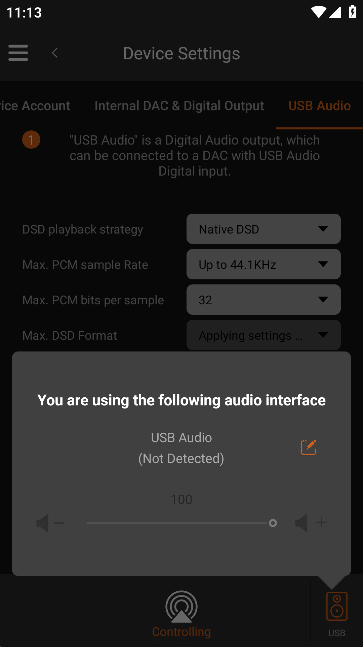
Click "External USB DAC (Not Detected)", you can view the audio output analysis and the corresponding output port of the device at the bottom of the interface.After confirming that the "External USB DAC" output device has been connected, click the "Apply" button, and a prompt "Apply successful" will appear above the button before it can be used normally .

If the VitOS device is successfully connected to the "USB DAC" , the content in the brackets of "External USB DAC (****)" is the name of the USB decoder.And "Show USB DAC Details" is displayed at the bottom, click to find the details of the USB DAC .


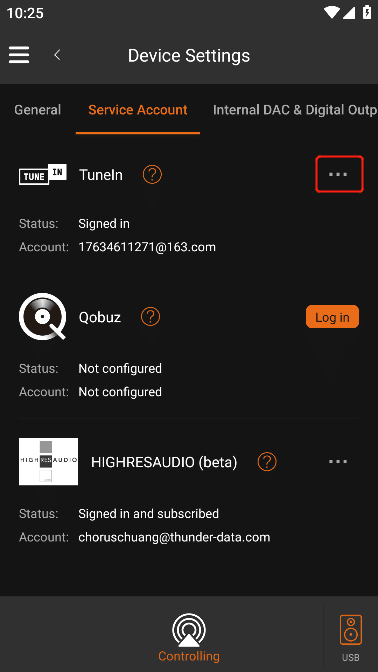
3.5.3.1.2. Service Account
Click "Service Account" in the upper menu to enter the "Set Service Account" interface, where you can choose to log in to the corresponding service,and view service login status .
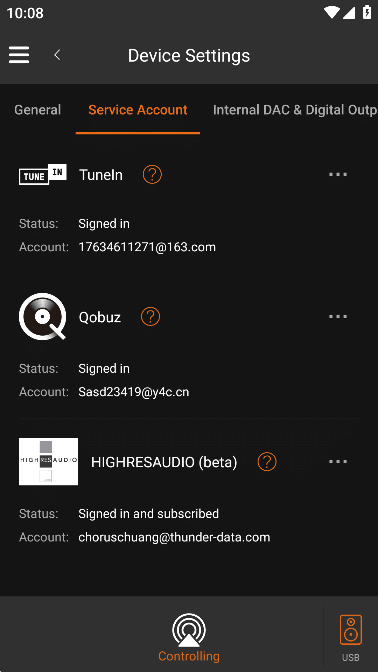
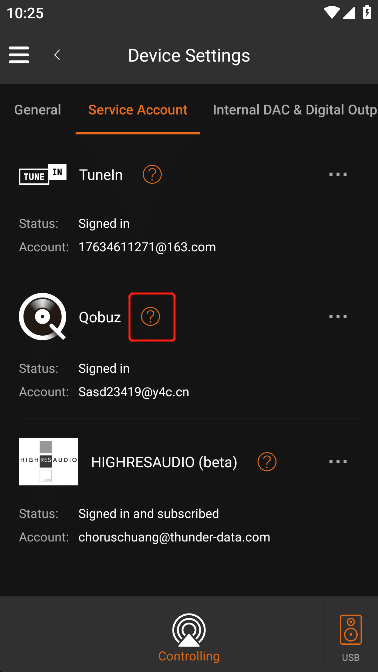
Click the "?" on the right side of the service to enter the "Service Details" interface, where you can learn more about the service.

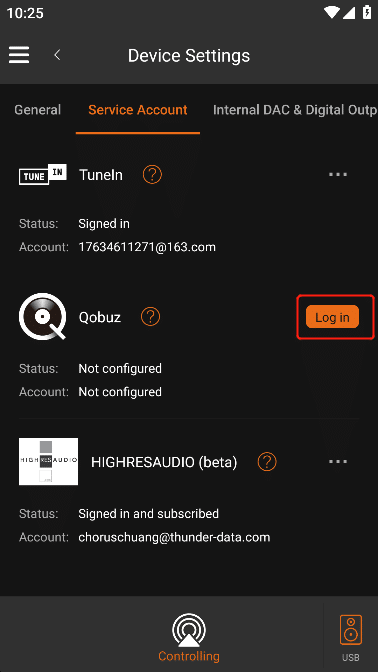
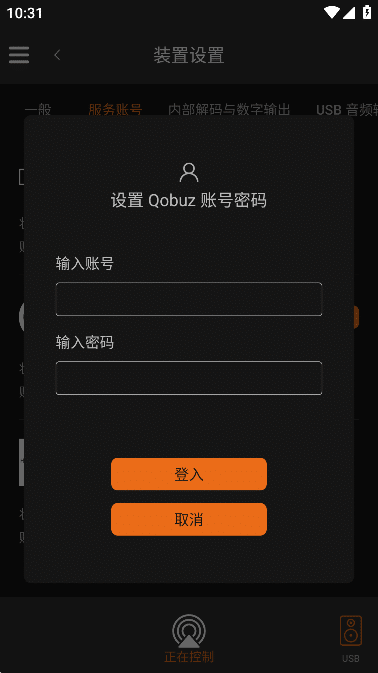
3.5.3.1.2.1. Streaming Music login
Click "Log in" on the right side of the service to enter the service "Login" interface. Enter your account and password, and click "Login" to successfully log in.
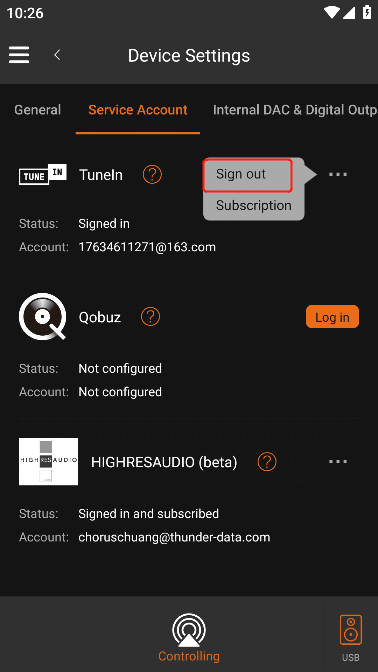
3.5.3.1.2.2. Streaming Music Logout
Click "..." on the right side of the service, and then click the pop-up "Sign Out" to successfully log out.
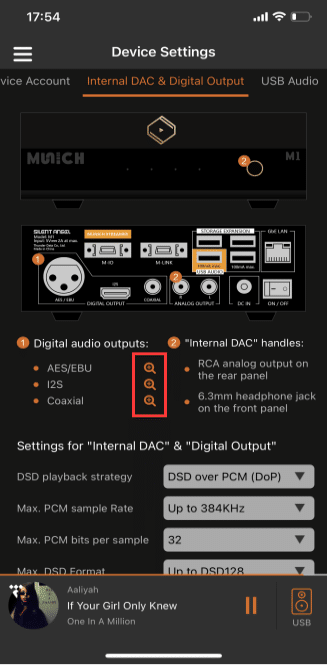
3.5.3.1.3. Internal DAC & Digital Output
Click "Internal DAC & Digital Output" in the upper menu to enter the "Internal DAC & Digital Output Settings" interface, such as in "Manage Audio Output Devices" Select "Local Device" in the interface, you can set the data of the audio output and view the detailed information of the digital output in this interface .
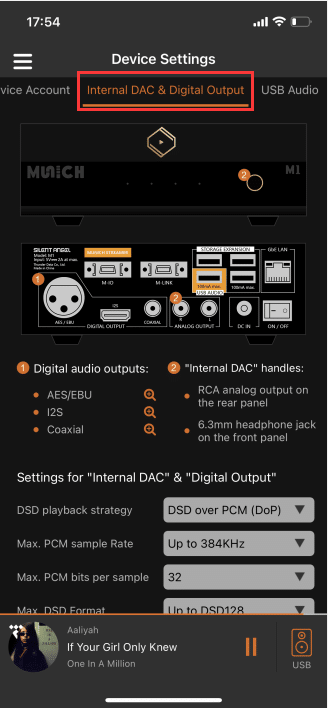
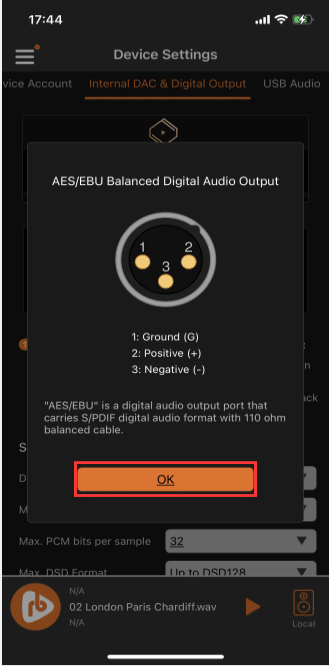
3.5.3.1.3.1. Digital Audio Details
Click the "Zoom in" button on the right side of different outputs to enter the "Output Introduction" interface, and you can view the detailed introduction of the corresponding output port.Click the "OK" button to exit this interface.
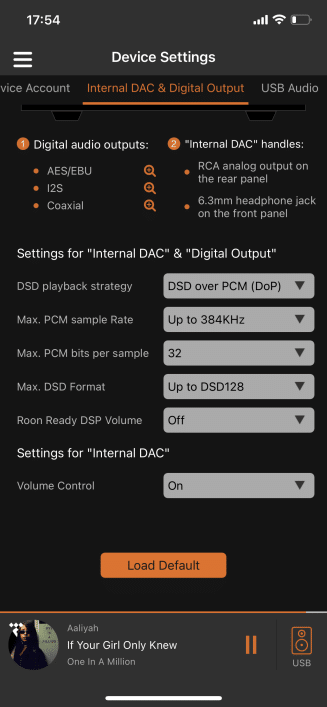
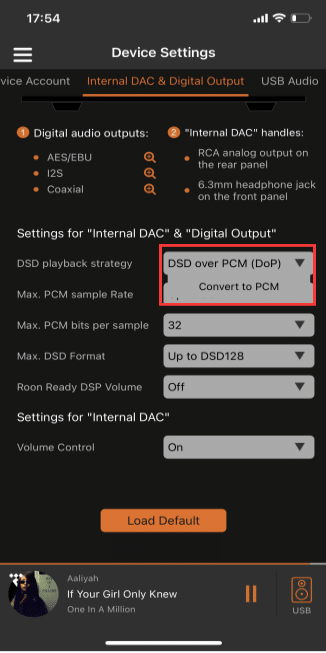
3.5.3.1.3.2. Internal Decoding And Digital Output Settings
3.5.3.1.3.2.1. DSD Playback Strategy
Set the "DSD Playback Strategy", if the VitOS device is connected to a DAC decoder, please refer to the capabilities of the connected DAC decoder,Choose a playback strategy that matches your decoder. (Note: If "Convert to PCM" is selected for "DSD Playback Strategy", the "Max. DSD Format" cannot be edited.)
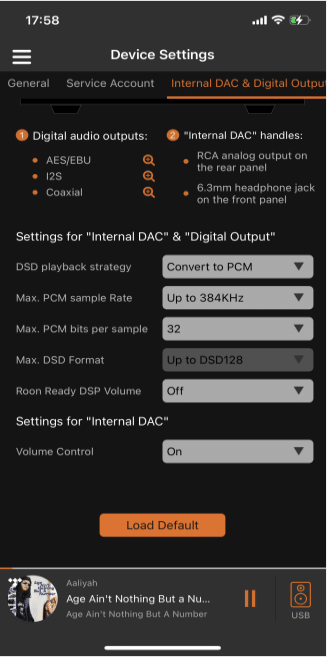
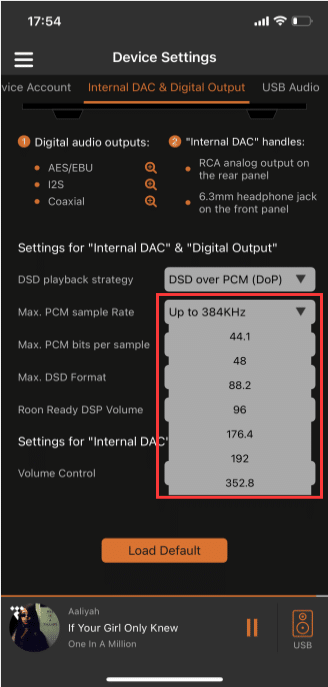
3.5.3.1.3.2.2. Max. DSD PCM Sample Rate
Set the "Max. PCM sample rate", if the VitOS device is connected to a DAC decoder, according to the capabilities of the connected DAC decoder,Choose a sample rate that matches your decoder.
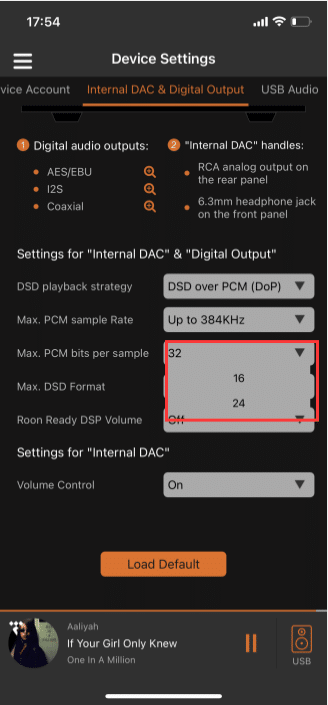
3.5.3.1.3.2.3. Max. PCM Bits Per Sample
Set the "Max. PCM bits per sample", if the VitOS device is connected to a DAC decoder, according to the capabilities of the connected DAC decoder,sample bit depth that matches your decoder .
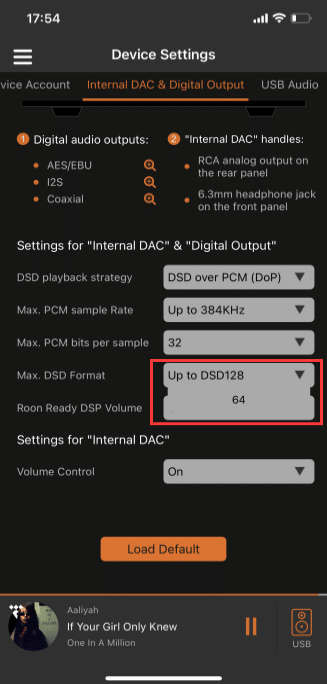
3.5.3.1.3.2.4. Max. DSD Format
Set the "Max. DSD Format", if the VitOS device has a DAC decoder connected, depending on the capabilities of the connected DAC decoder,Select the DSD style that matches the decoder.
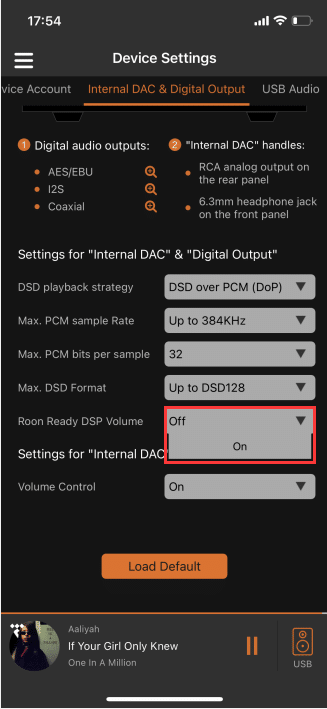
3.5.3.1.3.2.5. Roon Ready DSP Volume
If the current App has enabled "Roon Ready", you can set the "Roon Ready DSP Volume", select "Off" in the options,Then the "ROON App" cannot adjust the volume, if you choose "On", the "ROON App" can adjust the volume normally.
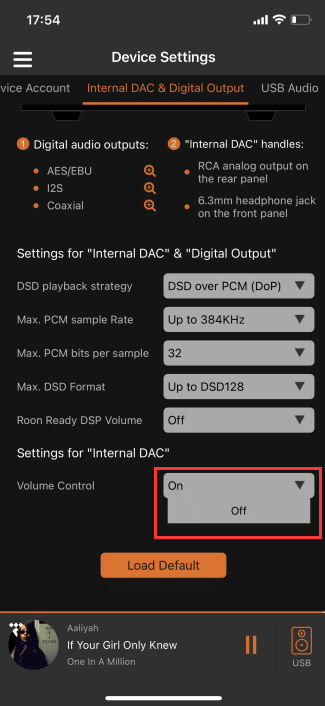
3.5.3.1.3.2.6. Volume Control
Set "Volume Control", select "Off" in the options, then enter the "Disable volume Control" interface, click the "Disable" button,The current APP cannot adjust the volume. If you select "On", the current APP can adjust the volume normally.

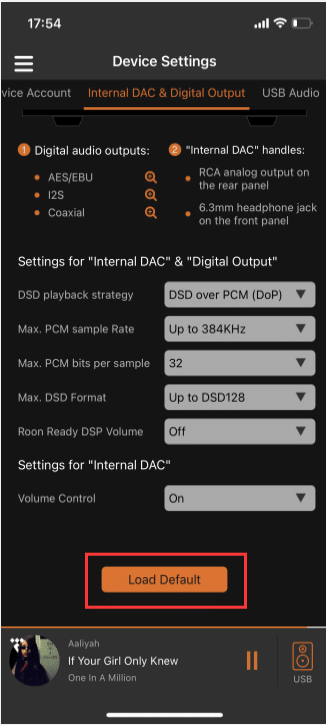
3.5.3.1.3.2.7. Load Defaults
Clicking the "Load Default" button will clear the data selected in "Internal decoding and digital output settings" and restore to the default data.
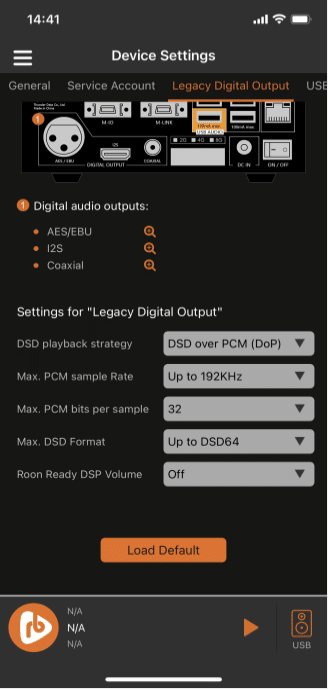
3.5.3.1.4. Legacy Digital Output
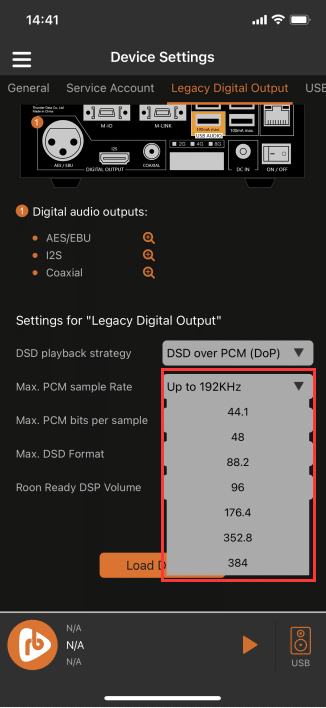
Click "Legacy Digital Output" in the upper menu to enter the "Legacy Digital Output Settings" interface, such as in "Manage Audio Output Devices" Select "Local Device" in the interface, you can set the data of the audio output and view the detailed information of the digital output in this interface .

3.5.3.1.4.1. Digital Audio Details
Click the "Zoom in" button on the right side of different outputs to enter the "Output Introduction" interface, and you can view the detailed introduction of the corresponding output port.Click the "OK" button to exit this interface.
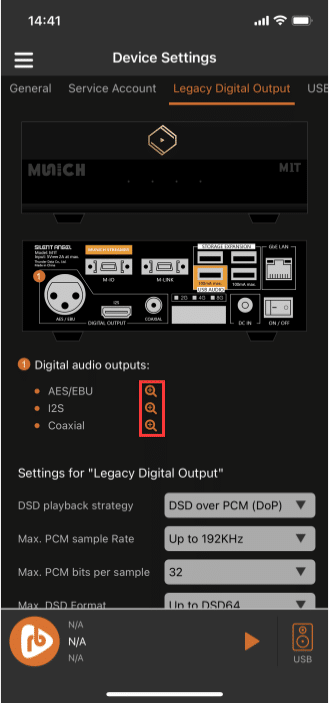
3.5.3.1.4.2. Traditional Digital Outputs
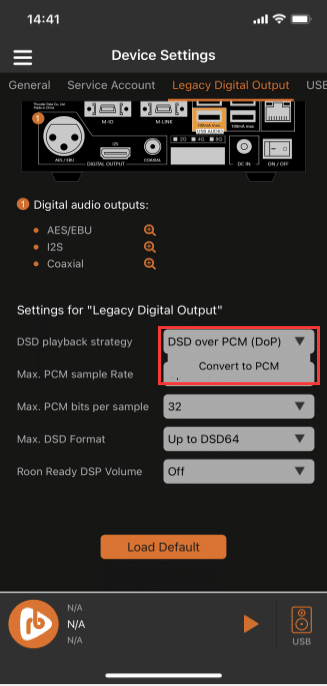
3.5.3.1.4.2.1. DSD Playback Strategy
Set the "DSD Playback Strategy", if the VitOS device is connected to a DAC decoder, please refer to the capabilities of the connected DAC decoder,Choose a playback strategy that matches your decoder. (Note: If "Convert to PCM" is selected for "DSD Playback Strategy", the "Max. DSD Format" cannot be edited.)
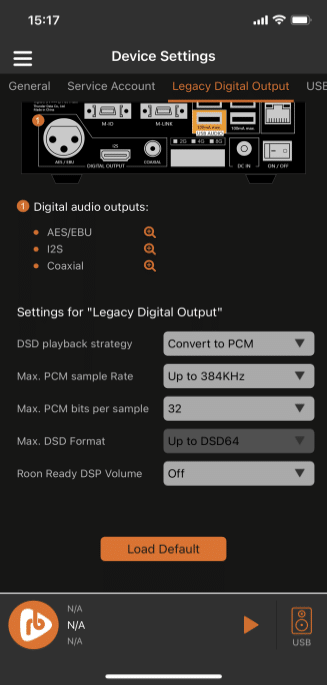
3.5.3.1.4.2.2. Max. PCM Sample Rate
Set the "Max. PCM Sample Rate", if the VitOS device is connected to a DAC decoder, according to the capabilities of the connected DAC decoder,Choose a sample rate that matches your decoder.
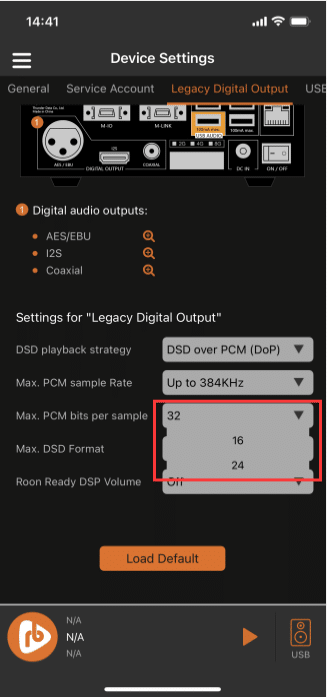
3.5.3.1.4.2.3. Max. PCM Bits Per Sample
Set the "Max. PCM bits per sample", if the VitOS device is connected to a DAC decoder, according to the capabilities of the connected DAC decoder,sample bit depth that matches your decoder .
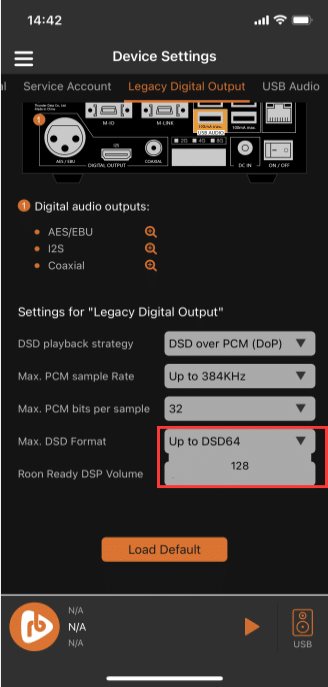
3.5.3.1.4.2.4. Max. DSD Format
Set the "Max. DSD Format", if the VitOS device has a DAC decoder connected, depending on the capabilities of the connected DAC decoder,Select the DSD style that matches the decoder.
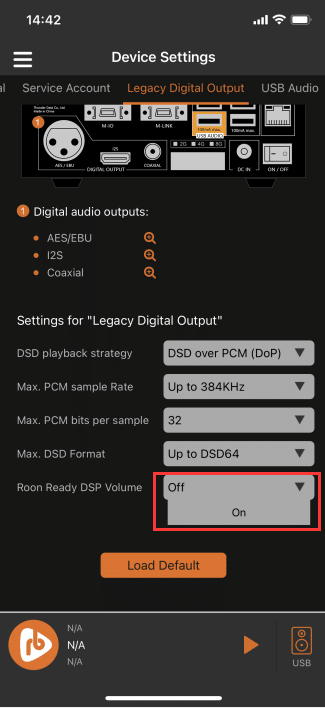
3.5.3.1.4.2.5. Roon Ready DSP Volume
If the current App has enabled "Roon Ready", you can set the "Roon Ready DSP Volume", select "Off" in the options,Then the "ROON App" cannot adjust the volume, if you choose "On", the "ROON App" can adjust the volume normally.
3.5.3.1.4.2.6. Load Default
Clicking the "Load Default" button will clear the data selected in "Internal decoding and digital output settings" and restore to the default data.
3.5.3.1.5. USB Audio
Click "USB Audio" in the upper menu to enter the "USB Audio Output Settings" interface, such as in "Manage Audio Output Devices" Select "External USB DAC (*****)" in the interface, you can set the audio output data in this interface .
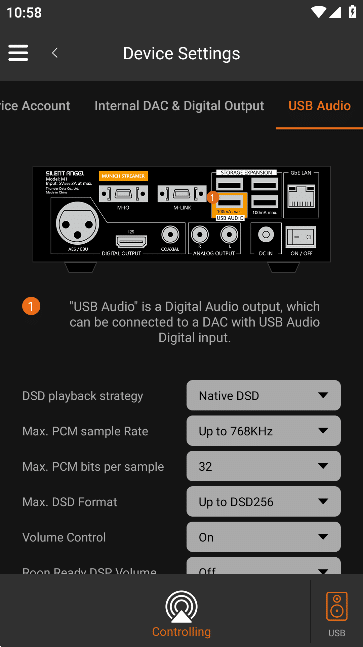
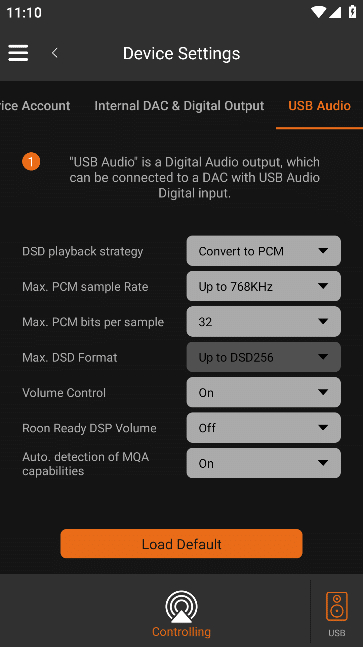
3.5.3.1.5.1. DSD Playback Strategy
Set the "DSD Playback Strategy", if the VitOS device is connected to a DAC decoder, please refer to the capabilities of the connected DAC decoder,Choose a playback strategy that matches your decoder. (Note: If "Convert to PCM" is selected for "DSD Playback Strategy", the "Max. DSD Format" cannot be edited.)

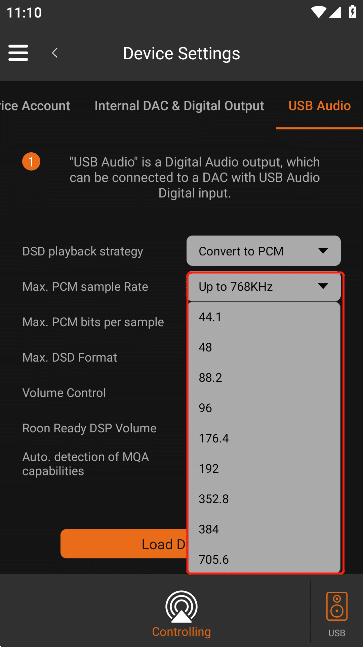
3.5.3.1.5.2. Max. PCM Sample Rate
Set "Max. PCM Sample Rate". If the VitOS device has been connected to a DAC decoder, the selected sample rate must be connected to the VitOS device.The "DAC decoder sample rate" is equal.
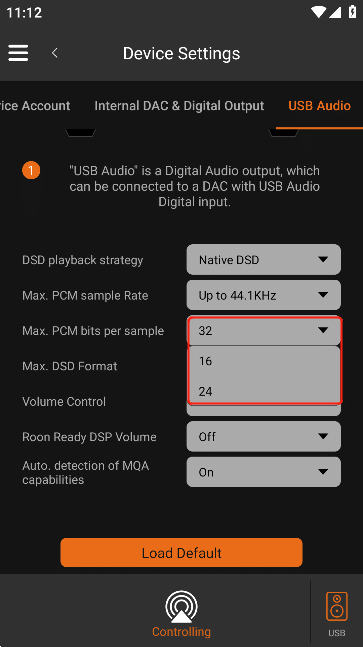
3.5.3.1.5.3. Max. PCM Bits Per Sample
Set the "Max. PCM bits per sample", if the VitOS device is connected to a DAC decoder, the selected bit depth must be compatible with the VitOS device The "Maximum bit depth of DAC decoder" is equal.
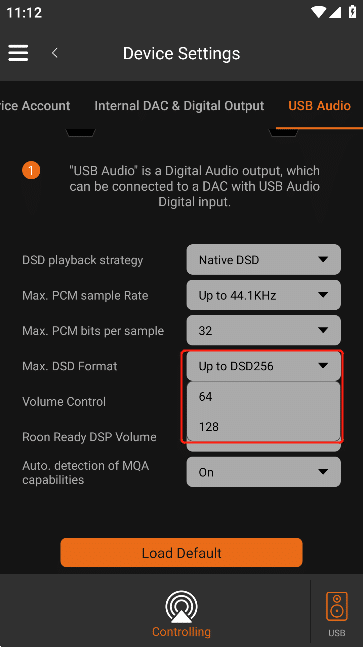
3.5.3.1.5.4. Max. DSD Format
Set the "Max. DSD Format", if the VitOS device has a DAC decoder connected, depending on the capabilities of the connected DAC decoder,Select the DSD style that matches the decoder.
3.5.3.1.5.5. Volume Control
Set "Volume Control", select "Off" in the options, the current APP cannot adjust the volume, such as selecting "On",The current APP can adjust the volume normally.

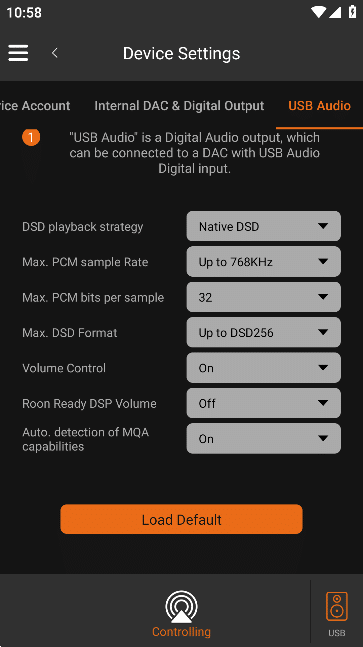
3.5.3.1.5.6. Roon Ready DSP Volume
If the current App has enabled "Roon Ready", set "Roon Ready DSP Volume", select "Off" in the options,Then the "ROON App" cannot adjust the volume, if you choose "On", the "ROON App" can adjust the volume normally.
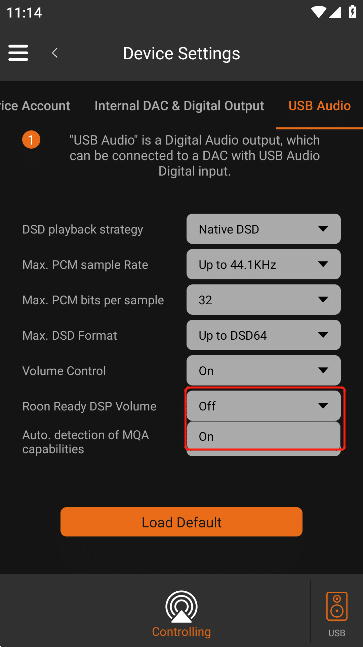
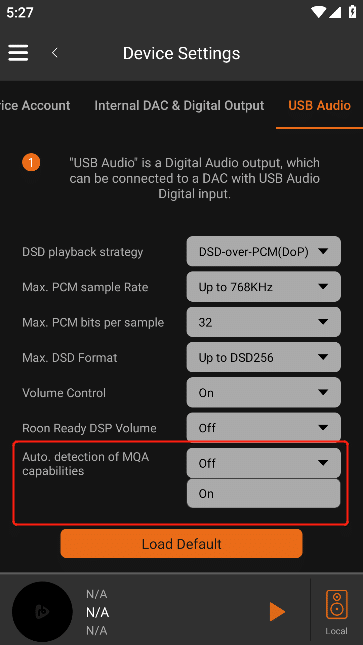
3.5.3.1.5.7. Auto.detection of MQA Capabilities
You can choose whether the "Auto.detection of MQA capabilities" is "on" or "off ". If your DAC does not support MQA decoding capability, confirm that the' Auto Detect MQA Capability 'in the USB audio output is in the "off " state.
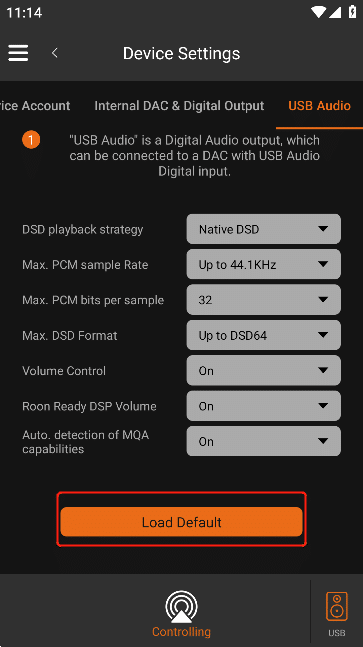
3.5.3.1.5.8. Load Default
Clicking the "Load Default" button will clear the data selected in "USB Audio Output Settings" and restore to the default data.
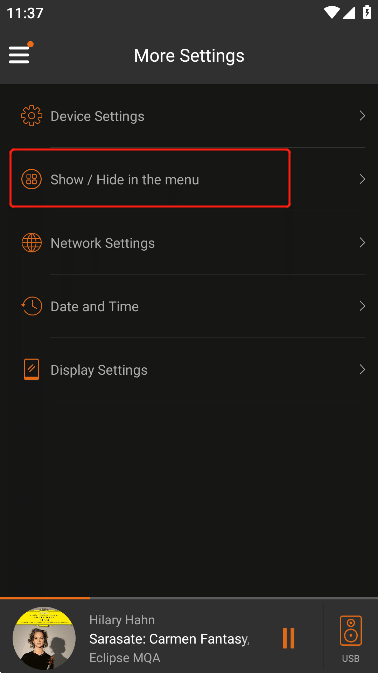
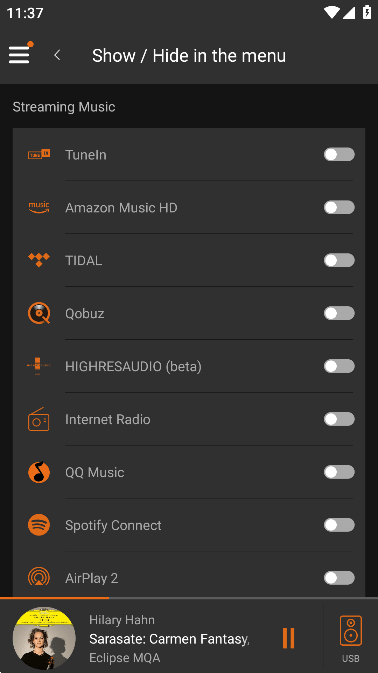
3.5.3.2. Show/Hide in menu
Click "Show/Hide in menu" to enter the "Show/Hide in menu" interface, where you can set the display or hide of streaming music. Click the button on the right, and slide the button to the left. The streaming music is hidden in the left sidebar menu, and the orange color of the button that slides to the right indicates that the streaming music is displayed in the left sidebar menu.
3.5.3.3. Network Settings
Click "Network Settings" to enter the "Network Settings" interface, where you can set the network data of the connected device .

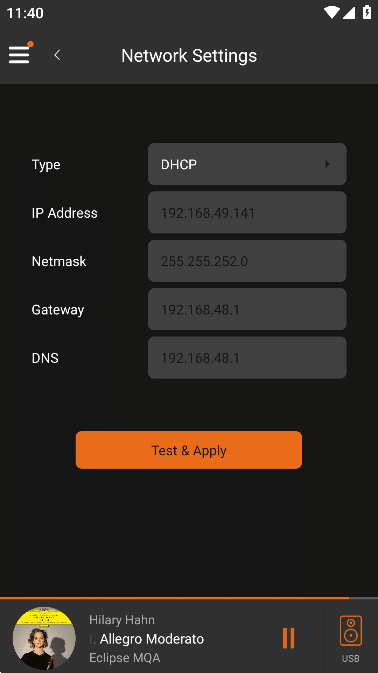
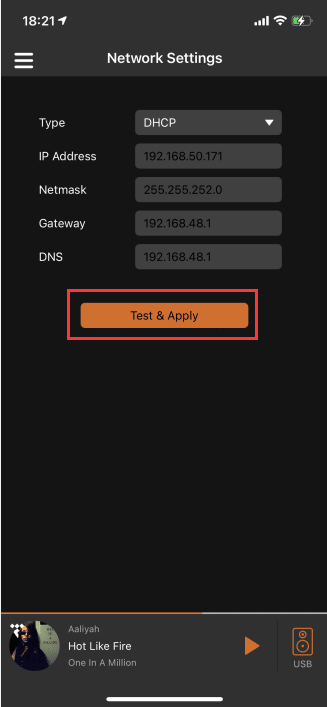
In the "Type" option, select "DHCP", then the IP address will be obtained automatically, no need to fill in manually, if the data has been changed,Click "Test & Apply", the changed data will be applied successfully .
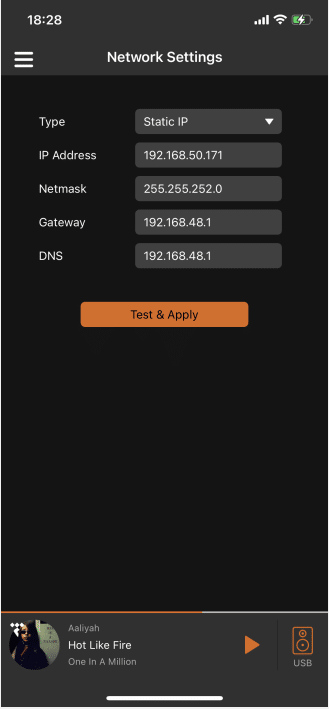
In the "Type" option, select "Static IP", you can manually fill in the IP address information, if the data has been changed,Click "Test and Apply", the changed data will be applied successfully .
3.5.3.4. Date And Time
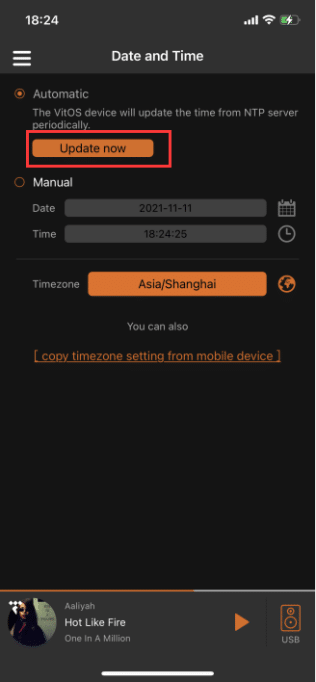
Click "Date and Time" to enter the "Date and Time Setting" interface, where you can view and set the date and time of the device .
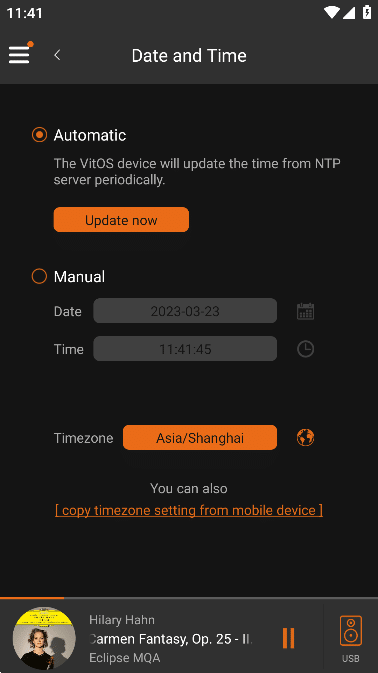
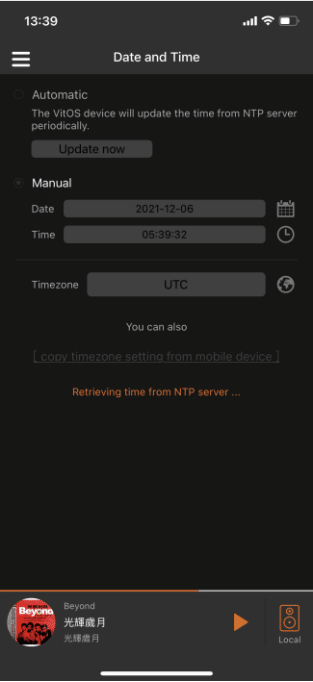
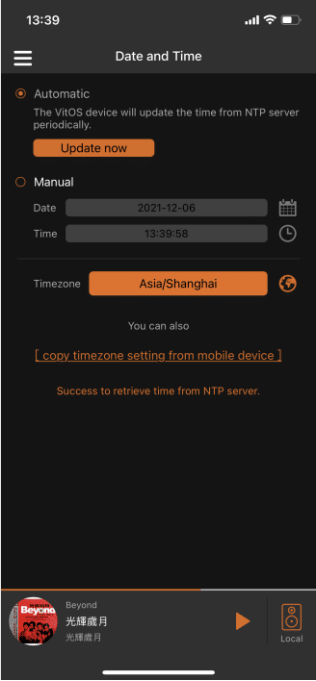
3.5.3.4.1. Automatic
When you select "Automatic" to obtain time, "Retrieving time from NTP server..." will pop up, and "Success to retrieve time from NTP server" will pop up after acquiring time.If you click the "Update Now" button, the time will be obtained from the NTP server again .
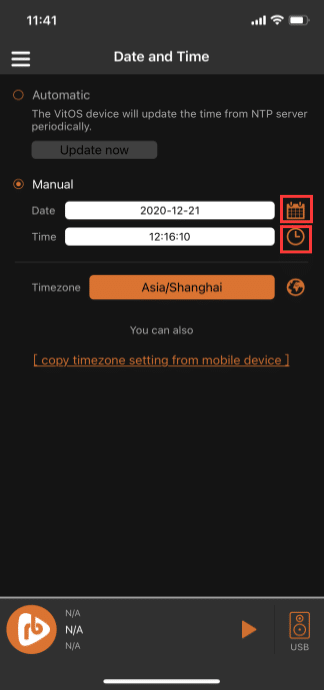
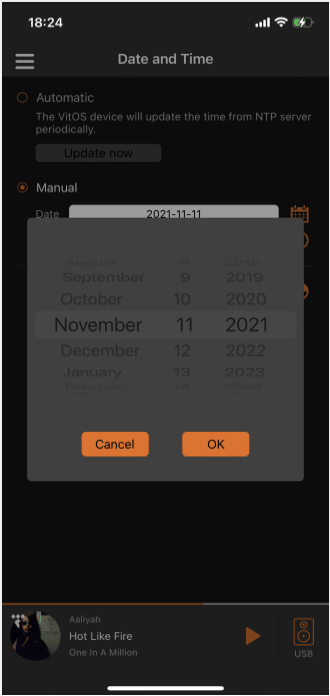
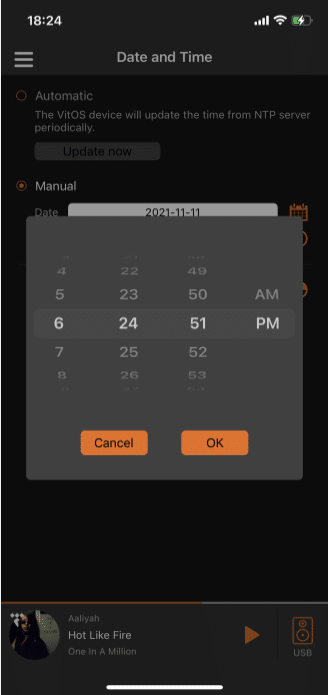
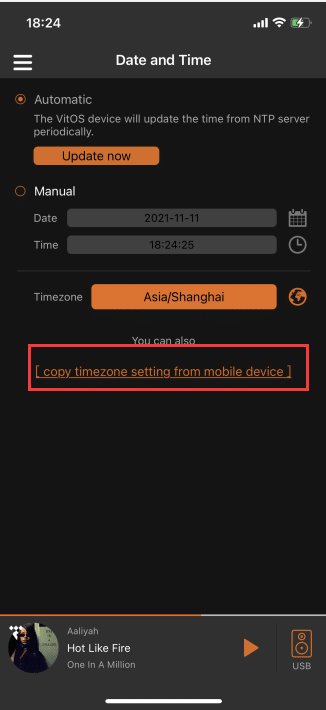
3.5.3.4.2. Manual
After selecting the "Manual setting" time, you can click the "Date" or "Time" button to enter the "Select Date" or "Select Time" interface,can choose the "Date" and "Time" by yourself .
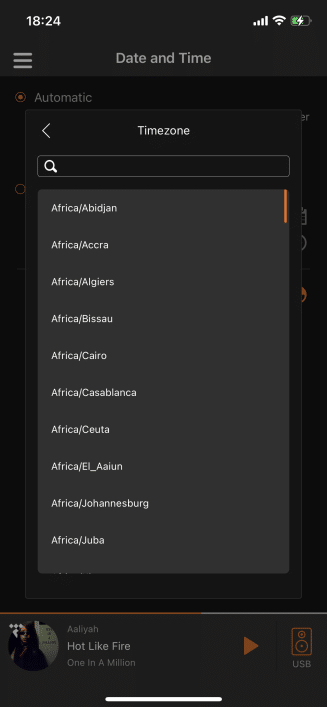
Click the "Timezone" button or the icon on the right to enter the "Timezone" list interface, click any "Timezone", "Date" and "Time" content Automatically switch to the selected regional time.
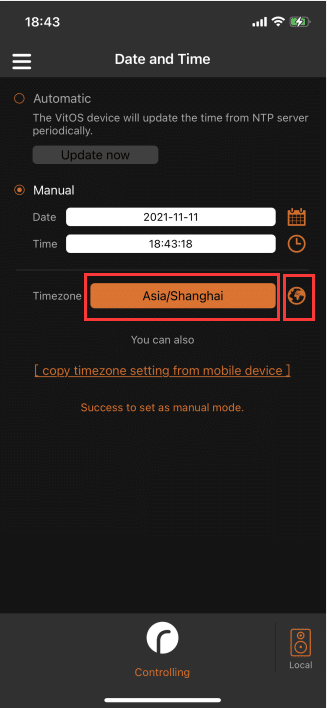
Click "copy timezone settings from mobile device" to update the "Date" and "Time" in the current region .
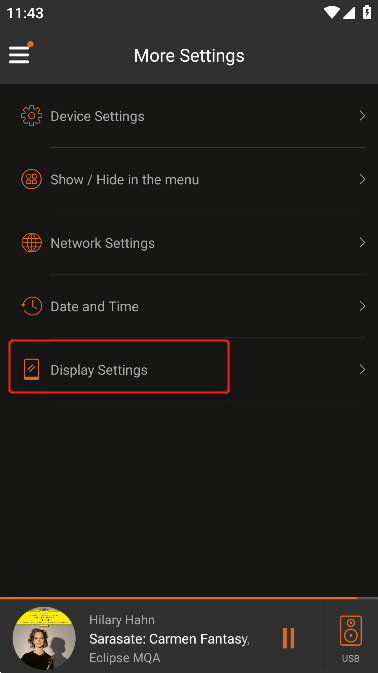
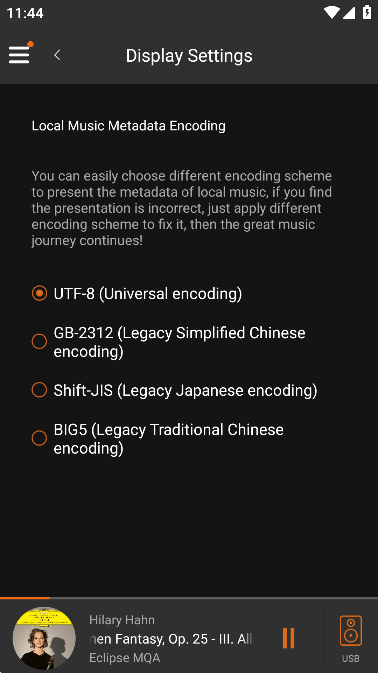
3.5.3.5. Display Setting
Click "Display Settings" to enter the "Display Settings" interface, where you can set the encoding format of local music metadata .
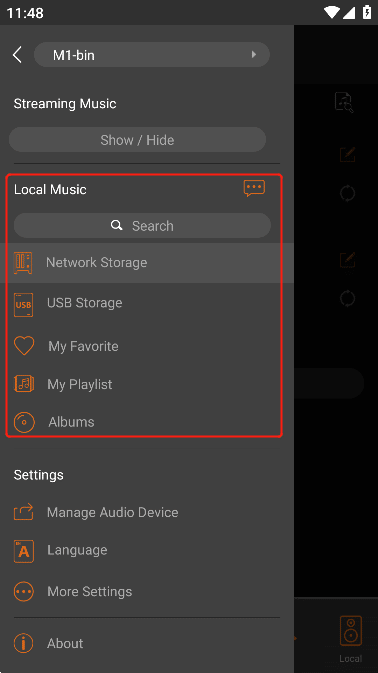
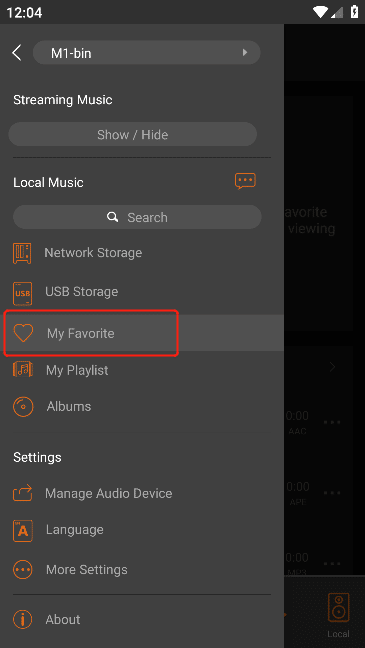
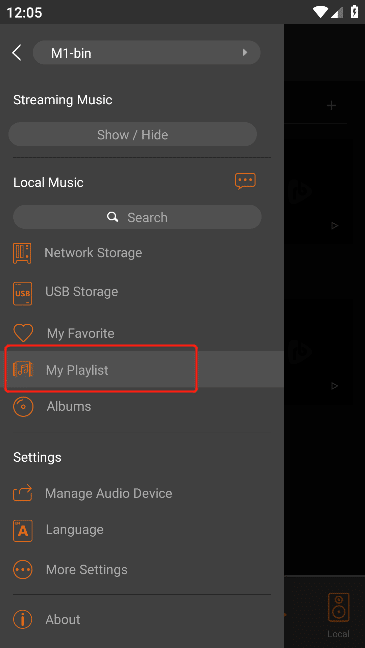
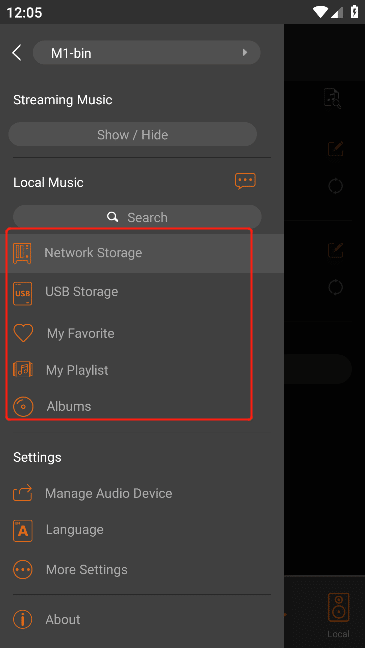
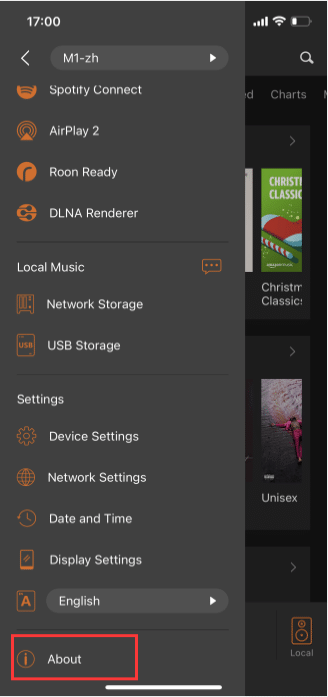
3.6. Local Music
Click the menu button in the upper left corner to see the "Local Music" menu list .
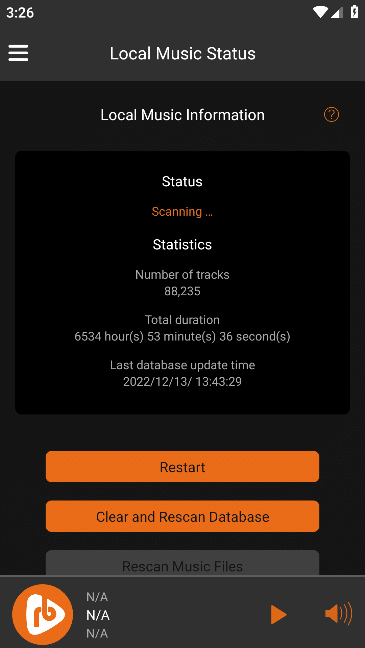
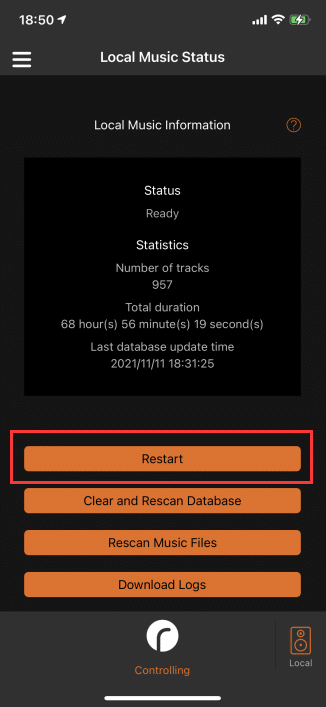
3.6.1. Local Music Status
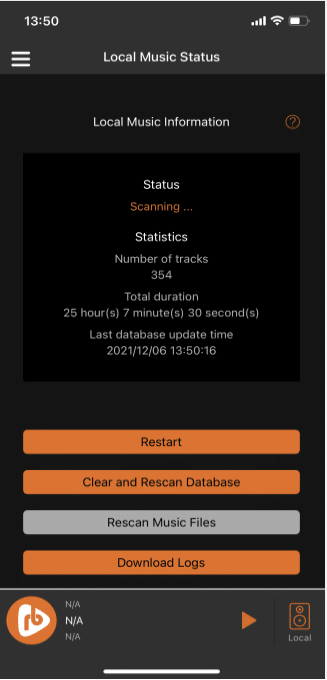
Click the icon button to the right of "Local Music" to enter the "Local Music Status" interface.
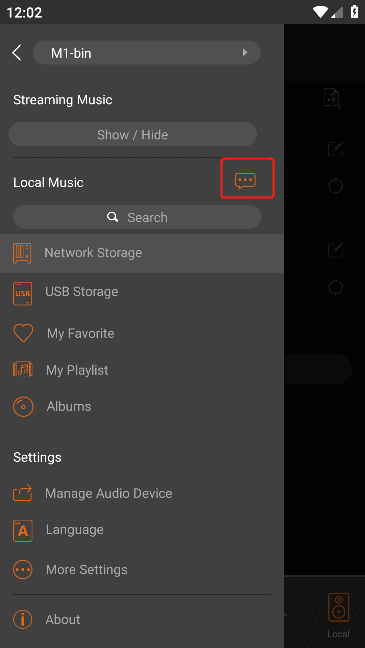
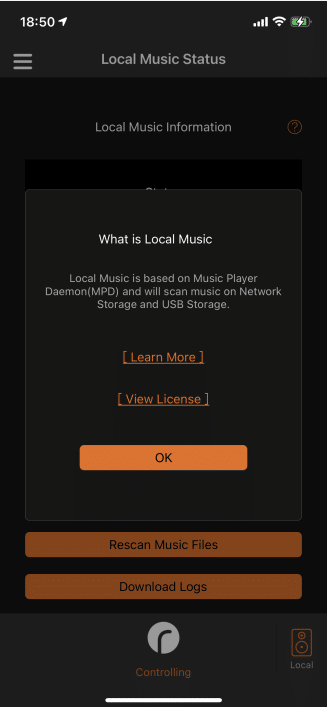
Click the "?" button with the orange icon to the right of "Local Music Information" to enter the "Local Music Introduction" interface.
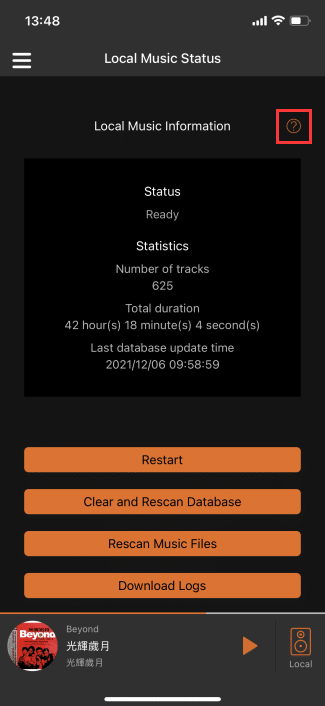
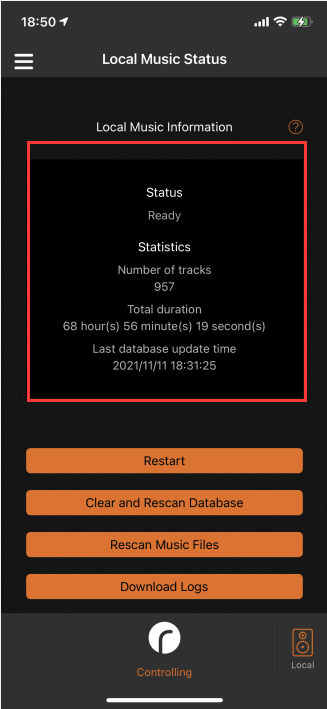
Check the "local music information", you can check the local music status ("ready" means the local music is normal, "scanning" means The network storage or USB storage is connecting to the storage for scanning, "Restarting" means the local music function is restarting), the network storage and the
The total number of songs stored in USB, the total playing time of songs in network storage and USB storage, and the time of the last update of local music data.
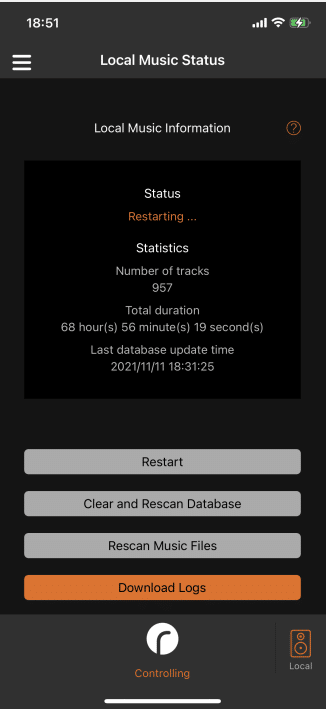
3.6.1.1. Local Music Restart
For example, when the status of "Local Music " is abnormal, click the "Restart" button, and the status of "Local Music" is "Restarting.
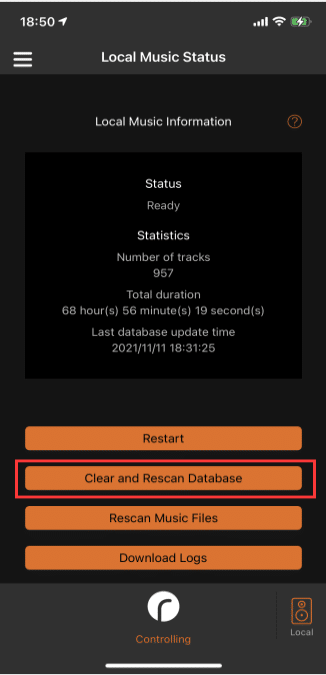
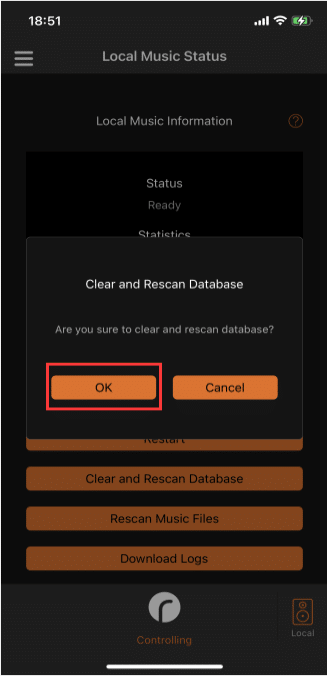
3.6.1.2. Clean And Rescan The Database
Click the "Clear and Rescan The Database" button, "OK to clear and rescan the database" pops up, click the "OK" button,It means to clear all music files in network storage and USB storage, and reconnect to the storage for scanning. The status of "Local Music" is "Scanning".
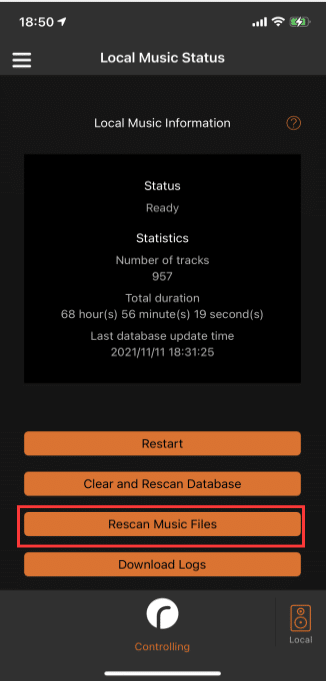
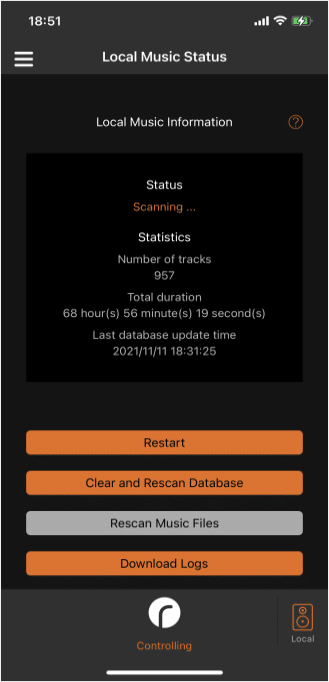
3.6.1.3. Rescan Music Files
Click the "Rescan Music Files" button to scan the newly added or deleted music files in the storage, "Local Music Information" The status is "Scanning...".
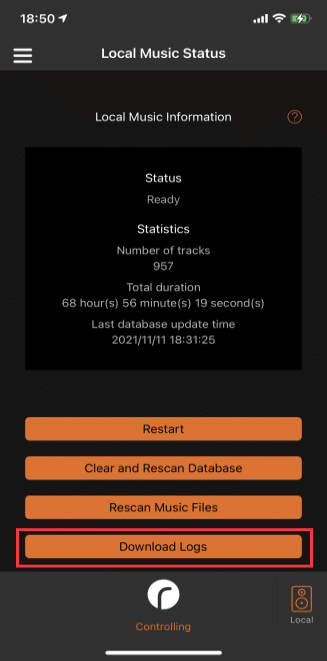
3.6.1.4. Download Logs
If there is an abnormality in the local music playback, if you need to provide the system log, click "Download Logs" on this interface,The system log is automatically downloaded, and jumps to the Select Email interface to send the system log according to the provided email address.
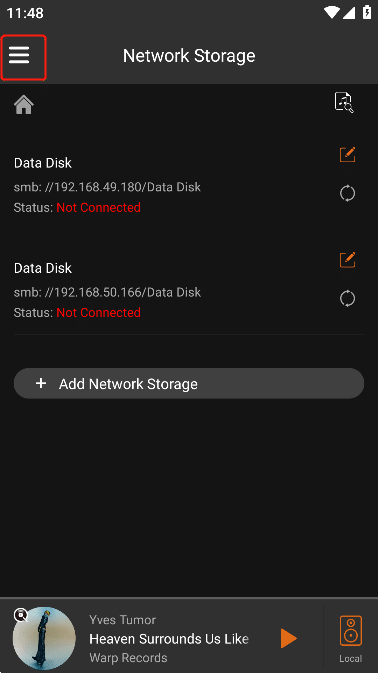
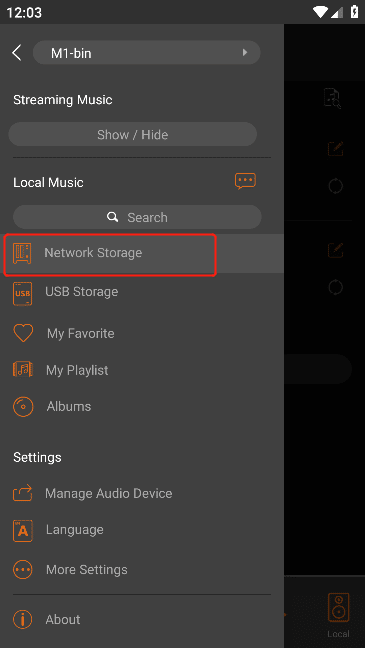
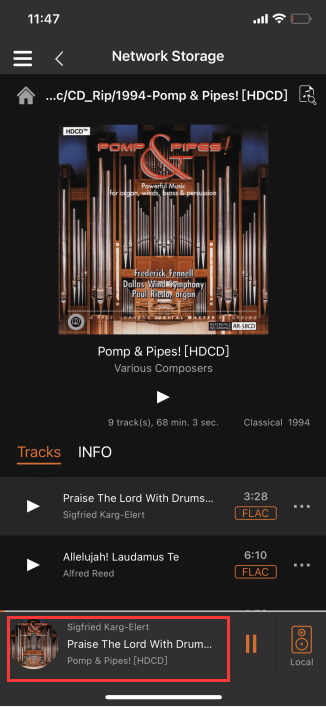
3.6.2. Network Storage
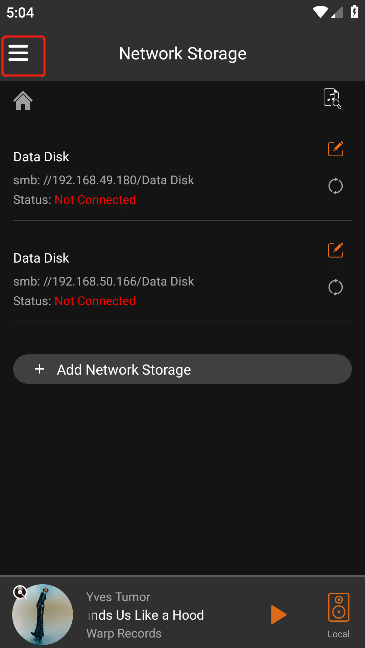
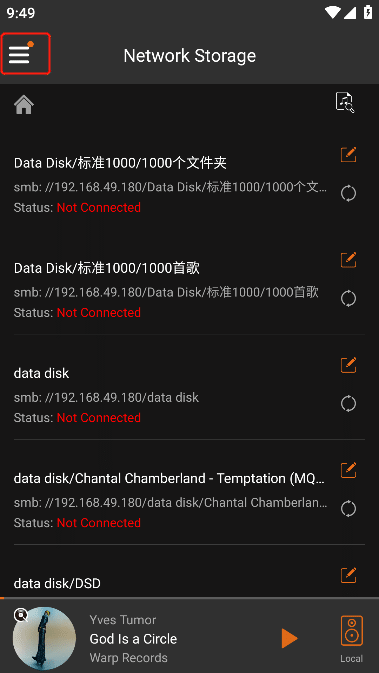
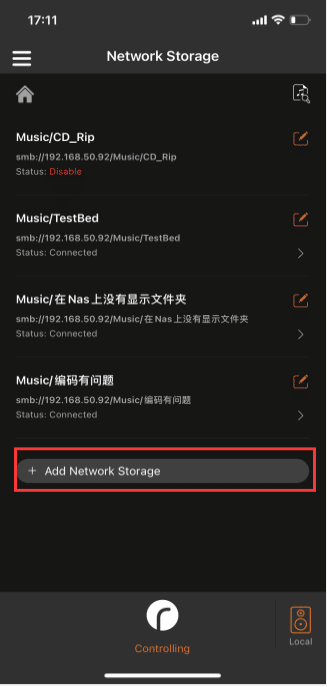
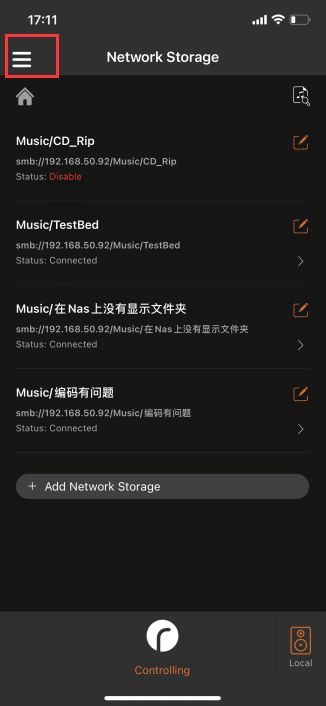
Click "Network Storage" to enter the "Network Storage Management" interface .

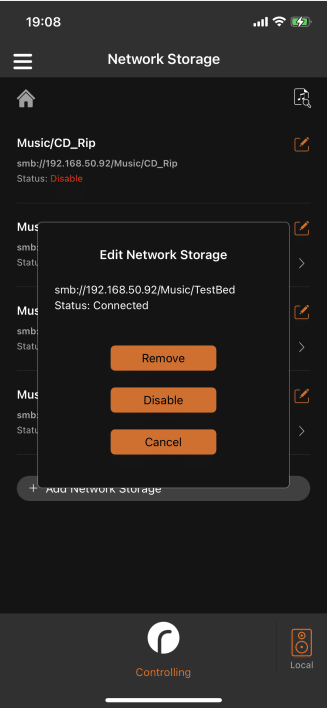
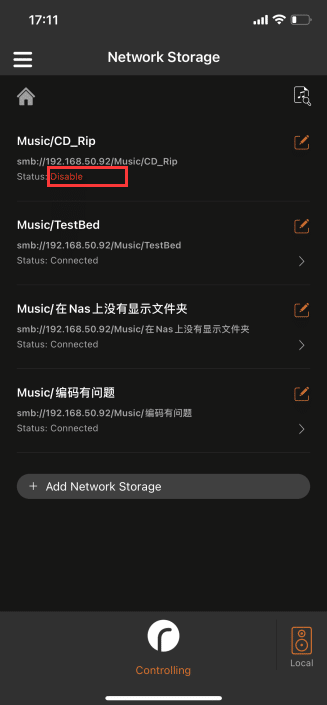
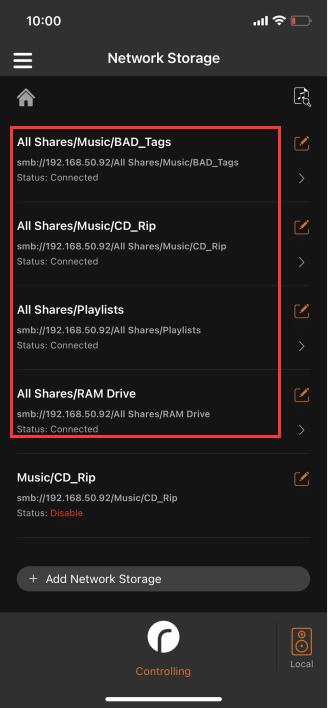
3.6.2.1. Network Storage Management
Click the Scan icon in the upper right corner to rescan the connected network storage for music files .
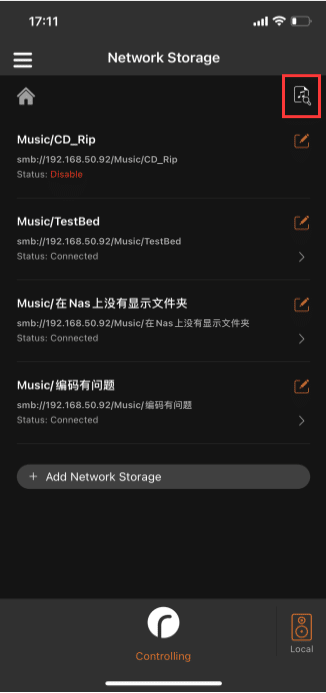
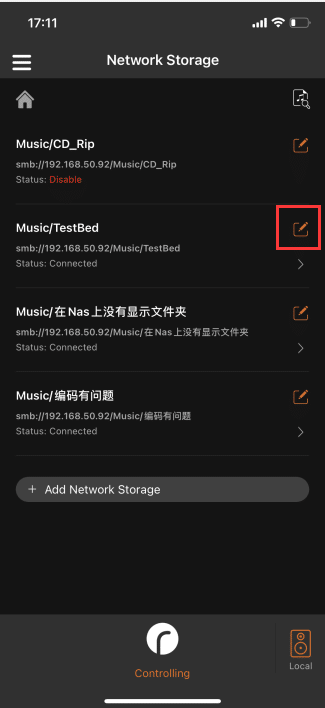
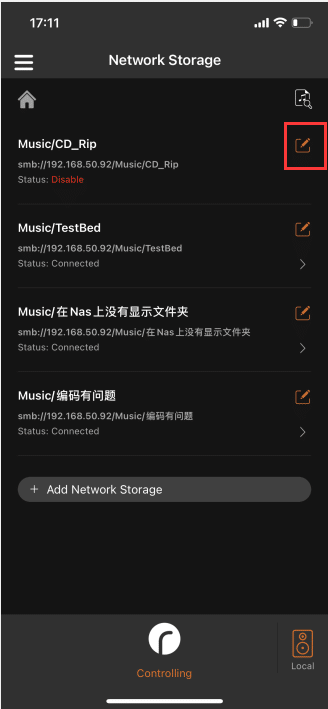
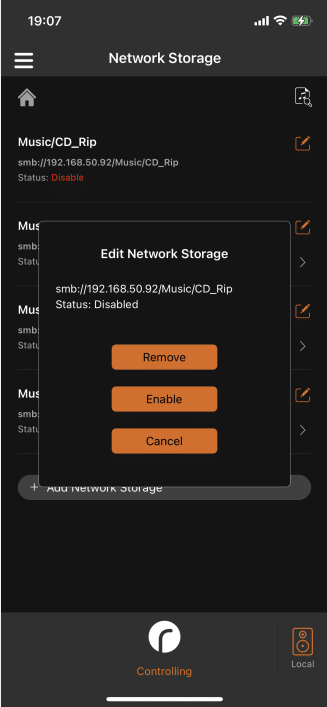
Click the "Edit" icon to the right of the enabled network storage, and the "Edit Network Storage" interface will pop up.
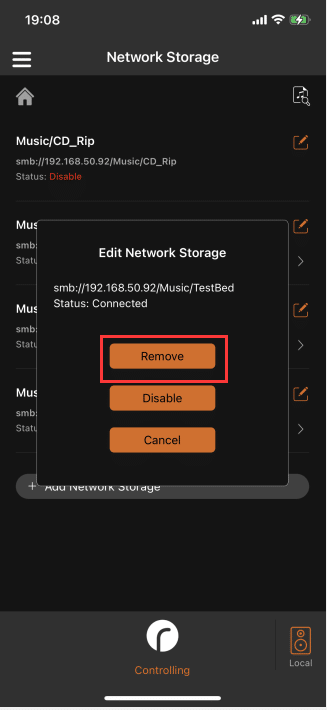
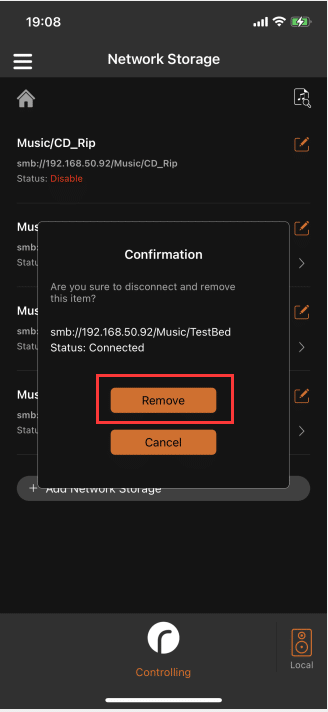
3.6.2.1.1. Remove Network Storage
In the "Edit NAS" interface, click the "Remove" button, and the "Confirmation" interface will pop up. click the "Remove" button,After deleting, the NAS will no longer be displayed.Click the "Cancel" button to exit the "Edit Network Storage" interface.
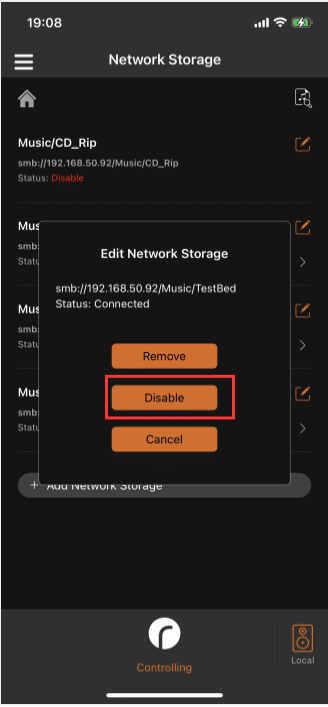
3.6.2.1.2. Disable Network Storage
In the "Edit NAS" interface, click the "Disable" button, the status of the NAS is "Disabled", which means that the NAS cannot be accessed.
3.6.2.1.3. Enable Network Storage
After it has been changed to "Disabled", click the "Edit" icon on the right side of the network storage to enter the "Edit Network Storage" interface.Click "Enable", the network storage status changes to "Connected", you can continue to use the network storage.
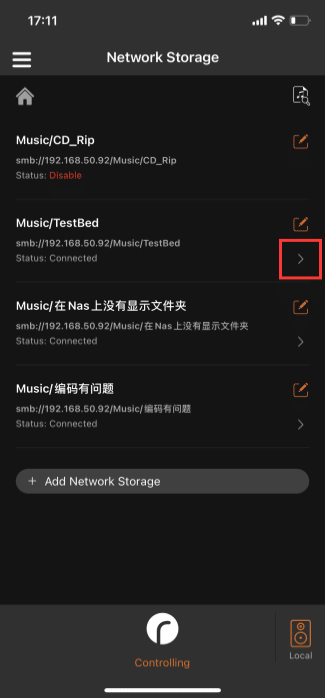
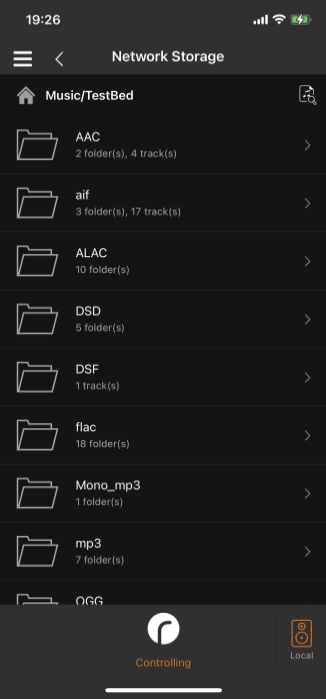
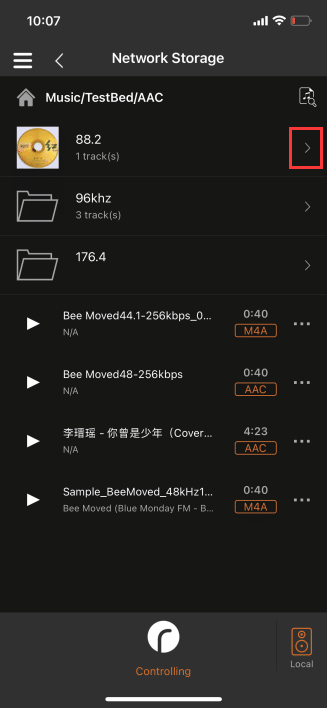
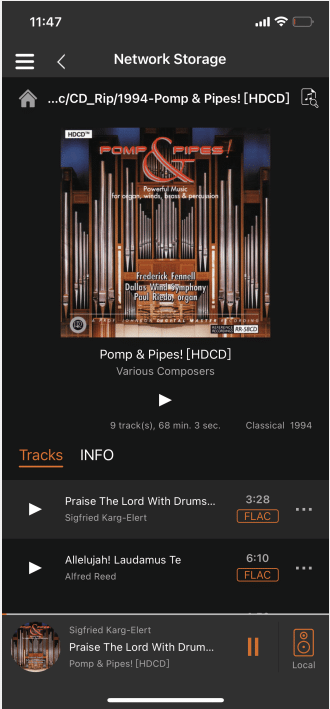
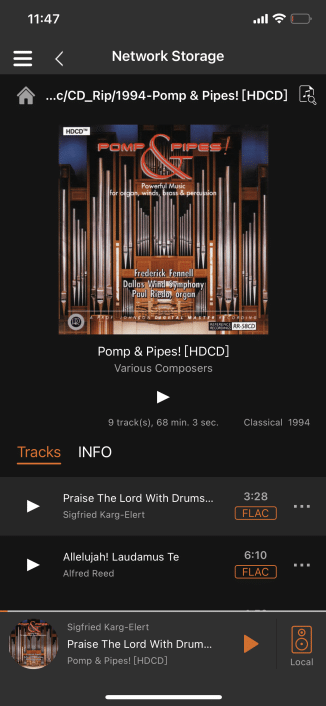
3.6.2.2. Go To Network Storage
Click the ">" button on the right side of the network storage to enter the network storage folder. For the next steps, refer to 3.6.4.
3.6.2.3. Add Network Storage
Click "+ Add Network Storage" in the interface to enter the "Add Network Storage" interface, and automatically scan the nearby "Network Storage" that can be connected .
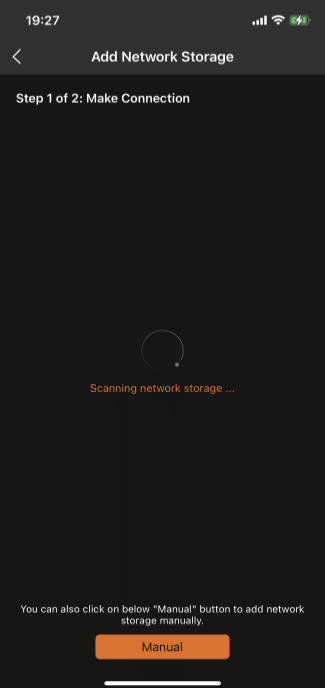
3.6.2.3.1. How To Connect Network Storage
3.6.2.3.1.1. Automatically Scan Network Storage
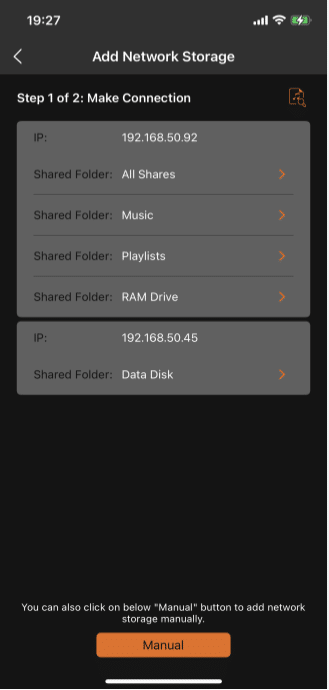
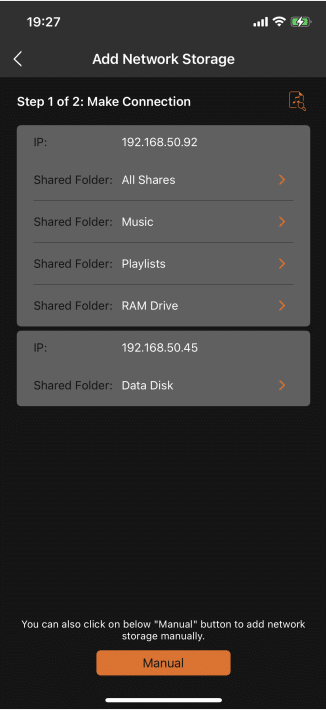
Click the "Scan" icon to the right of the established connection to rescan the "Network Storage".

Scan out the "Network Storage" that can be connected, select the "Shared Folder" under the storage that needs to be connected, and enter the "Network Connection Information" interface.

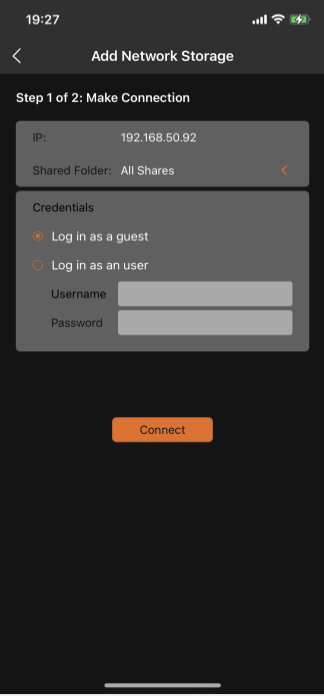
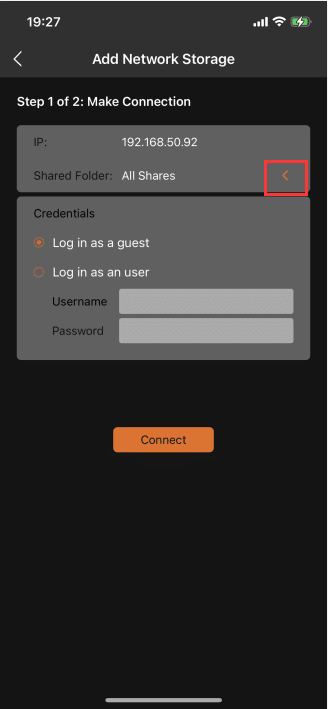
Click the "<" button on the right side of the path to switch to the "Network Storage" interface.
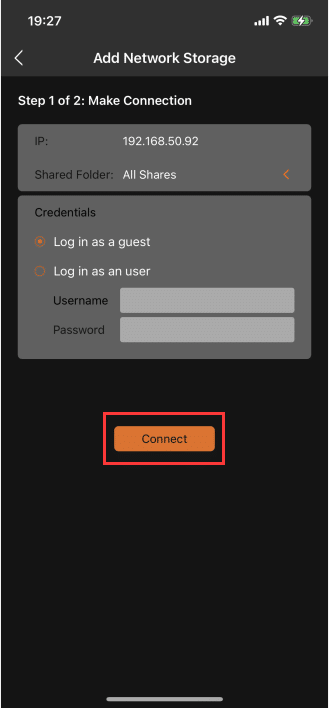
Fill in the "Login Information" manually , select "Log in as a user" or "Log in as a guest" according to the access rights of the selected music files Click the "Connect" button, and the next steps will jump to 3.6.2.3.2.
3.6.2.3.1.2. Manually Set Up Network Storage
If the "Network Storage" to be connected is not displayed after scanning, it means that the "Network Storage" may have set the hidden function, click "Manual",In the "Add NAS" interface, you need to manually enter the NAS connection information.

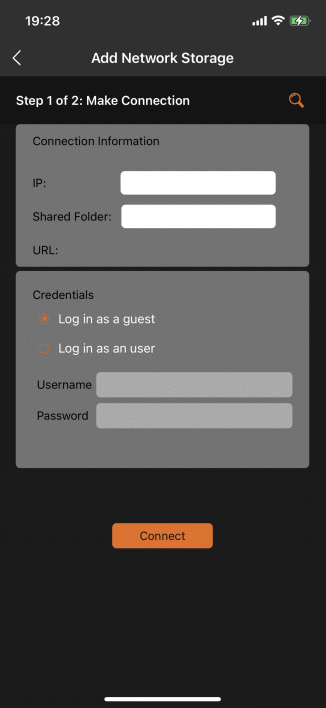
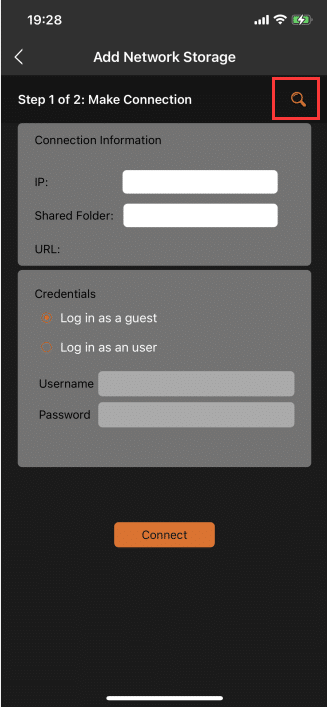
On the "Network Connection Information" interface, click the "Scan" icon on the right, switch to the "Network Storage" interface, and scan the network storage again.

Manually fill in the "connection information" and "login information", click the "connection" button, and the next steps will jump to 3.6.2.3.2
"Connection Information": Enter the IP address of the "Network Storage" to be connected and the name of the music file in the storage.
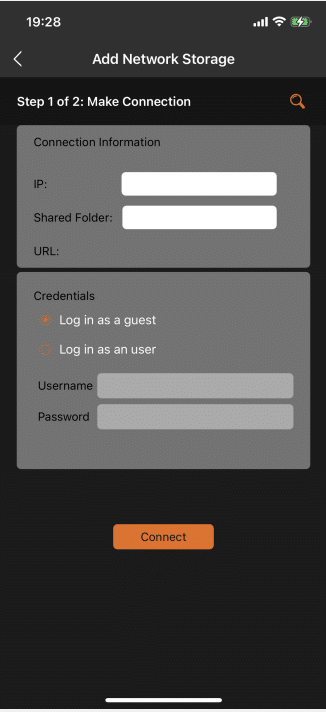
"Credentials": Select "Log in as a user" or "Log in as a guest" according to the access rights of the music files filled in.

3.6.2.3.1.3. Error Code Parsing
After clicking the "Connect" button, if prompted, you can adjust your information according to the corresponding content
101: System mount point media/nas folder creation failed
103: The IP address entered is incorrect
105: Missing Shared Folder Name
106: Password parsing failed
107: The submitted folder name has an unsupported character ' '
301: Error mounting connection: No permission (error number:% 1 $s).
302: Mount connection error: Unable to connect to network address% 2 $s (error number:% 1 $s).
303: Error mounting connection: The folder or file does not exist (error number:% 1 $s).
304: Error in mounting connection: Wrong parameter (error number:% 1 $s).
305: Mount connection error: Device or resource busy (error number:% 1 $s).
306: Mount connection error: Folder% 2 $s is already mounted (error number:% 1 $s).
307: Error mounting connection: Unable to change path to% 2 $s due to non-existent path (error number:% 1 $s).
Other: Error: Connection failed (Error code: 300)
Error number 301: Mount connection error: Possible username or password error, or the user does not have access permissions
Error number 303: Mount connection error: The folder or file does not exist, or the user does not have access permissions
Error number 300: First enter the NAS backend, locate the file service - Advanced settings - Change the maximum SMB protocol to SMB3, and try connecting again.
301:
1. Need to specify a folder for user connection, did not submit username
2. You need to specify the folder where the user connects and submit the username, but the password for submitting the password is incorrect or not submitted
3. You need to specify the folder where the user is connected, submit other unauthorized username and correct password
4. The Win11 machine connected to the NAS service has an incorrect share directory and incorrect username or password.
303:
1. The share directory is incorrect
2. The share directory is correct, but only the specified user can find it. Use a different username to connect
3. The share directory is correct, but only the specified user can find it. Use the correct username to connect, but the password is incorrect.
3.6.2.3.2. Establish Connection
Click the "Connect" button, if it prompts "Connection failed", you need to check whether the selected "User Identity" has permission to access the music file,Or check whether the information filled in is wrong.
(Auto scan connection interface) (Manual setting connection interface)

Click the "Connect" button, if successful, it will enter the "Select Folders" interface.
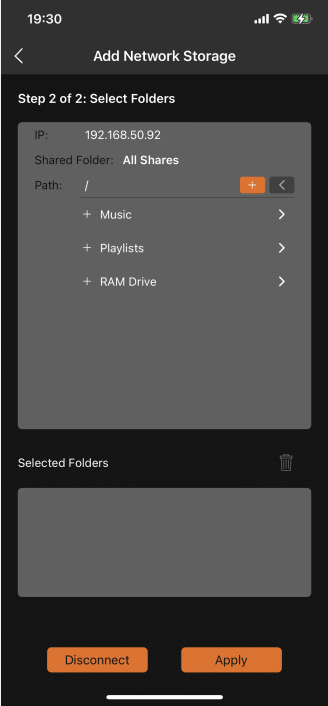
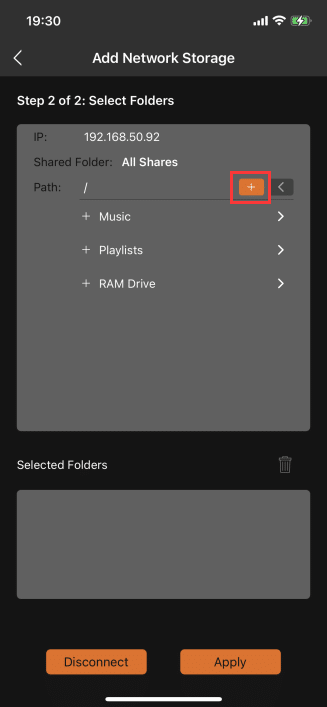
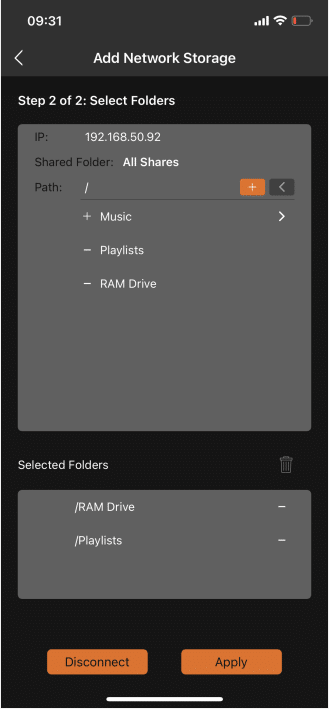
3.6.2.3.2.1. Select Folders
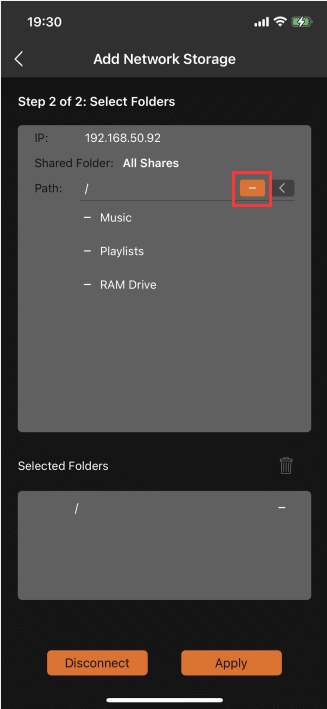
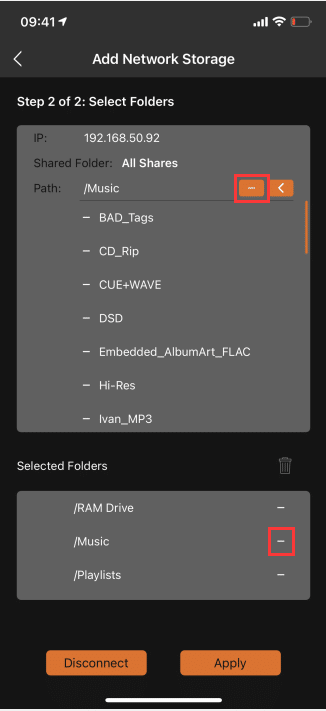
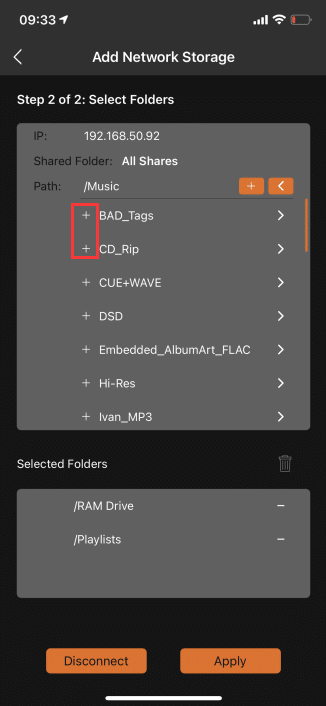
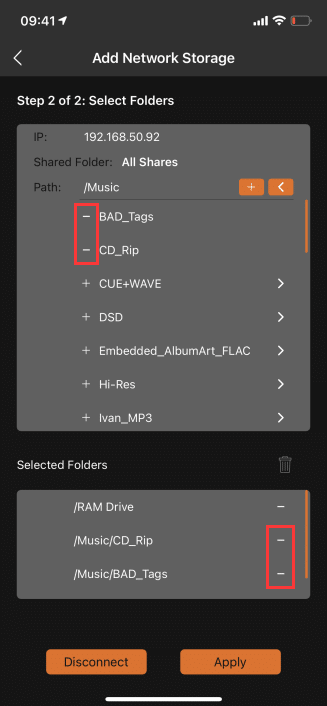
Click the orange "+" button next to the path to add all files under the path by default, and click the "-" button next to the path to delete the added files.
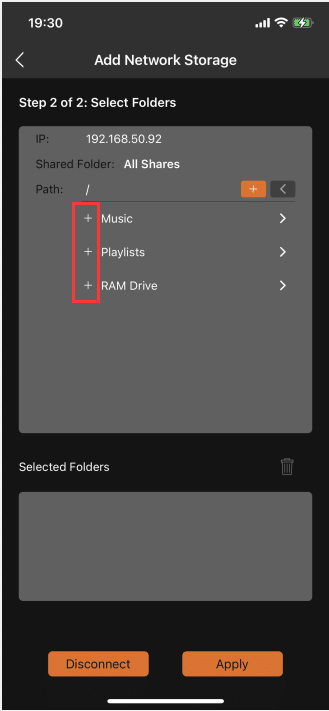
Click the "+" button in front of the file to add the corresponding folder, click the "-" button in front of the file or the selected file box The "-" button corresponding to the folder can delete the corresponding folder.

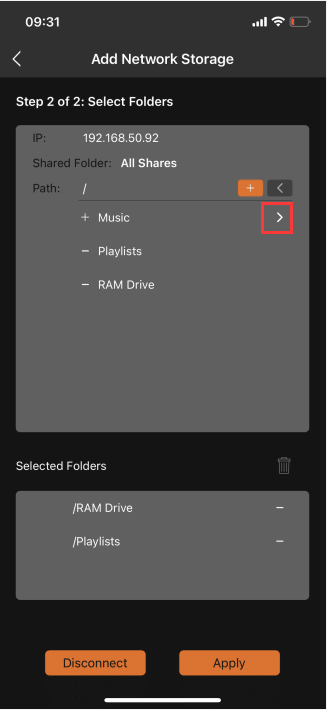
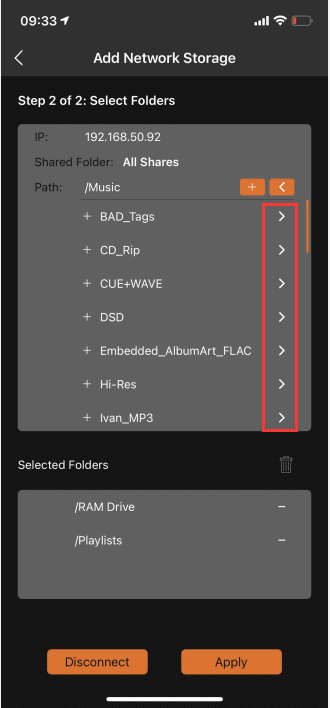
3.6.2.3.2.2. Select Subfolder
Click the ">" button to the right of "Unselected Folder" to view the subfolders under this folder. If there are no subfolders under this folder, it will be empty.

You can choose to add all subfolders under the folder, click the orange "+" button next to the path, and all files under the file path will be added by default.Click the "-" button next to the path or the corresponding "-" in the selected folder to delete the added files.

Click the "+" button before the file to add the corresponding subfolder, click the "-" button before the file or the selected folder The corresponding "-" button can delete the corresponding subfolder.
If the folder to be selected is not at this level, you can continue to click the ">" button on the right side of the folder until you find the folder you want to add.
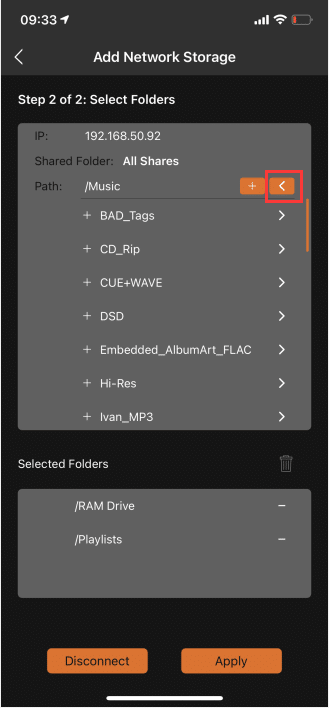
3.6.2.3.2.3. Return To The Previous Folder
Click the "<" button to the right of the path to return to the previous folder.
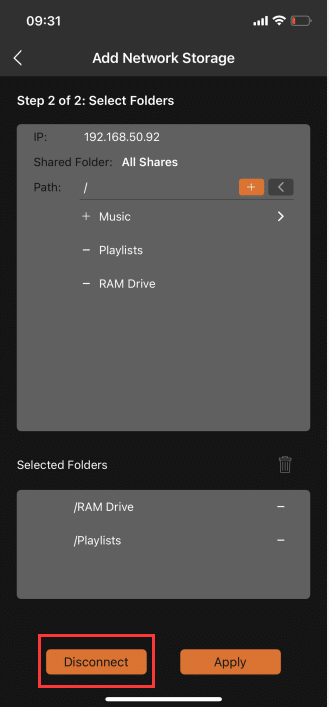
3.6.2.3.2.4. Disconnect
Click the "Disconnect" button to switch to the "Connect" interface .

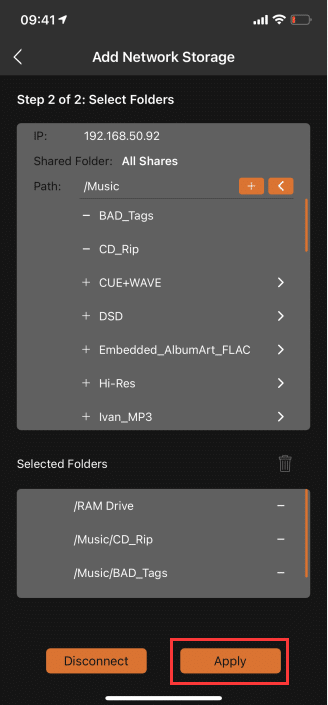
3.6.2.3.2.5. Apply
Click the "Apply" button, switch to the "Network Storage" interface, you can view the newly added "Network Storage", according to the connection The folders and subfolders selected in "Network Storage" will be displayed above the "Network Storage" list respectively.
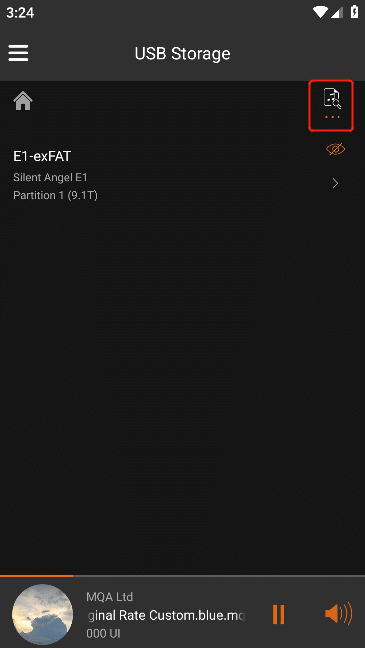
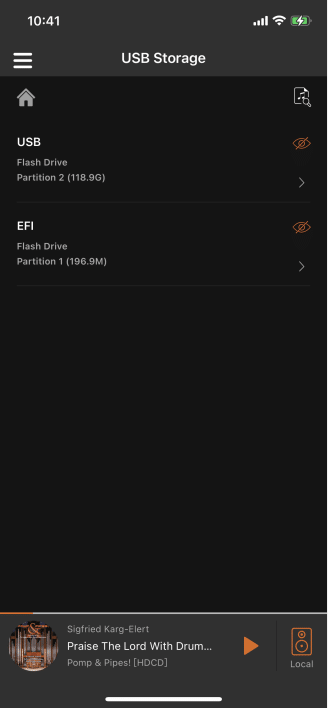
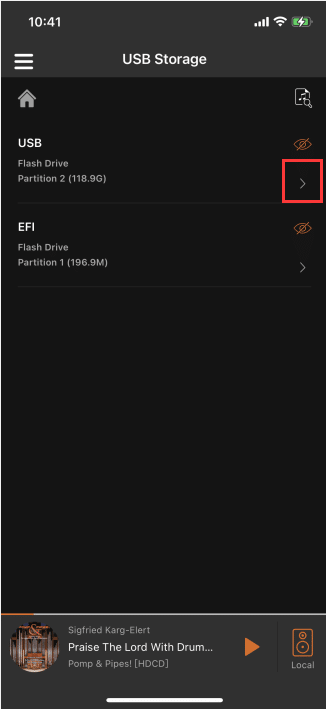
3.6.3. USB Storage(You can view the connected E1)
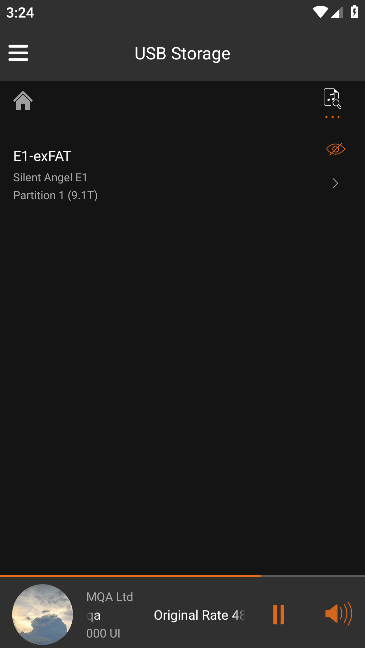
Click "USB Storage" to enter the "USB Storage Management" interface, where you can view the partitions of the connected USB storage .
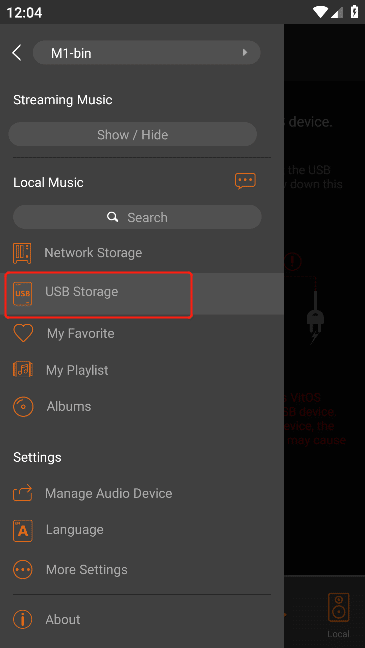
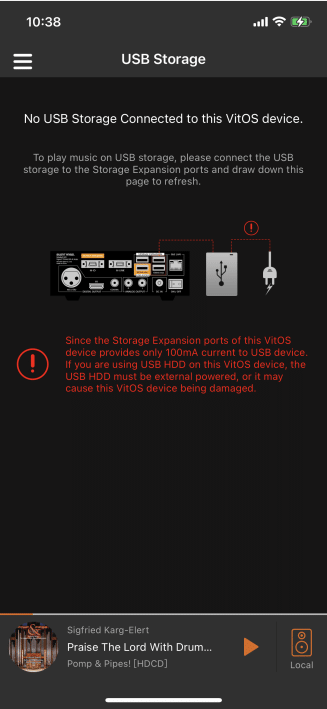
Click "USB Storage", if the VitOS device is not connected to "USB Storage", a prompt and "USB Storage" connection guide will appear.
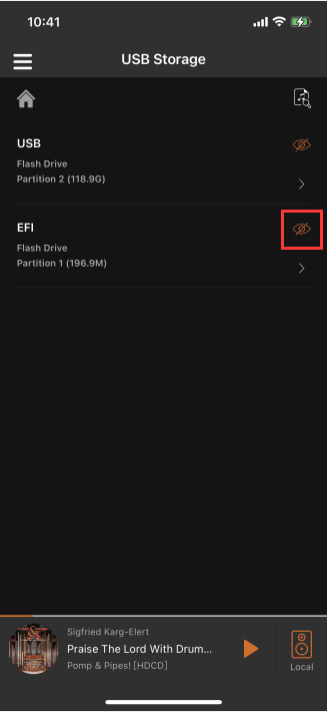
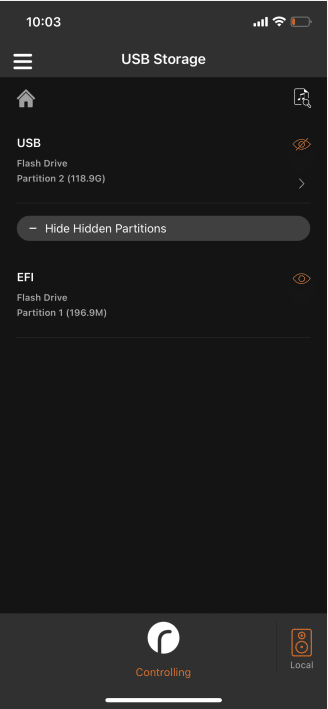
3.6.3.1. USB Storage Management
Tap the "Scan" icon in the upper right corner to rescan the music files in the connected SUB storage .
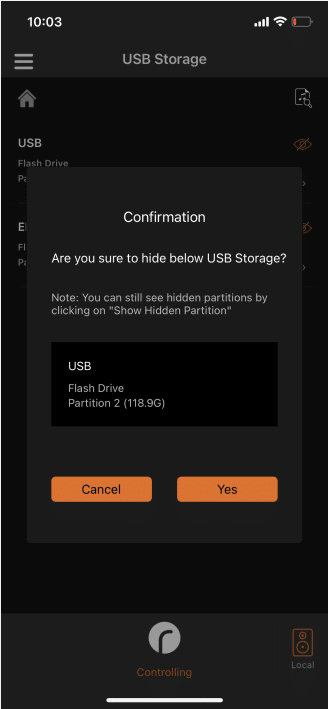
Click the "Hide" button on the right side of the storage partition to pop up the "Confirmation" interface, click the "OK" button ,The selected partition will not be visible.
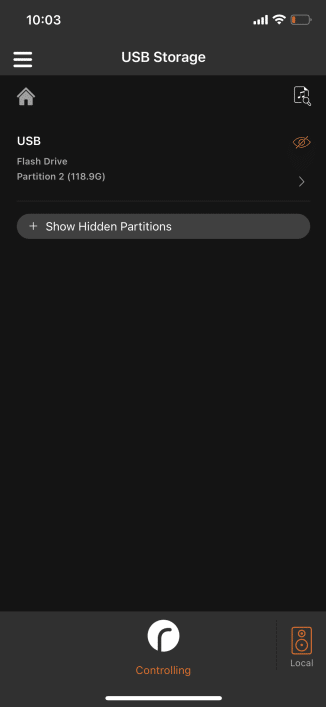
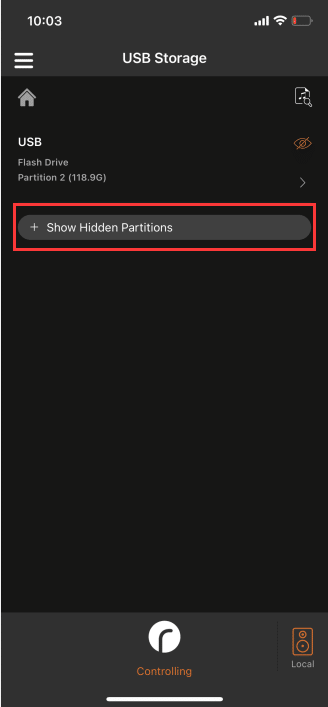
Click the "+ Show Hidden Partitions" button to view all hidden partitions.
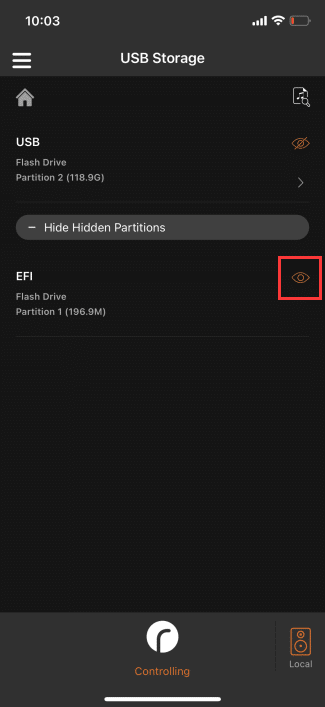
Click the "Show" button in the hidden partition, and the corresponding hidden partition can be viewed normally.
3.6.3.2. Enter The Storage Partition
Click the ">" button on the right side of the storage partition to enter the folder of the storage partition. For the next steps, refer to 3.6.4.

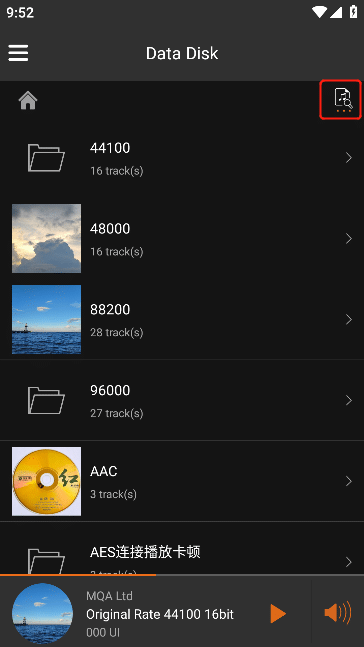
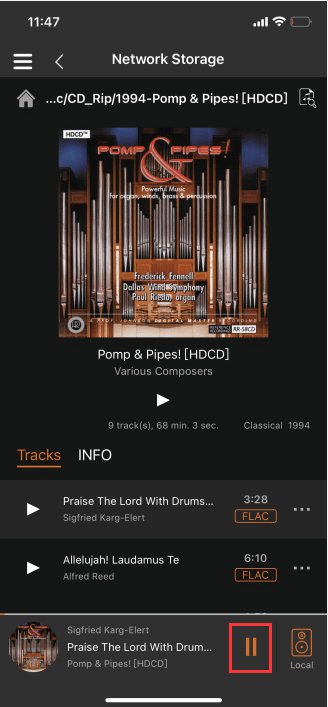
3.6.4. Enter Folder
Enter the folder of data disk, network storage or USB storage to view all the folders of the corresponding data disk or storage.
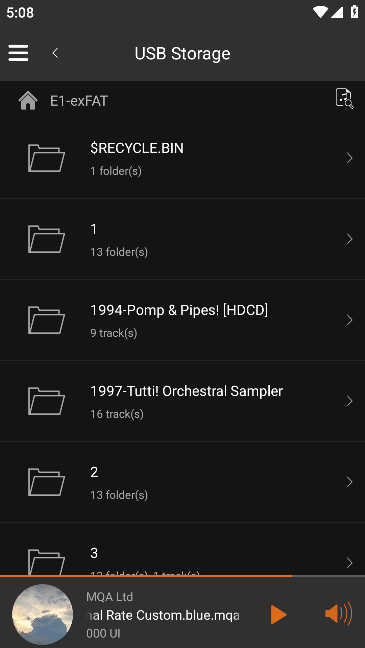
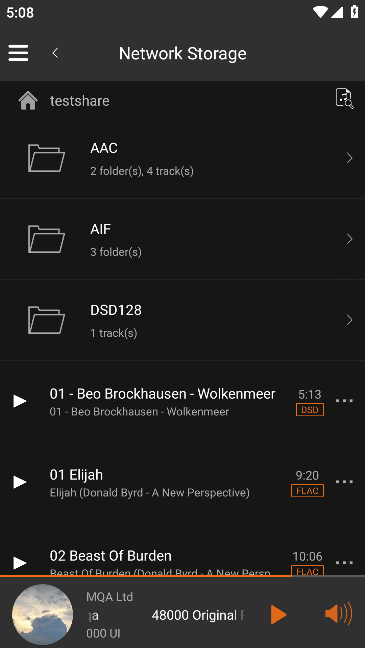
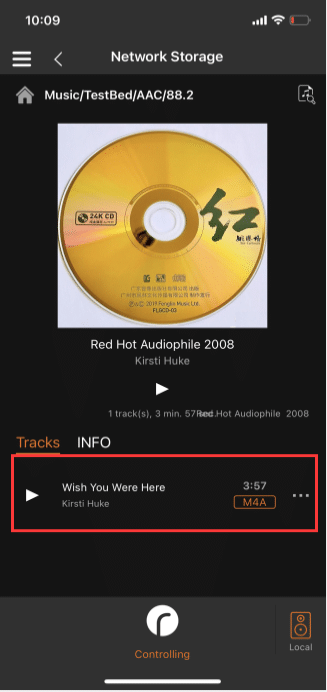
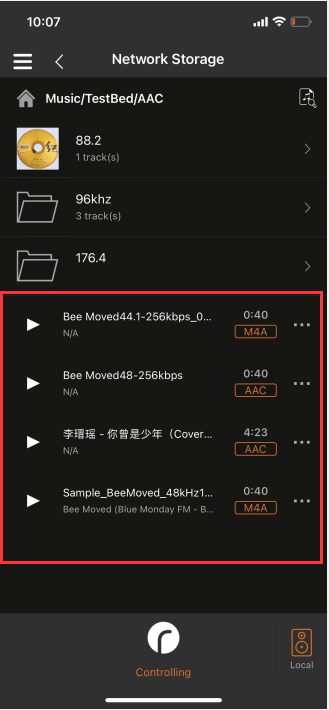
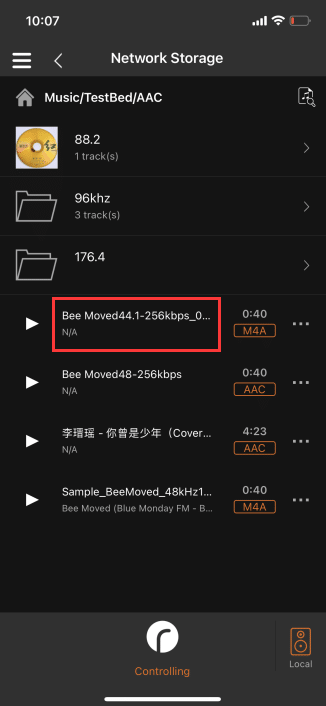
3.6.4.1. Folder Display Description
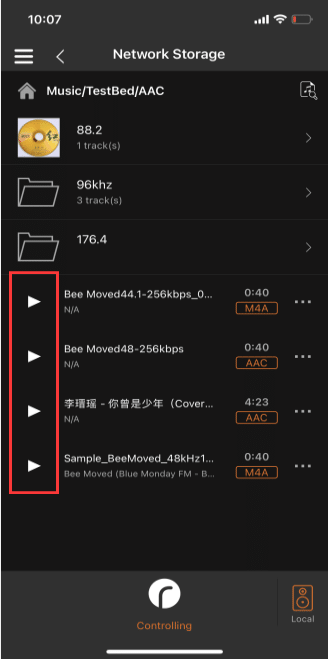
If there are folders and songs in the folder under the file path, the folder image, folder name, number of folders and number of songs will be displayed.If there are only folders in the folders under the file path, the folder pattern, folder name and number of folders will be displayed.
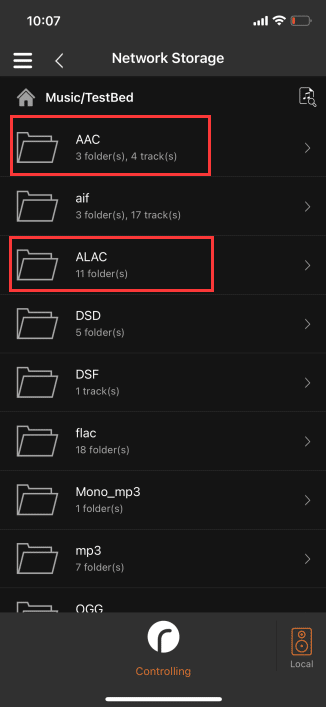
If there are only songs in the folder under the file path and song pictures are added, the folder will display the song pictures, folder name and number of songs.If there are only songs and no song pictures in the folder under the file path, the folder image, folder name and number of songs will be displayed.
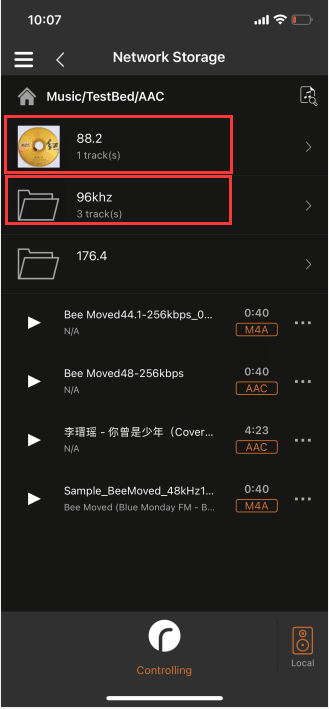
There are folders and songs in the folder, click the ">" button on the right side of the file to enter the folder,Songs in this folder are displayed at the end.
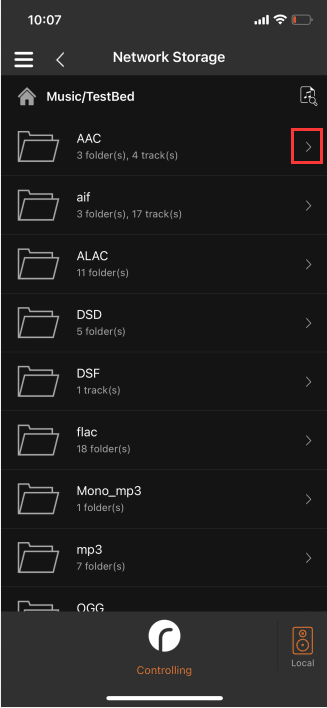
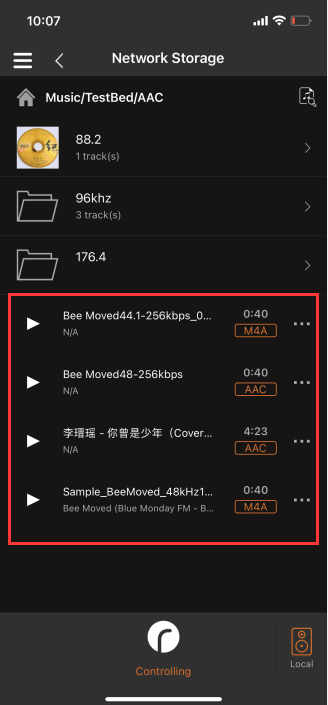
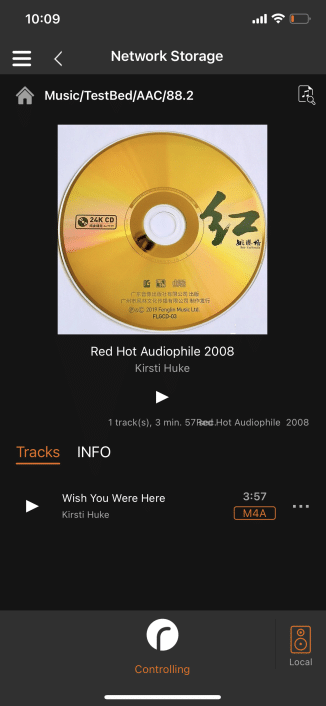
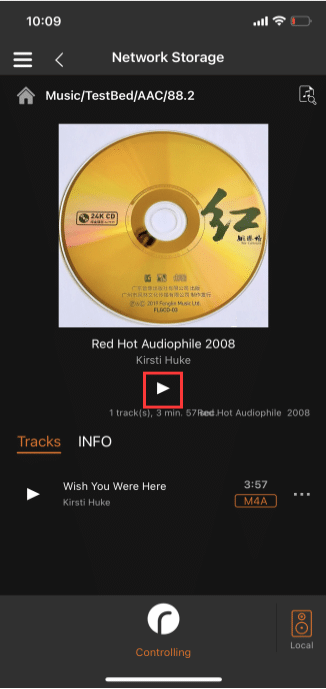
There are only songs but no folders in the folder. Click the ">" button on the right side of the file to enter the "Album" interface.All songs in this folder are displayed in "Albums".
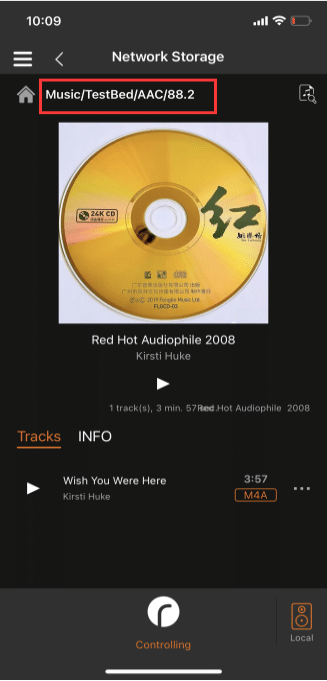
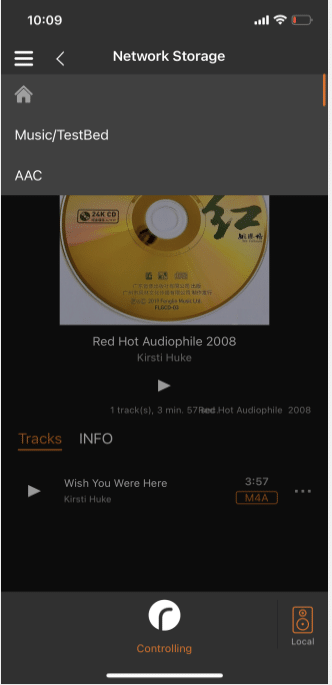
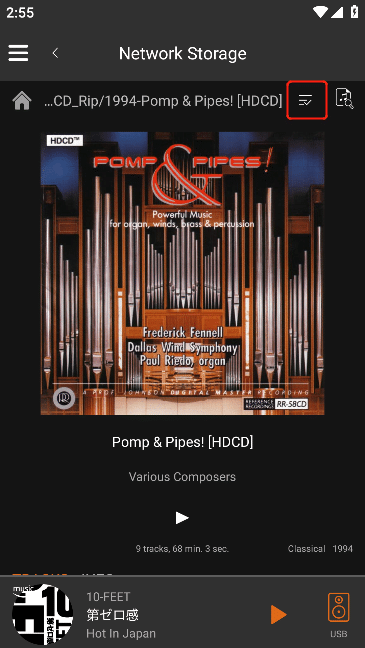
3.6.4.2. Return To The Specified Folder
Click "File Path" in the upper left corner to view all the selected file paths, select the "home" icon, and switch to the "Network Storage" interface.Select the specified "file path" to switch to this path.
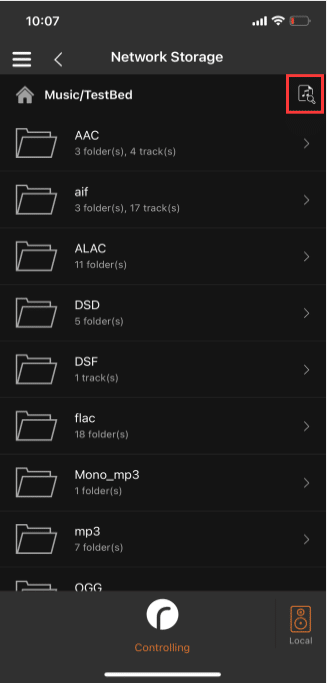
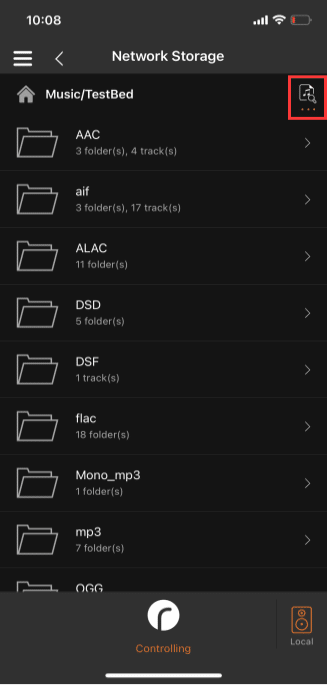
3.6.4.3. Rescan Current Folder
Click the "Scan" icon in the upper right corner to rescan for new or deleted music files.Only scan the music files in the current file path, if " ... " is displayed, it means "scanning", and if " ... " disappears, it means "scan complete".
3.6.4.4. File Song Operations
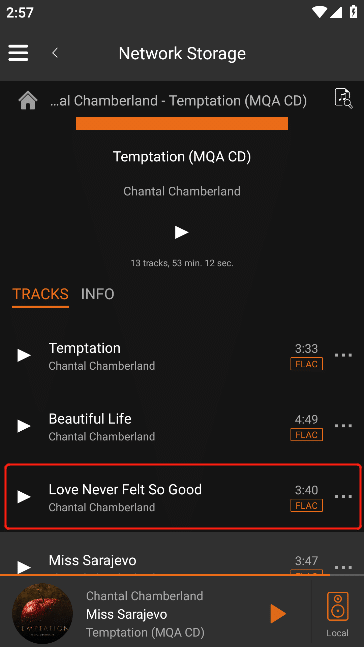
3.6.4.4.1. Song Playing
Click the "Play" button in front of the song in the folder to play the corresponding song, click on the "Album" interface The "Play" button on the left side of the song will play the corresponding song.
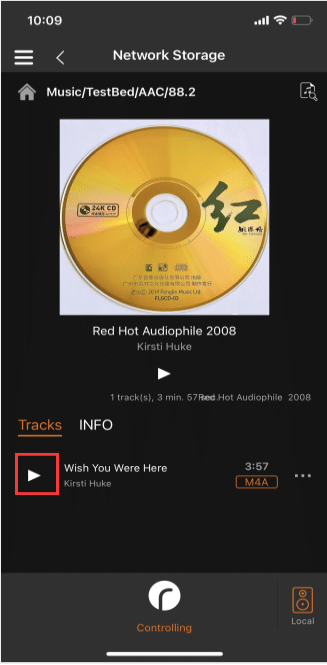
![]() In the "Album" interface, click the " " button in the middle of the interface to add all the songs in the current "Album" In the "Play Queue", the songs in the current "Album" will be played in sequence by default. (Note: "Play Queue" in step 3.7.2.6)
In the "Album" interface, click the " " button in the middle of the interface to add all the songs in the current "Album" In the "Play Queue", the songs in the current "Album" will be played in sequence by default. (Note: "Play Queue" in step 3.7.2.6)

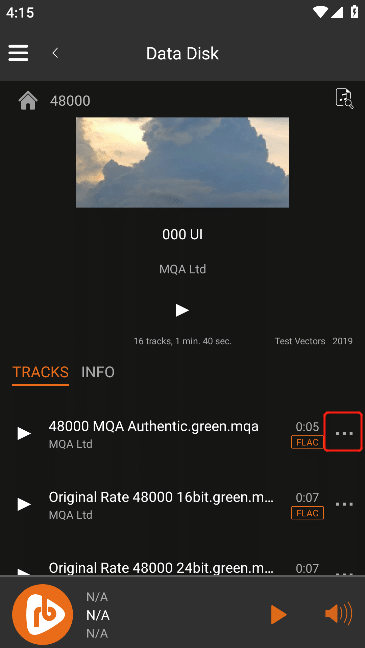
3.6.4.4.2. Song Operation
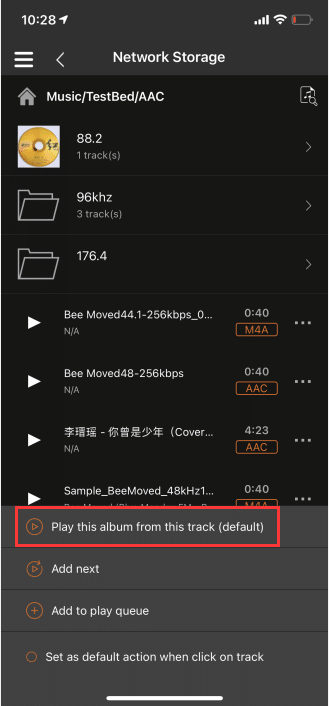
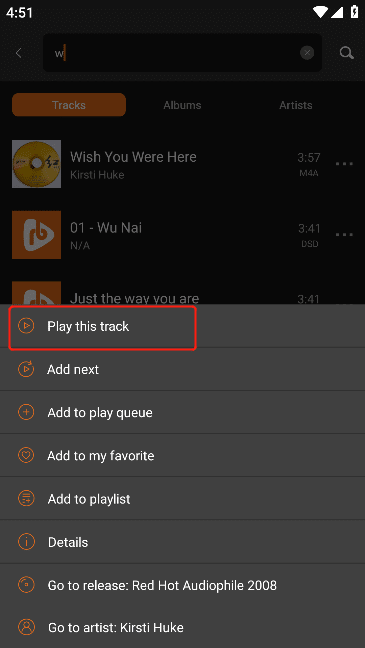
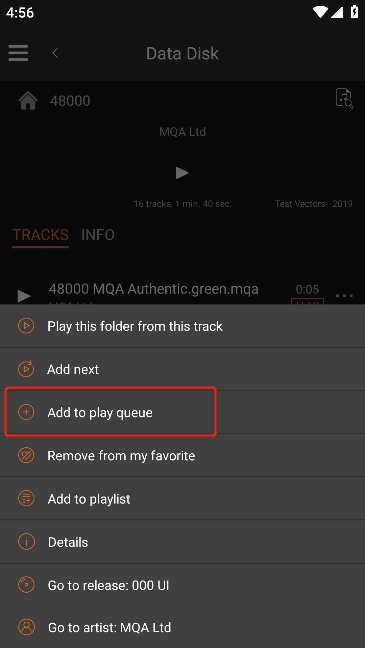
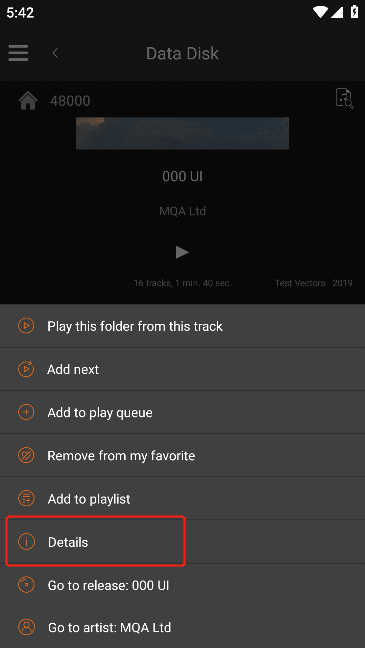
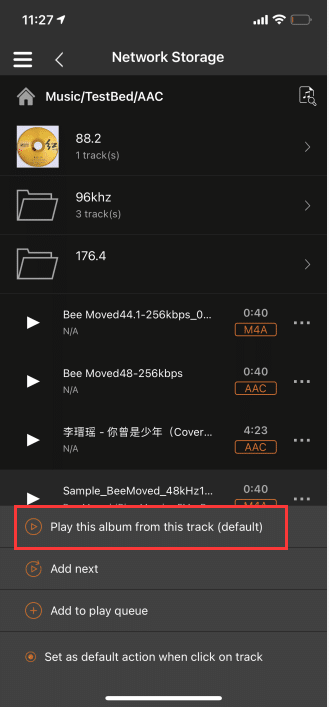
Click "..." button on the right side of the song , and perform corresponding operations on the current song according to the pop-up content.

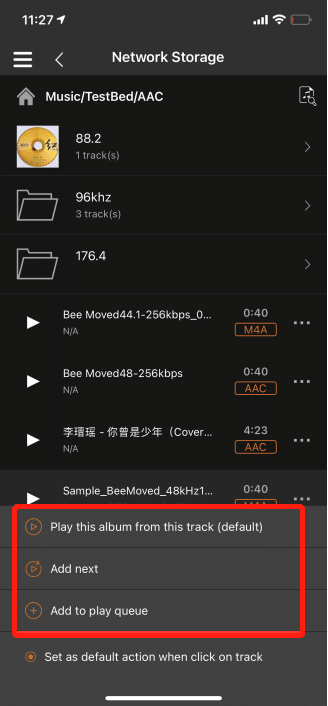
3.6.4.4.2.1. Play This Album From This Track
In the " Album " interface, click "Play the entire album from this track" to add all songs in order from the current song to In the "Play Queue", play all the songs of the "Album" in order from the current song. (Note: "Play Queue" in step 3.7.2.6)
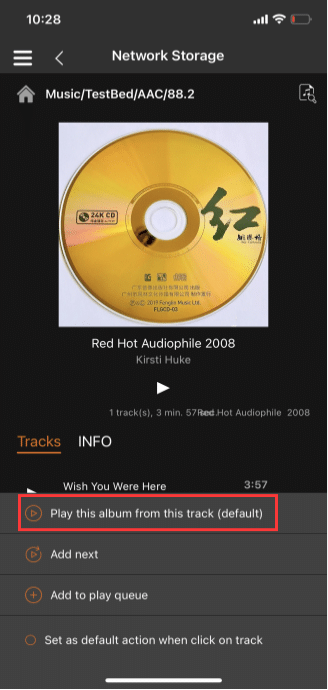
In the "Folder" interface, click "Play the entire album from this track" to add the current song in order All songs in the file path will be added to the "Play Queue", and all songs of the "Album" will be played in sequence from the current song.(Note: "Play Queue" in step 3.7.2.6)
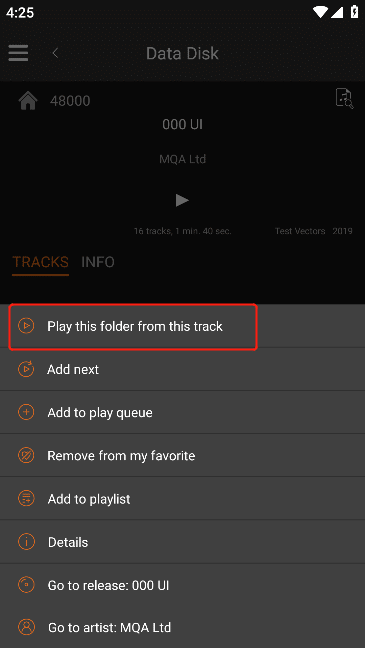
3.6.4.4.2.2. Play this Folder from this Track
In the "Folder" interface, click "Play this Folder from this Track" to add all the songs under the file path to the "Play Queue" in order from the current song, and start playing the "folder " in order from the current song All songs. (Note: "Play Queue" in step 3.7.2.6)
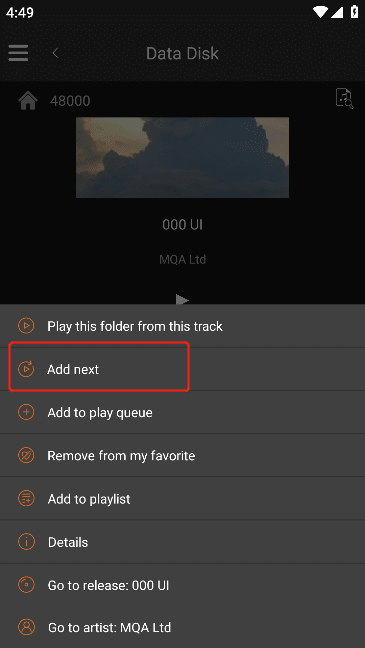
3.6.4.4.2.3. Add Next
Click "Add Next " to add the selected song to the play queue. After the "playing song" is finished, the selected song will be played. (Note: "Play Queue" in step 3.7.2.6)

3.6.4.4.2.4. Play this Track
Click "Play this Track" to play the selected song immediately.
3.6.4.4.2.5. Add to Play Queue
Click "Add to Play Queue" to add the selected song to the play queue. (Note: "Play Queue" in step 3.7.2.6)
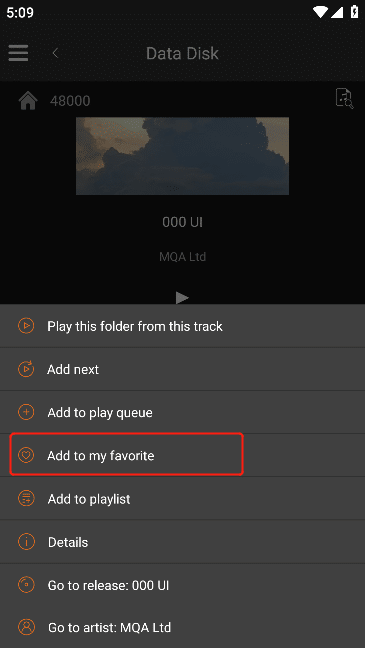
3.6.4.4.2.6. Add to My Favorite
Click "Add to My Favorite" to add the selected song to the "Tracks " of "My Favorite" . (Note: "Track" in step 3.6.6.2)

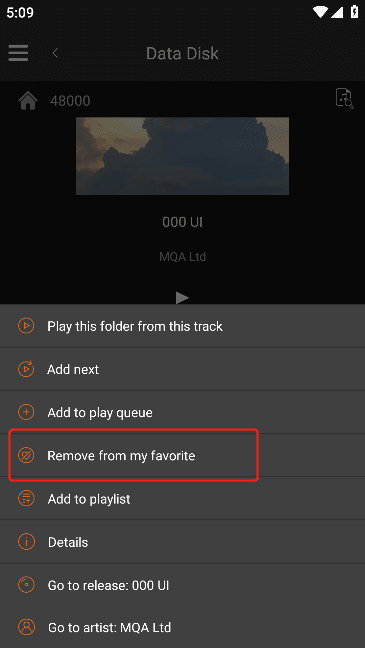
3.6.4.4.2.7. Remove From My Favorite
Click "Remove From My Favorite" to remove the selected song from the "Tracks" of "My Favorite" . (Note: "Tracks" in step 3.6.6.2)
3.6.4.4.2.8. Add to Playlist
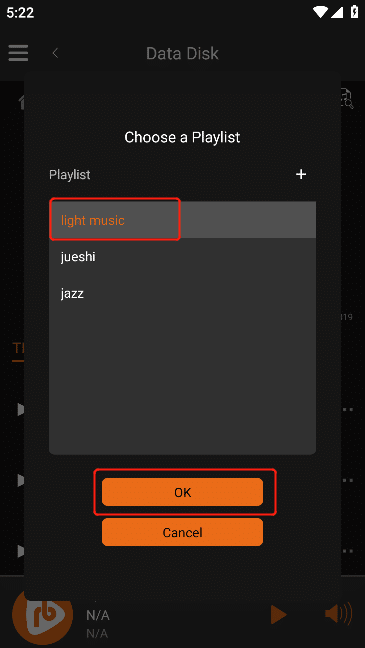
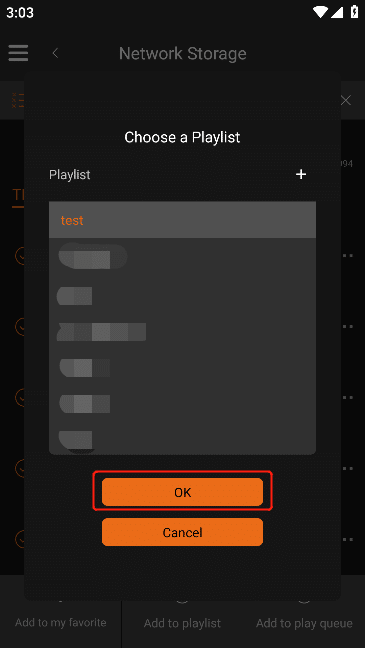
Click "Add to Playlist" to pop up the "Choose a Playlist" interface .
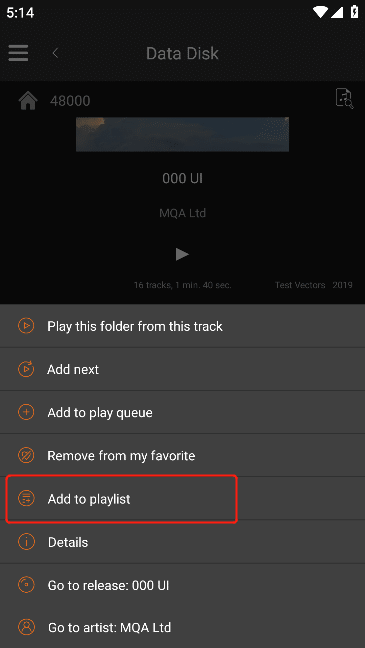
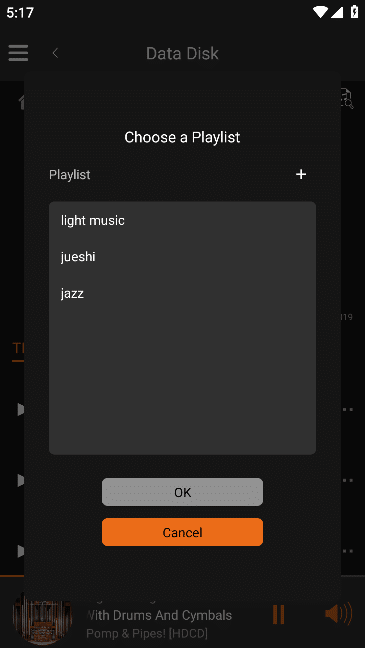
On the "Select Playlist" interface, select the playlist you want to add, and then click "OK" to add it successfully . ( Note: "My Playlist" in step 3.6.7)

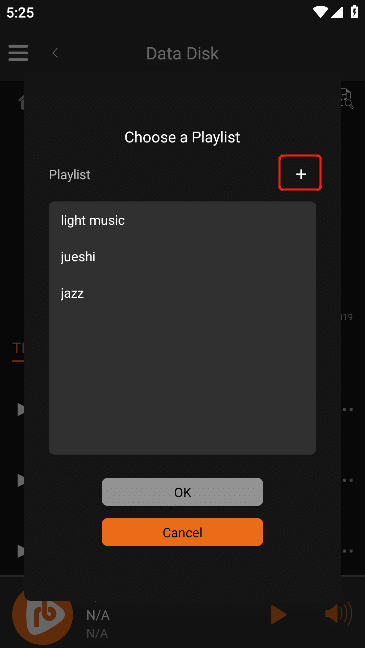
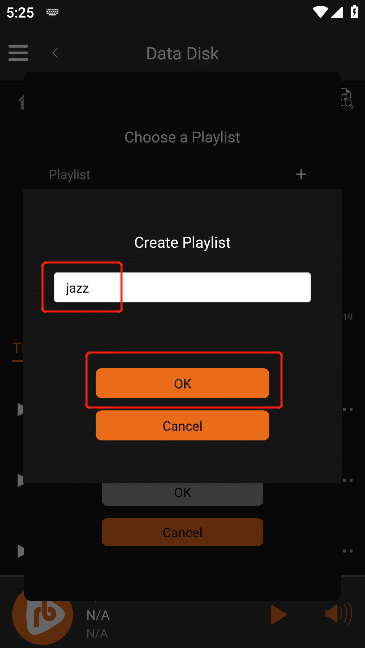
3.6.4.4.2.8.1. Create Playlist
On the "Select Playlist" interface, click the "+" button to enter the "Create Playlist" interface, enter the "Playlist Name", and then click the "OK" button to add the current track to the "Create Playlist" . (Note: "My Playlist" in step 3.6.7)
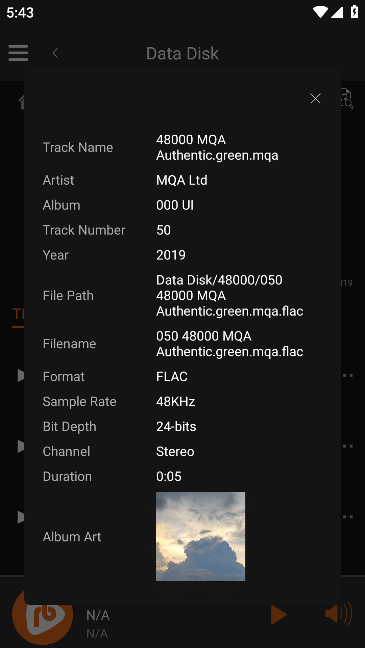
3.6.4.4.2.9. Details
Click "Details" to pop up the "Details" information interface of the selected song .
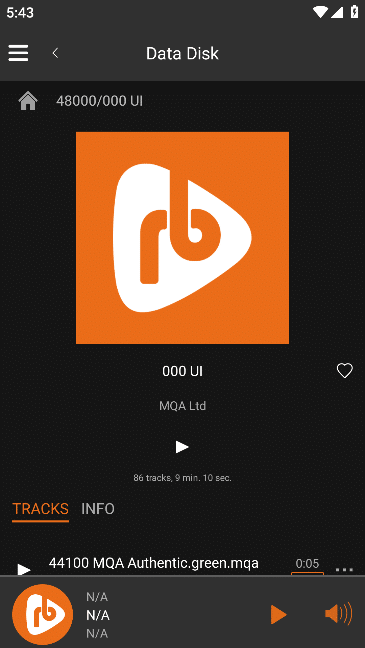
3.6.4.4.2.10. Go to Release
Click "Go to Release" to enter the "Album" track interface of the selected song.

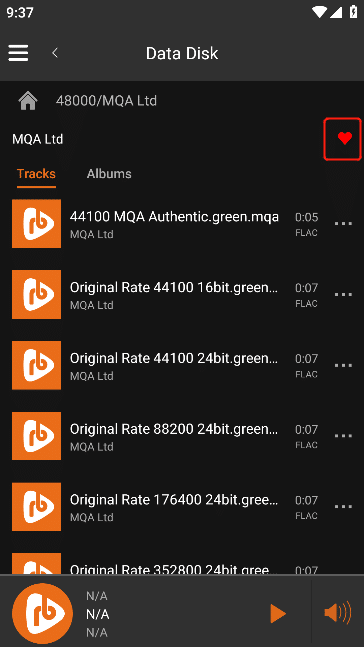
3.6.4.4.2.10.1. Favorite Release Albums/Remove Favorite Release Albums
Click the heart-shaped icon on the right side of the album, if it is red after clicking, it means that it has been successfully added to the "Albums" of "My Favorites" , if it is black after clicking, it means it has been deleted from the "Albums" (Note: "Albums" is in the Step 3.6.6.1 View)

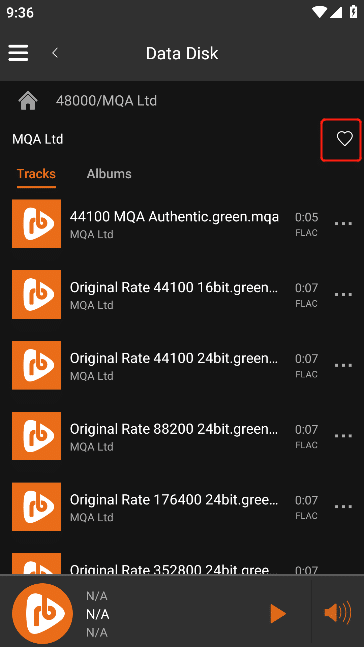
3.6.4.4.2.11. Go to Artist
Click "Go to Artist" to enter the "Artist" track interface of the selected song.
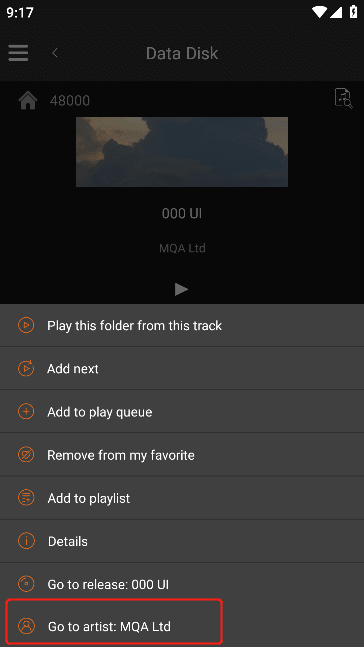

3.6.4.4.2.11.1. Favorite Artists/Remove Favorite Artists
the "Artists" has been successfully added to "My Favorites" , if it is black after clicking, it means it has been deleted from the "Artists" (Note: "Artists" is in Step 3.6.6.3 View)
3.6.4.4.2.12. Set As Default Action When Click On Track
Check "Set as default action when click on track", and then click any of the actions above,The text "(default)" is added at the end of the selected action .
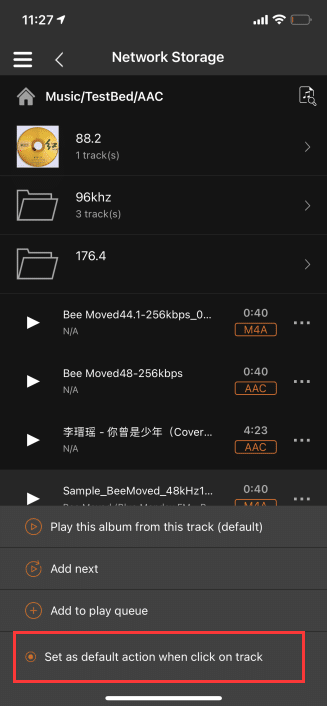
After the selected action is set to "default", if the default action is "play this album from this track", click any song,Then the selected song starts playing according to the "Play this album from this track" playing rule .
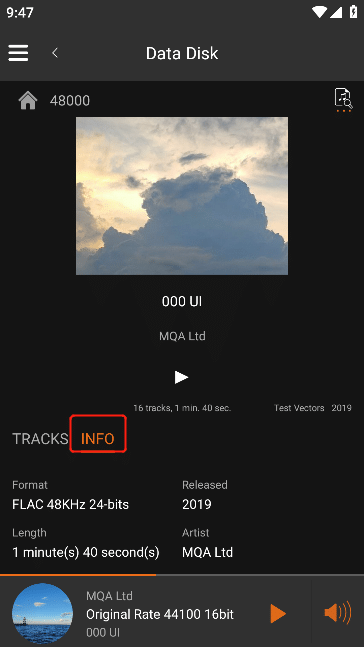
3.6.4.4.2.13. View Song Information
On the "Playlist" interface, click "INFO" to view Song Information.
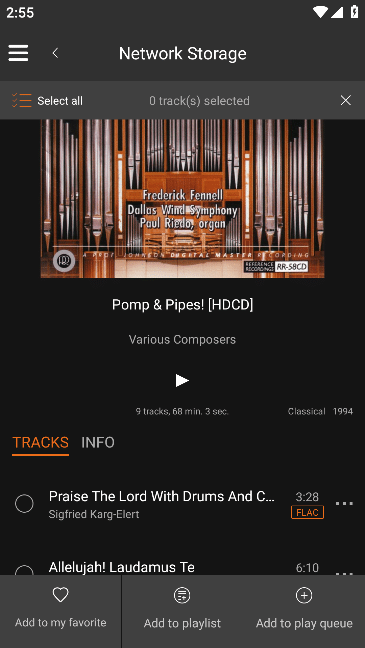
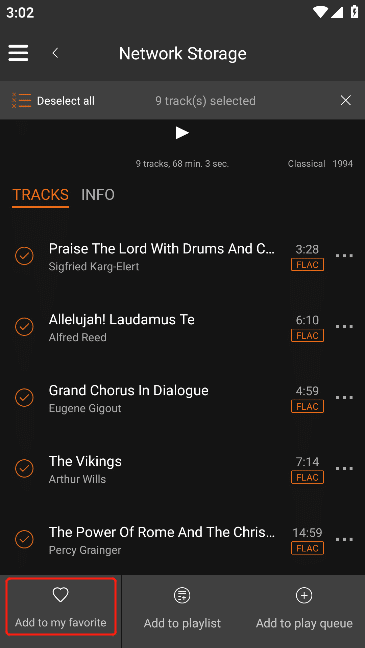
3.6.4.4.3. Song Tick Operation
In local music, enter the music file and click the "Tick" button to enter the song selection status.
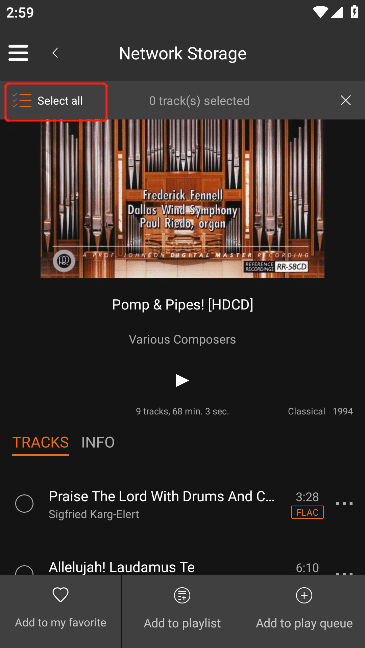
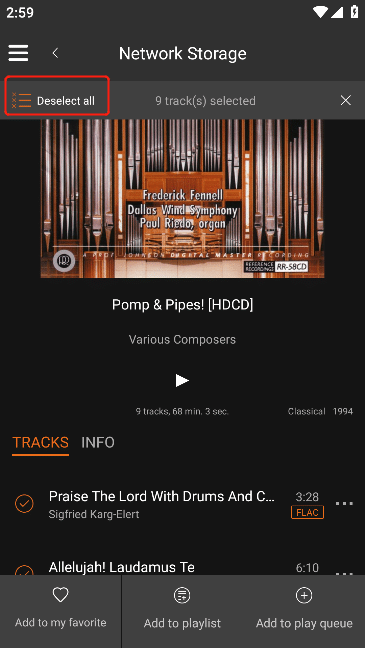
3.6.4.4.3.1. Select All/Deselect All
When the page is in the Select All state, click "Select All" to select all songs, and click "Deselect All" to cancel the selected songs.
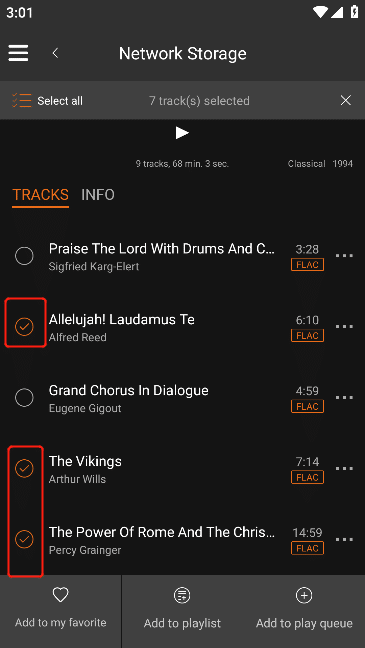
3.6.4.4.3.2. Select Some Songs
When the page is in the Select All state, clicking on the circle of the corresponding song will cause a tick state to appear, indicating that the corresponding song has been selected.
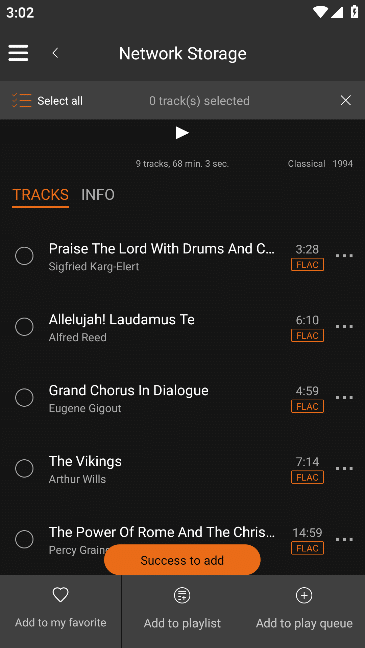
3.6.4.4.3.3. Add to My Favorite
Click "Add to My Favorite" to add the selected song to the "Track" of "My Favorite". (Note: "Track" is in step 3.6.6.2)
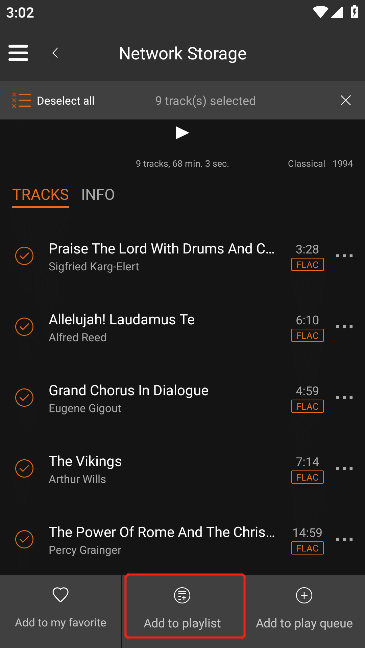
3.6.4.4.3.4. Add to Playlist
Click "Add to Playlist" to open the "Select Playlist" interface. Select the playlist to add the song to, and then click "OK" to add it successfully. (Note: "My Playlist" is in step 3.6.7)
3.6.4.4.3.5. Add to Play Queue
Click "Add to Play Queue" to add all songs in the current playlist to the "Play Queue" (Note: "Play Queue" is in step 3.7.2.6)

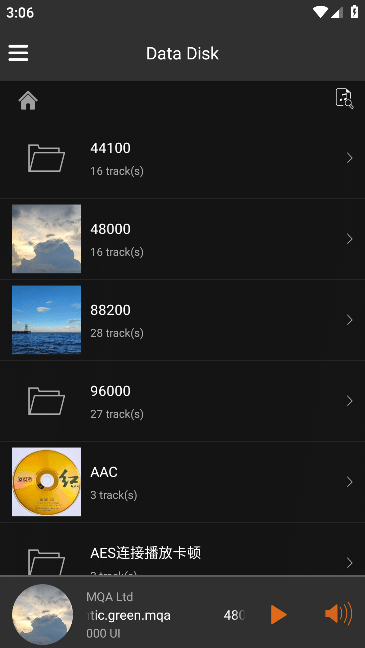
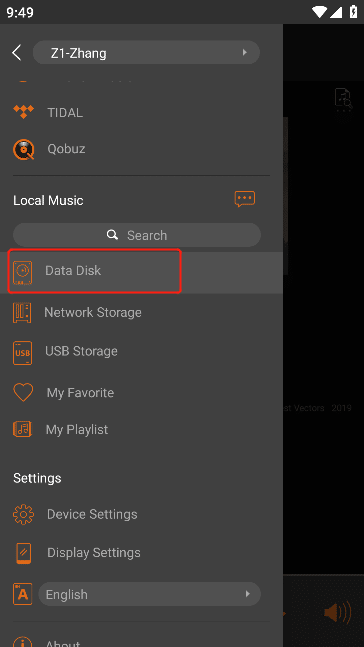
3.6.5. Data Disk
Click "Data Disk" to enter the "Data Disk" folder interface .
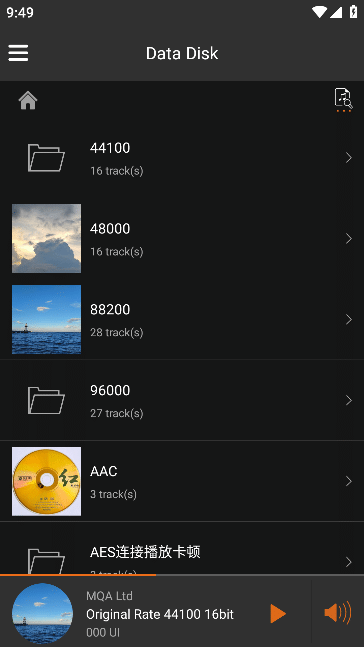
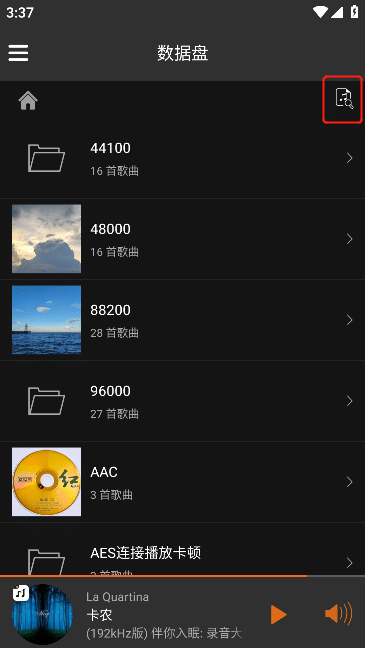
3.6.5.1. Rescan the Current Folder
Click the "Scan" icon in the upper right corner to rescan for new or deleted music files. According to the location of the file path entered, only the music files under the current file path will be scanned. The display of "..." means "scanning in progress", and the disappearance of "..." means "Scanning Completed".
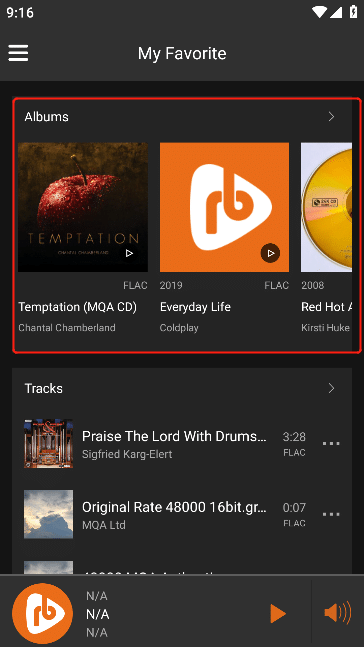
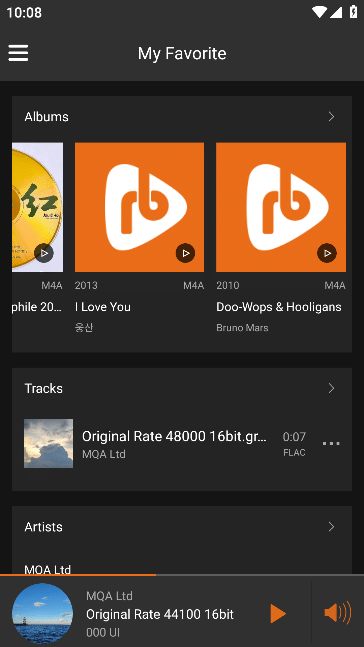
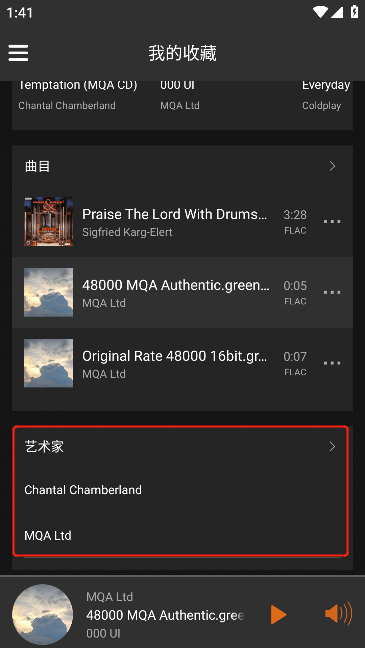
3.6.6. My Favorite
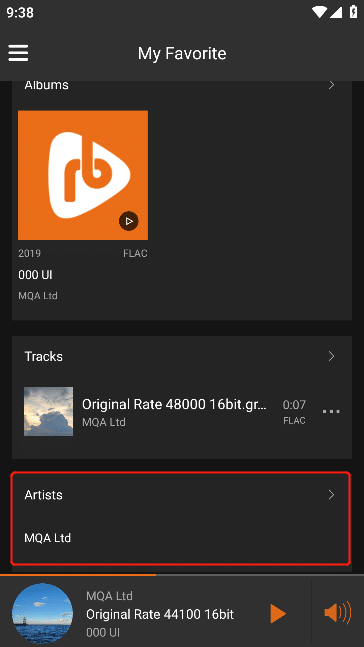
Click "My Favorite" to enter the "My Favorite" folder interface .
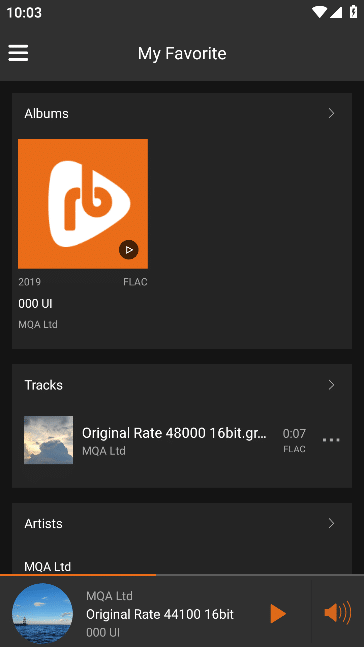
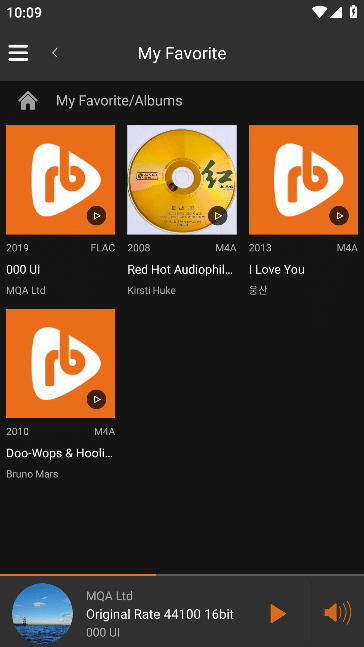
3.6.6.1. Albums
view more favorite "Albums" by sliding "Albums" to the left .
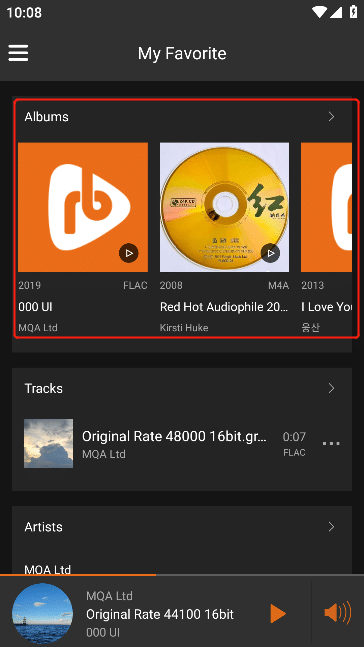
Click the ">" button on the right side of " Albums " to enter the "All Favorite Albums" interface.

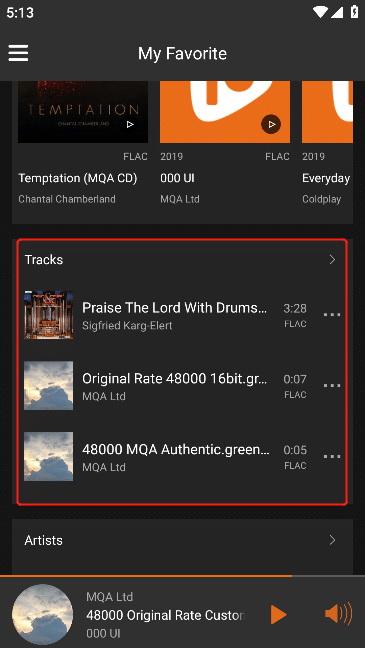
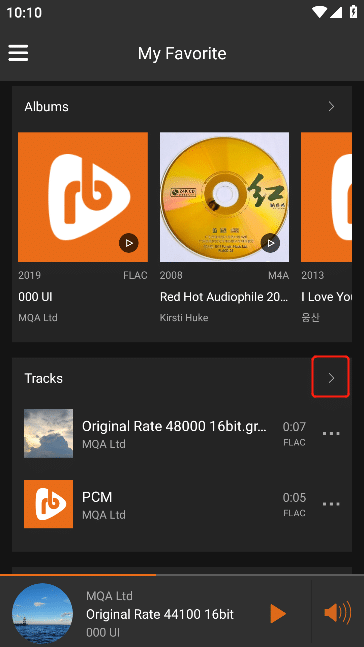
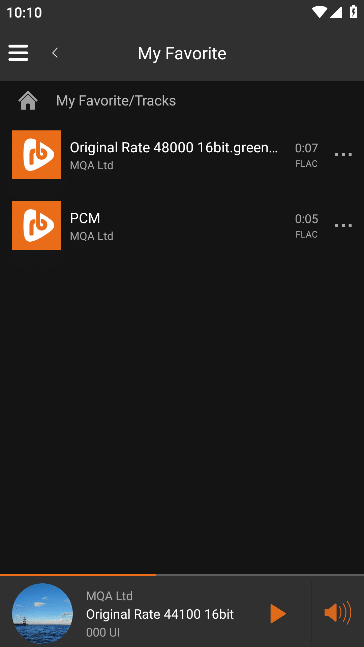
3.6.6.2. Tracks
Click the ">" button on the right side of "Track" to enter the "All Favorite Tracks" interface.
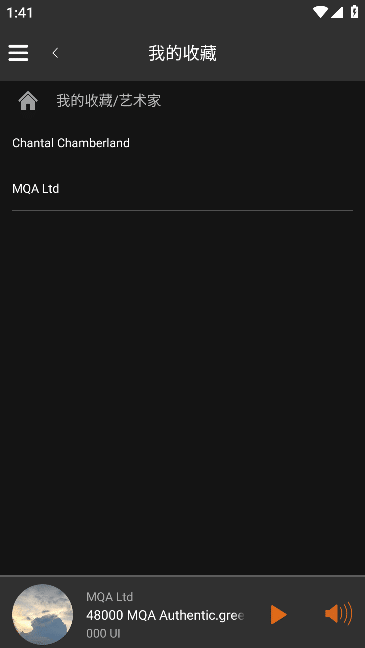
3.6.6.3. Artists
Click the ">" button on the right side of "Artists" to enter the "All Favorite Artists" interface.
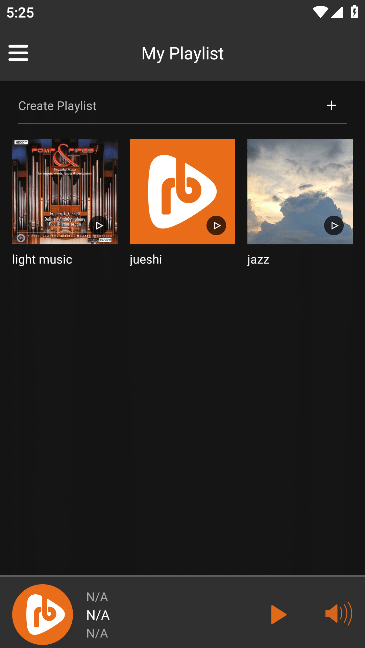
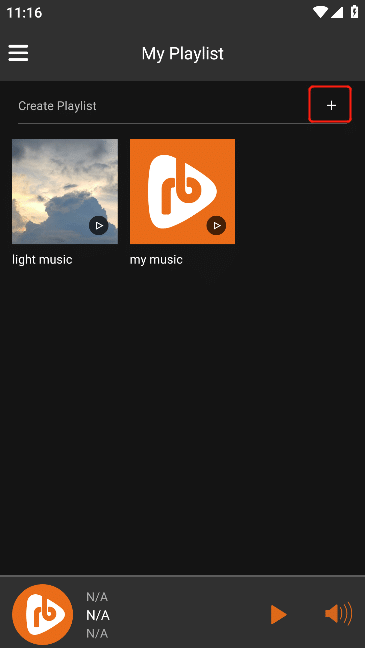
3.6.7. My Playlist
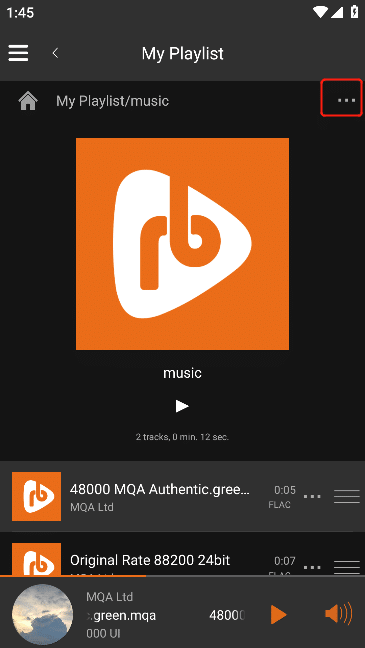
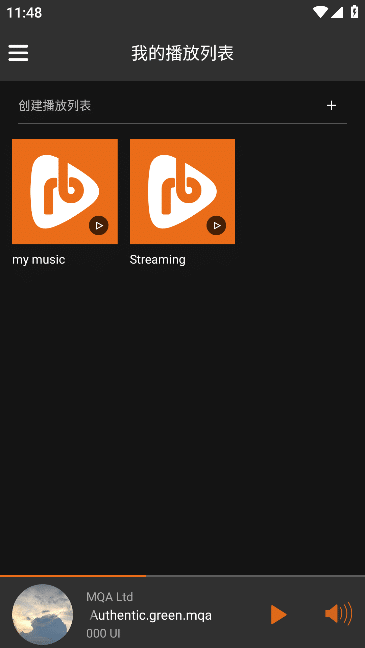
Click "My Playlist" to enter the "My Playlist" interface .
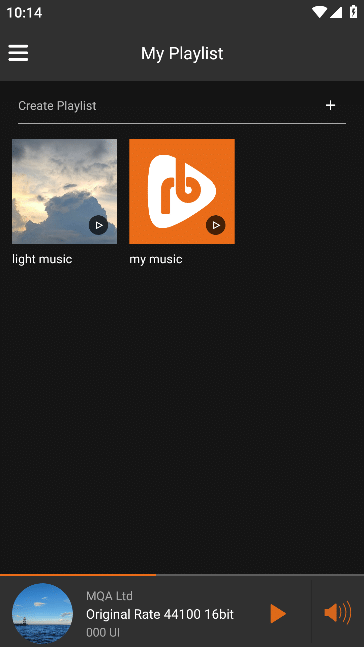
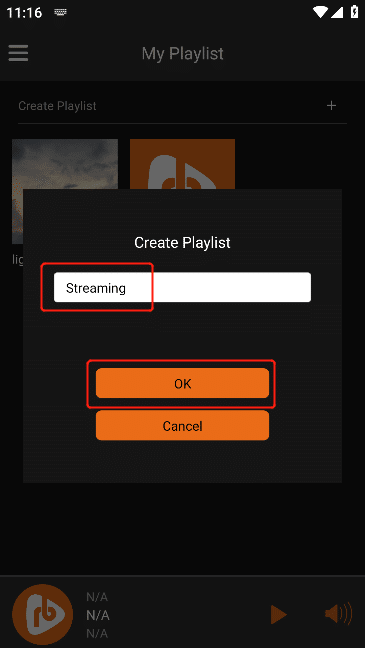
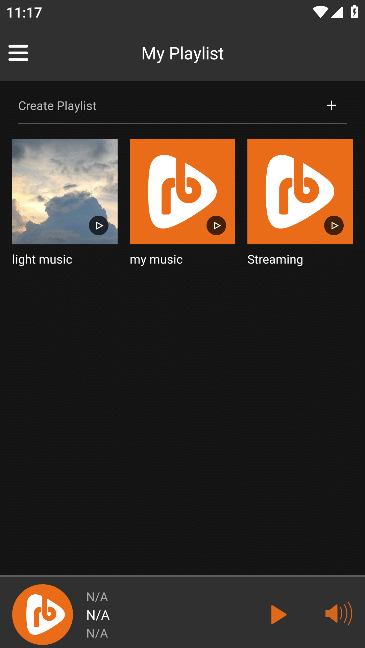
3.6.7.1. Create My Playlist
In the "My Playlist" interface, click the "+" button to enter the "New Playlist" interface, enter the "Playlist Name", and then click the "OK" button to add the "My Playlist".
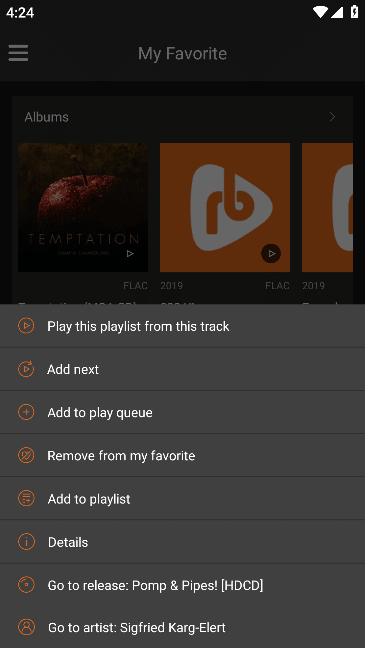
3.6.7.2. My Playlist Action
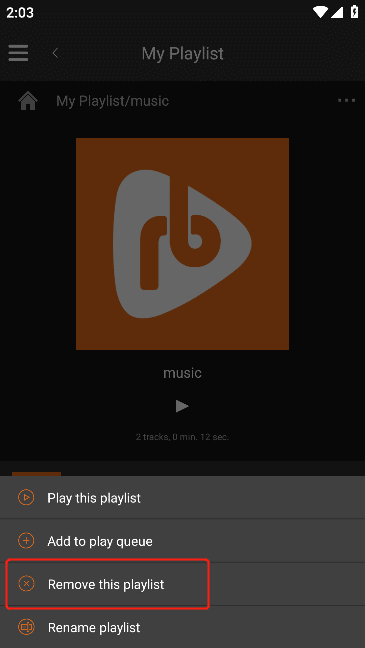
Select "Playlist" to enter the "Playlist" track interface, click the "..." button in the upper right corner, and perform corresponding operations on the current playlist according to the pop-up content.
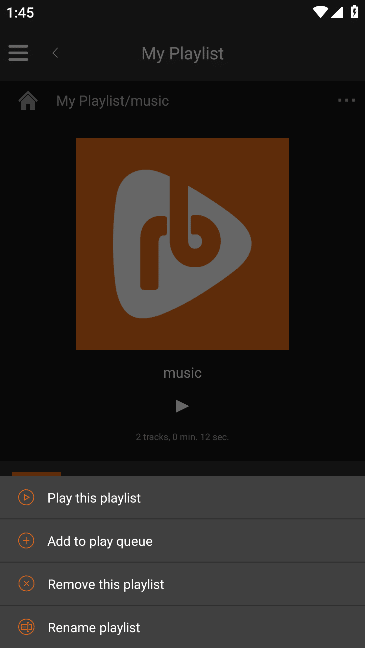
3.6.7.2.1. Play this Playlist
Click "Play this playlist" to add all the songs in the current playlist to the "Play Queue" and start playing all the songs in the current "Playlist" in order. (Note: "Play Queue" in step 3.7.2.6)

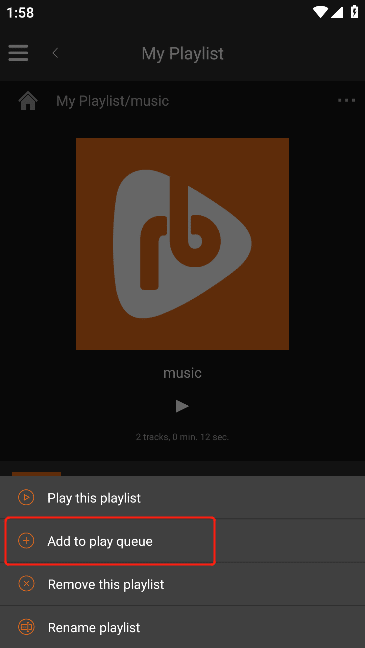
3.6.7.2.2. Add to Play Queue
Click "Add to Play Queue" to add all the songs in the current playlist to the " Play Queue " (Note: "Play Queue" is in step 3.7.2.6)

3.6.7.2.3. Remove this Playlist
Click "Remove this Playlist" and this playlist will be deleted from "My Playlists" .
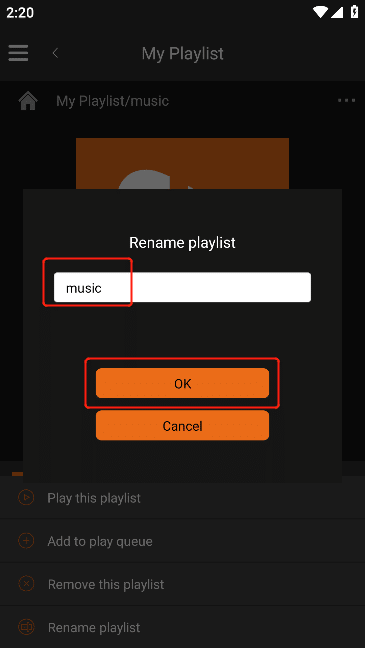
3.6.7.2.4. Rename Playlist
Click " Rename Playlist" to pop up the " Rename Playlist" interface, enter the "New Playlist Name " , and then click the "OK" button to complete the modification.

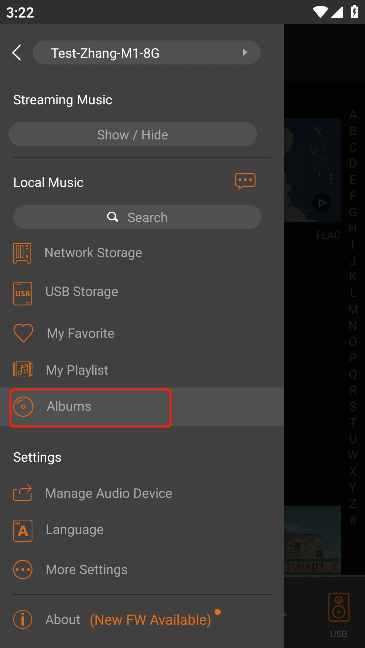
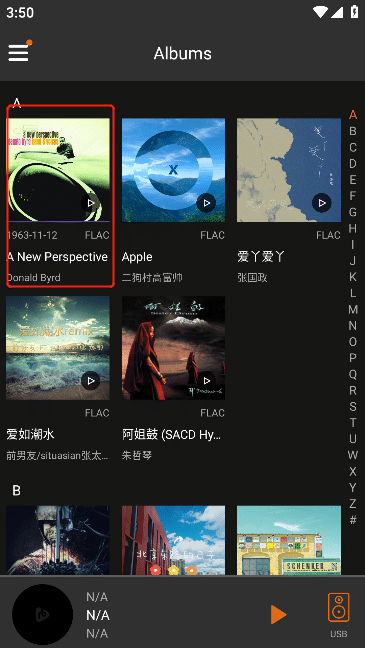
3.6.8. Albums
Click "Albums" to enter the "Albums" interface of local music, and the album content is automatically obtained from network storage and USB storage.
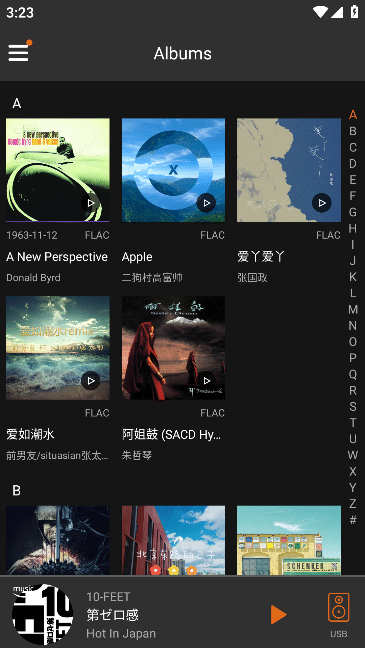
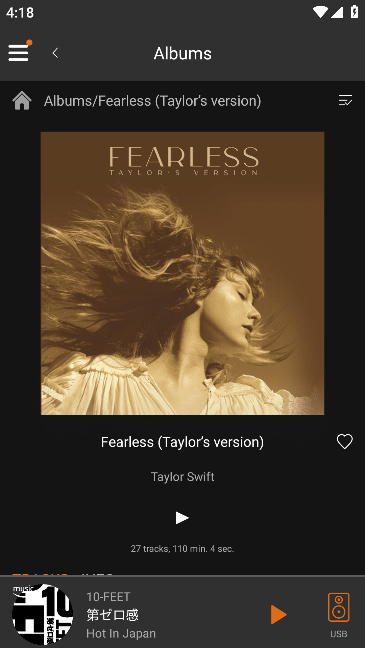
3.6.8.1. Play Album
Click the album you want to play, and then click the "Play" button to start playing the songs from the album in sequence.
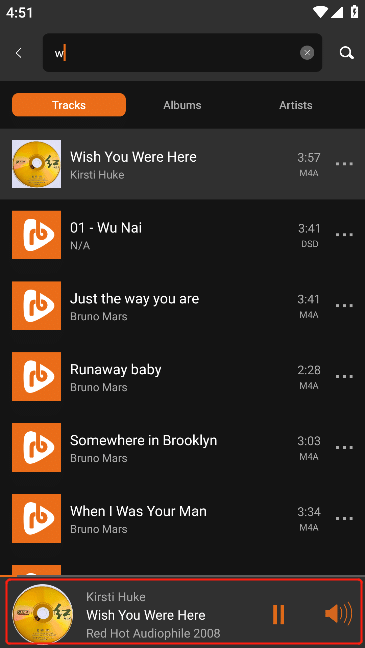
3.6.9. Search
Click the "Search" box to enter the "Search" interface.
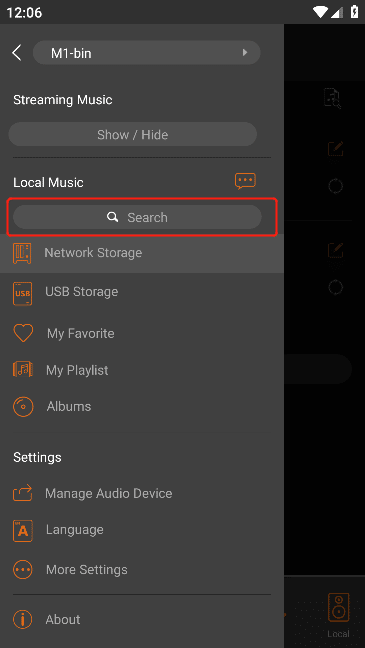
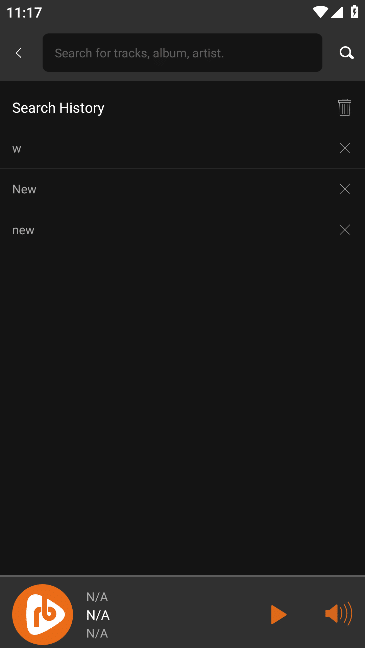
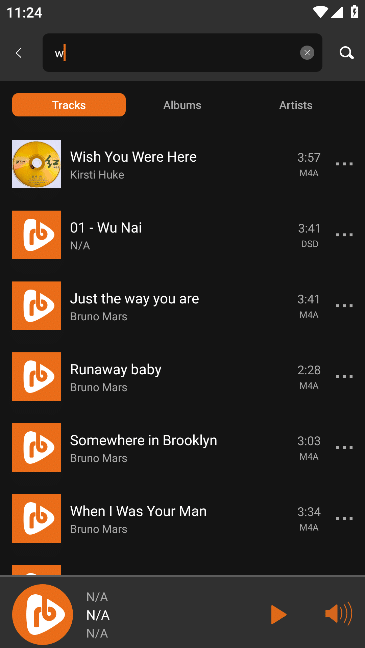
In the "Search" interface, enter the content to be searched, and click the "Start Search" button to search for matching Albums, Tracks, Playlists, and Artists in data sources, network storage, and USB storage according to the search content.
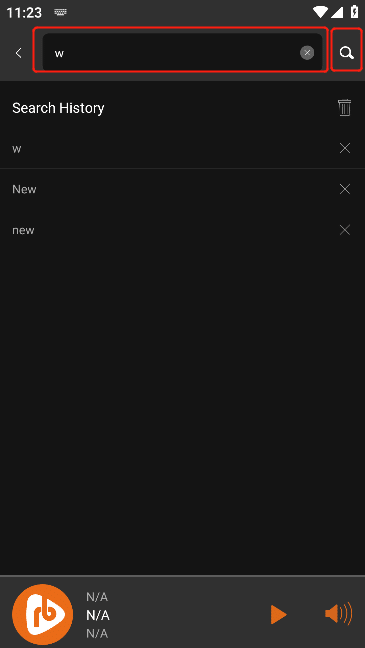

you can see the "Search Record" on the "Search" interface . Click any search content to start searching again based on the search content.

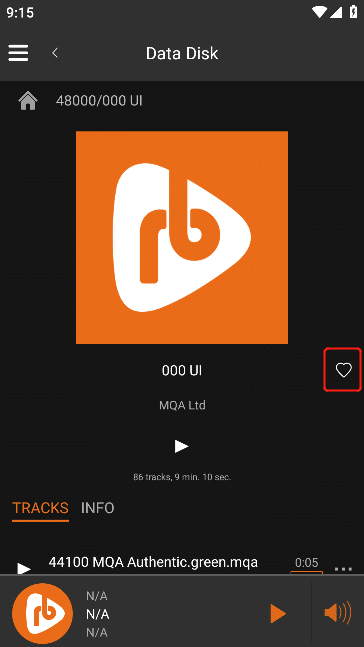
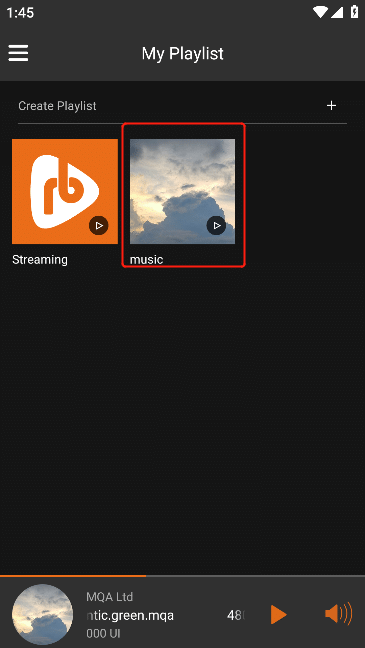
3.6.10. Play Local MQA Files
Select any "Storage"or "Favorites" in the local music, enter the track interface, and click the MQA track to play.
After playing the track, select "Small Player" to enter the "Big Player" interface.
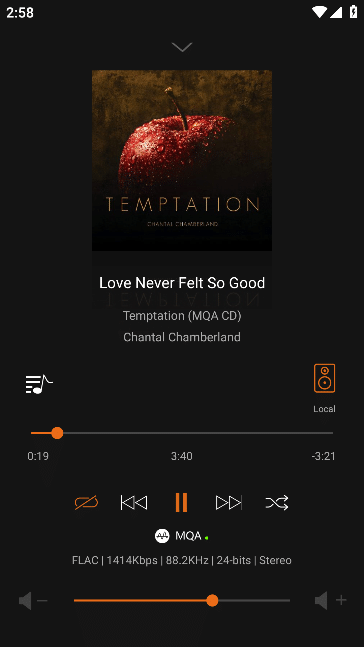
MQA tracks on the "Big Player" interface , automatically identify and display the MQA logo and the corresponding three different audio states.
1. MQA display MQA_Logo + MQA + ●、2. MQA Studio displays MQA_Logo + MQA Studio+ ●、3. OFS displays MQA_Logo+ OFS+ ●
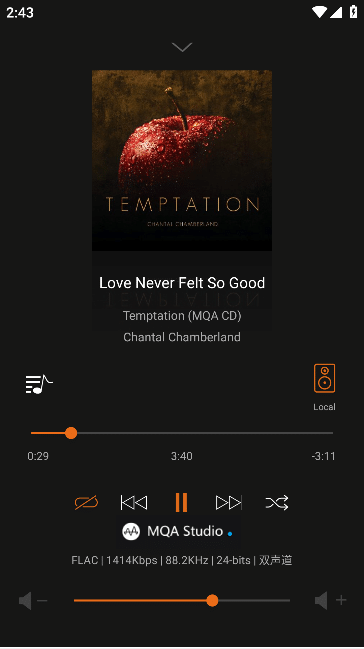
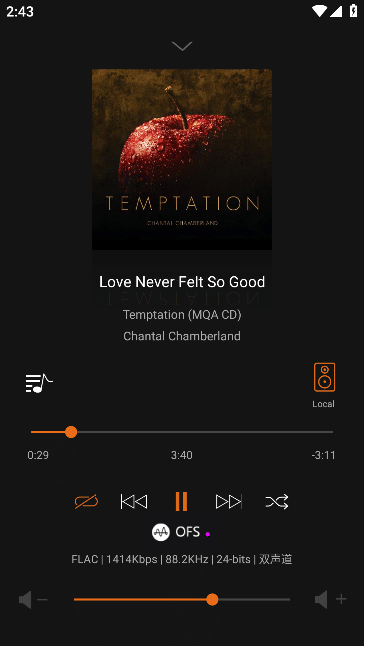
MQA information, including bit rate, sample rate, bit depth, etc., is not displayed in the non-playing state of the "Big Player" interface .
3.7. Playe
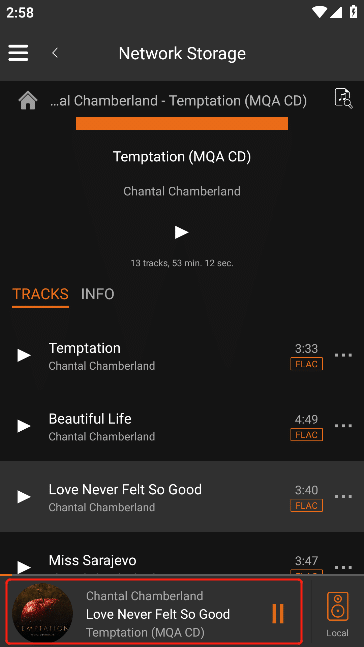
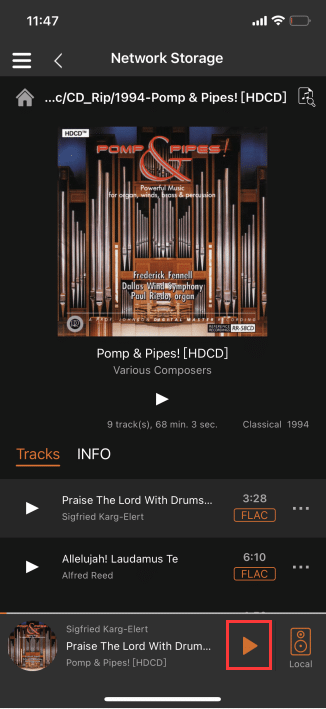
3.7.1. Small Player
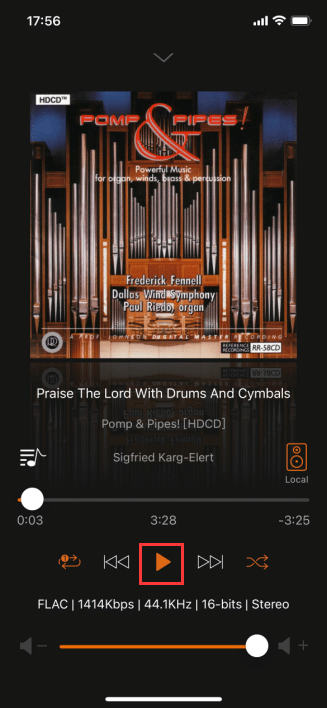
3.7.1.1. Play And Pause
![]()
![]() After playing the song, click the "||" button, the song will pause, click the " " button, the song will continue to play,“||” means playing, “ ” means pause playing.
After playing the song, click the "||" button, the song will pause, click the " " button, the song will continue to play,“||” means playing, “ ” means pause playing.
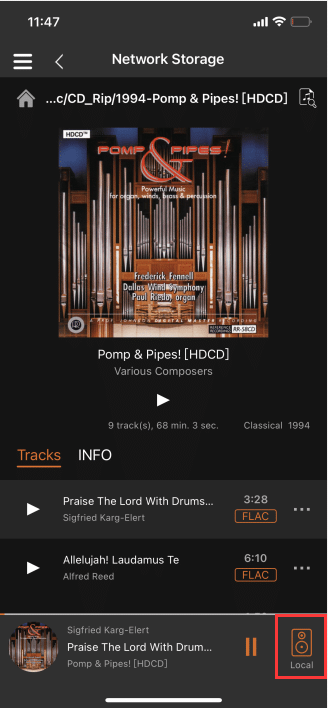
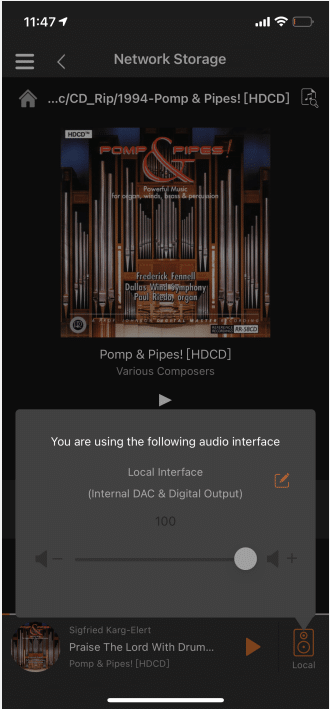
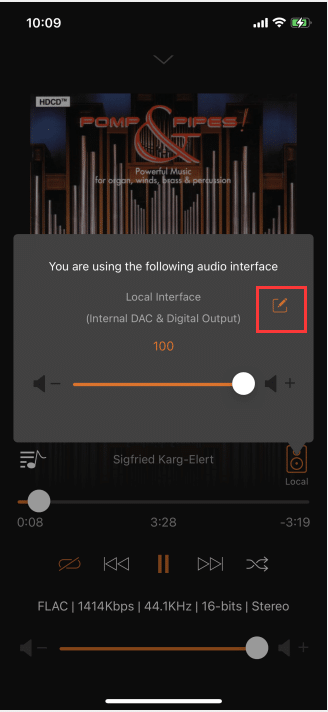
3.7.1.2. Local
Click the "Local" button to pop up the "Audio Interface", where you can adjust the volume of the song playing.
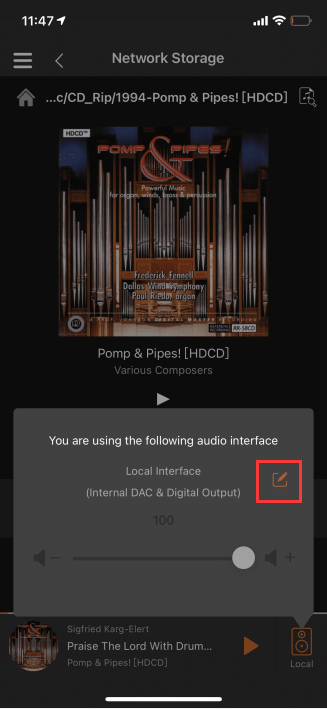
Click the "Edit" button on the right side of "Audio Output Device" to enter the "Manage Audio Output Device" interface.(Note: "Managing Audio Output Devices" is displayed in Step 3.5.1.1.3)
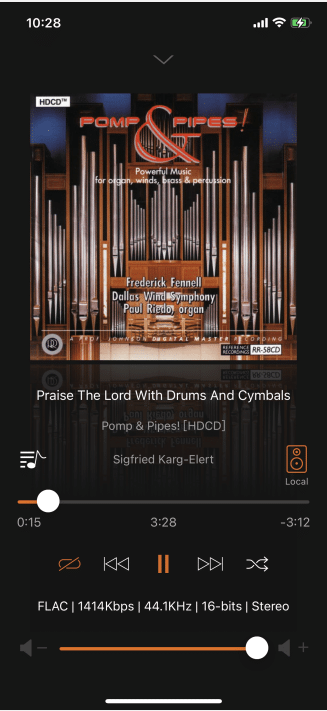
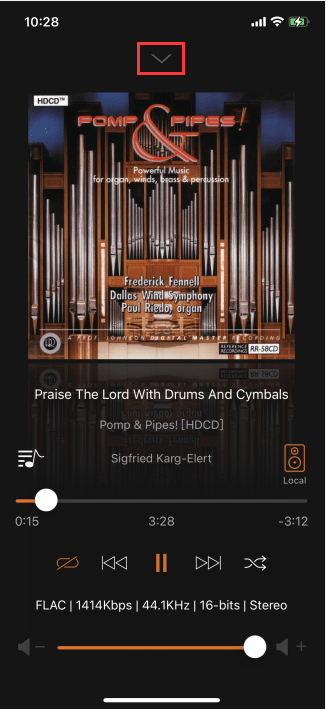
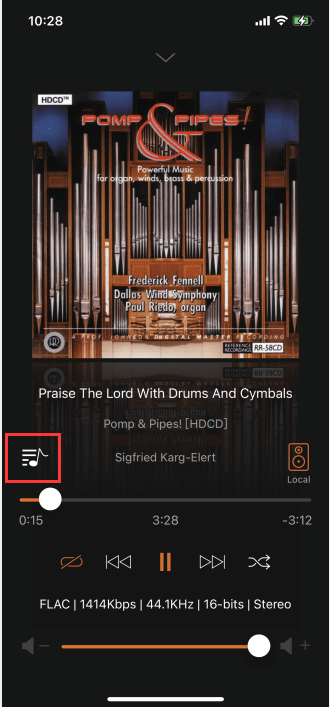
3.7.2. Big Player
After playing the song, click the "small player" below to enter the "big player" interface.
Click the "![]() " icon above the "big player" to switch to the "small player" interface.
" icon above the "big player" to switch to the "small player" interface.
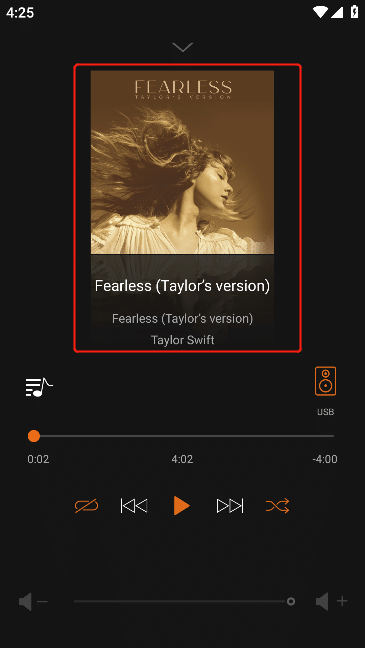
3.7.2.1. Play Cover
When playing local music, if the music you are playing comes with a cover page, the song's "cover page" will be displayed.
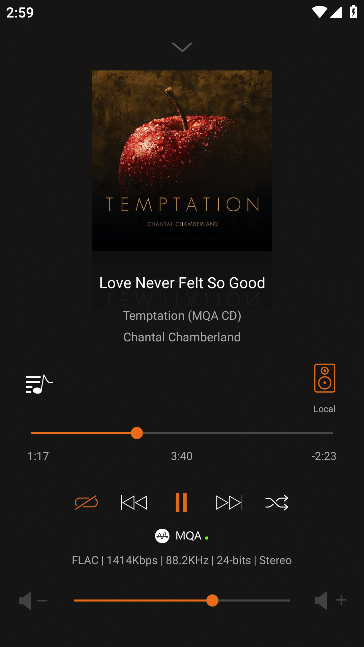
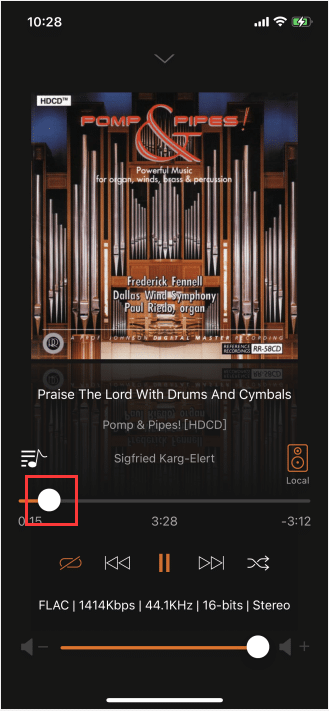
3.7.2.2. Song Play Bar
Click the "Song Play Bar" button, you can slide to control the position of playing the song.
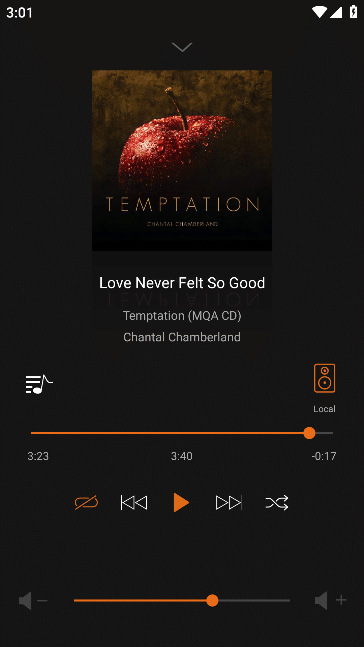
3.7.2.3. Play And Pause
![]() After playing the song, click the “||” button, the song will pause, click the“ ”button, the song will continue to play.
After playing the song, click the “||” button, the song will pause, click the“ ”button, the song will continue to play.
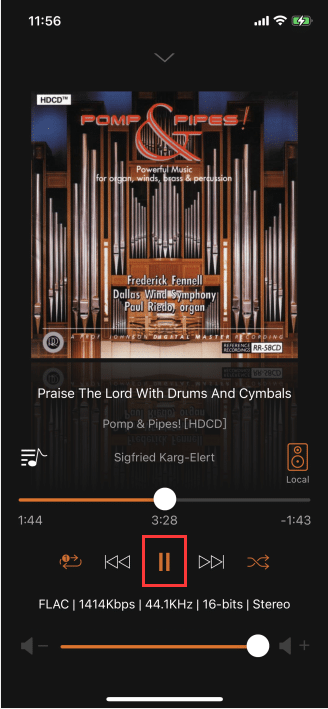
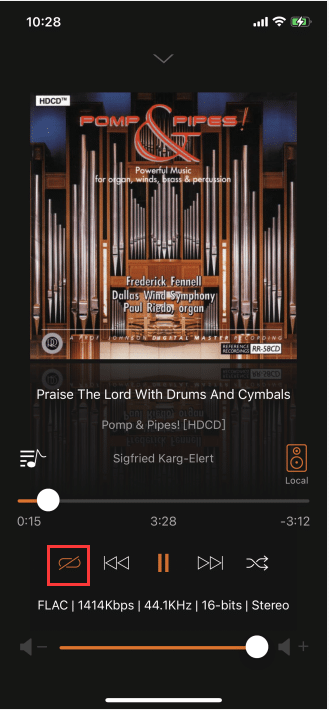
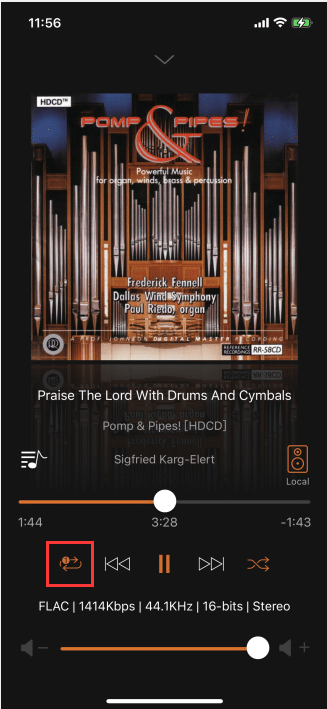
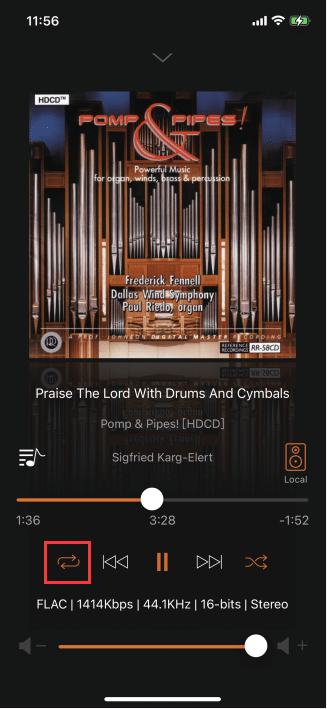
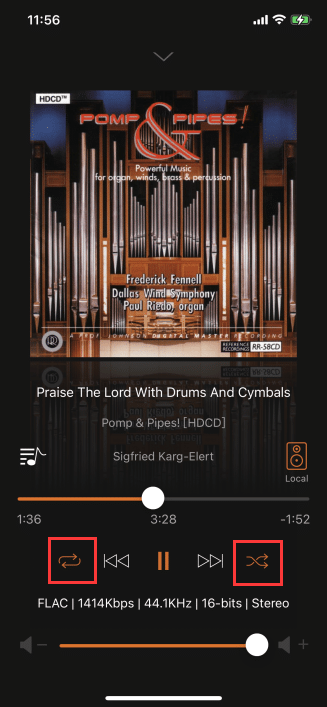
3.7.2.4. Play Rules
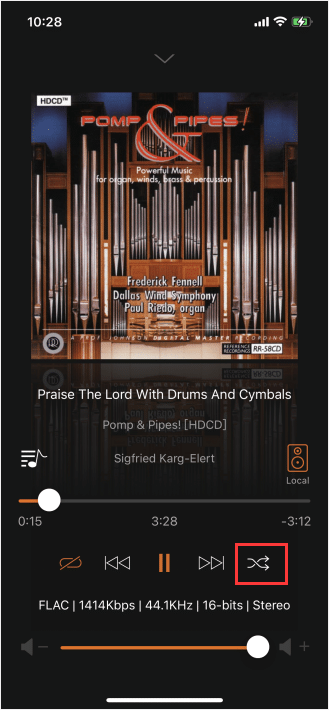
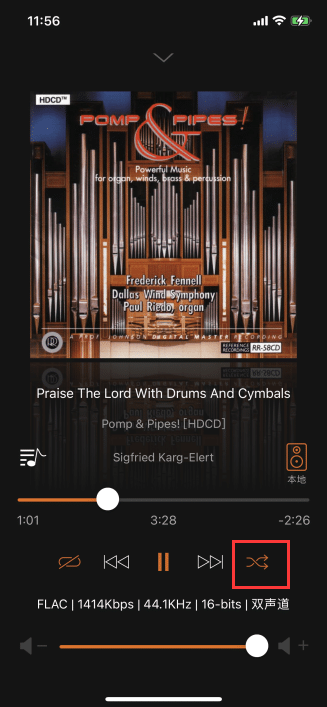
Click the "Playing Rules" button, different graphics represent different playing rules, "Playing Rules" only control the songs in the "Playing Queue".
(plays the songs in the queue in sequence, and pauses when finished)
(single loop)
(plays the songs in the queue in sequence)
Click the "Shuffle" button, the next song will randomly select the song in the "Play Queue" to play.
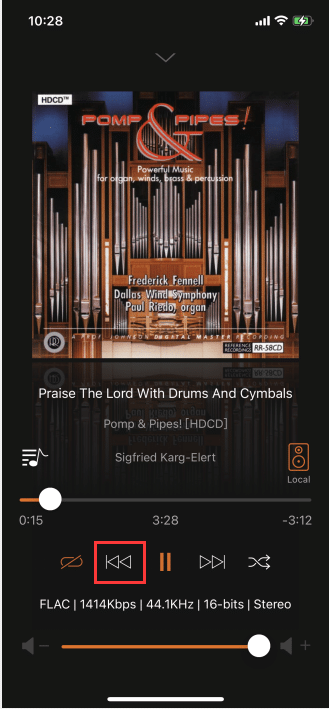
Click the "Previous" button, if the "Shuffle" button has been clicked, the songs in the "Play Queue" will be randomly selected to play.If the "Shuffle" button is not clicked, the previous song of the current song in the "Play Queue" will be played.
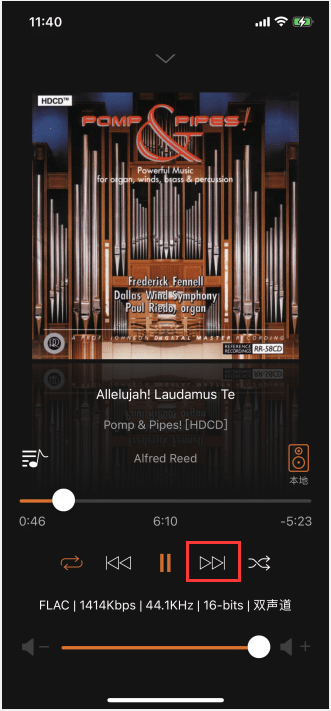
Click the "Next" button, if the "Shuffle" button has been clicked, the songs in the "Play Queue" will be randomly selected to play.If the "Shuffle" button is not clicked, the next song from the current song in the "Play Queue" is played.
If the "Single Loop" button and the "Shuffle Play" button are clicked at the same time, the next play song will be "Single Loop". if clicked at the same time "Play in order" and "Shuffle" buttons, the next play song is "Shuffle". If "Play in sequence" is clicked at the same time and the "Shuffle" button, the next playing song is "Shuffle".


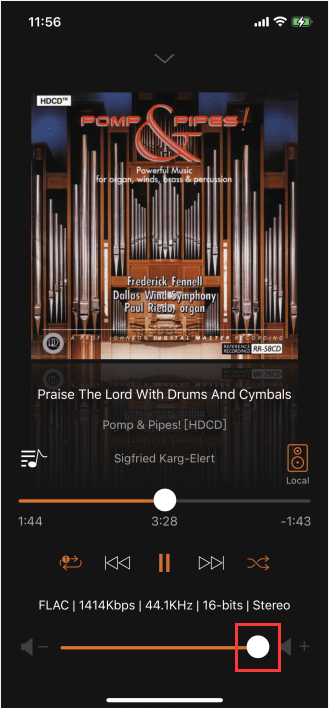
3.7.2.5. Volume Adjustment
Click the "Volume Adjustment" button in the lower volume bar to adjust the volume of the playing song.
3.7.2.6. Local
Click the "Local" button to adjust the volume of the playing song in the pop-up interface.
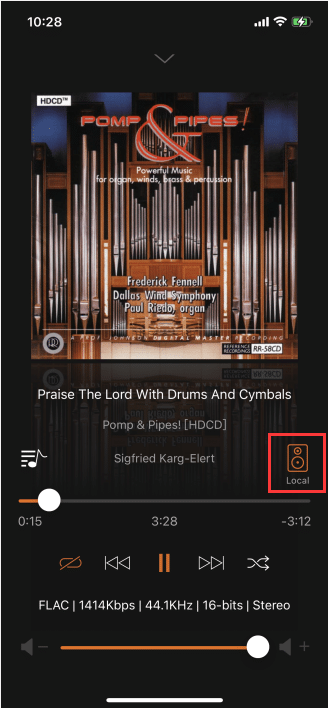

Click the "Manage" button in the volume adjustment interface to enter the "Manage Audio Output Devices" interface.(Note:"Manage Audio Devices" in "Local Music" step 3.5.1.1.3)

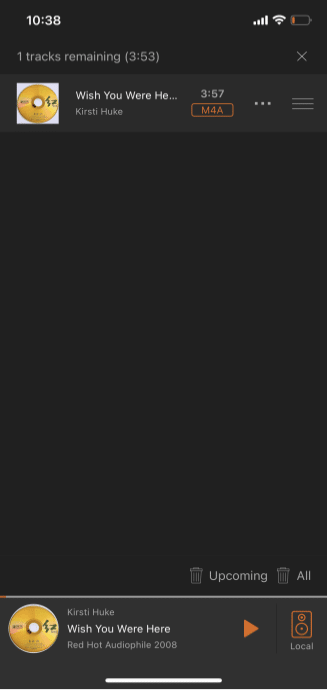
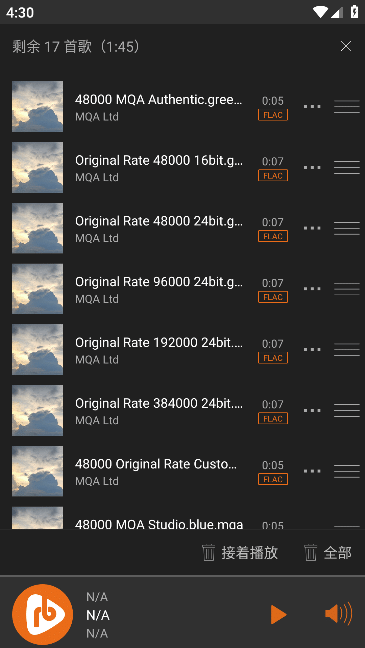
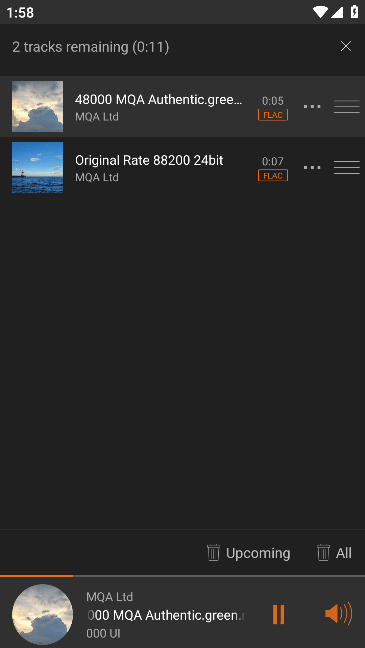
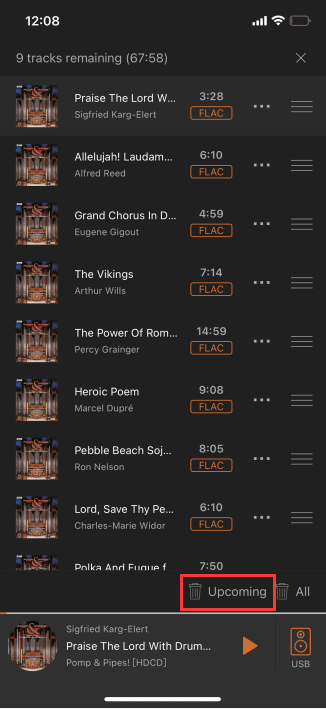
3.7.2.7. Play Queue
Click the "Play Queue" button on the left test to enter the "Play Queue" interface.
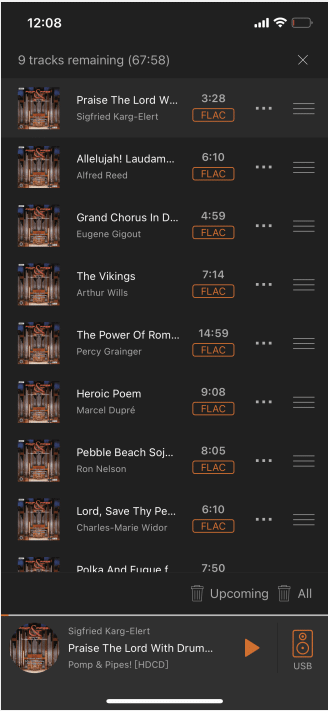
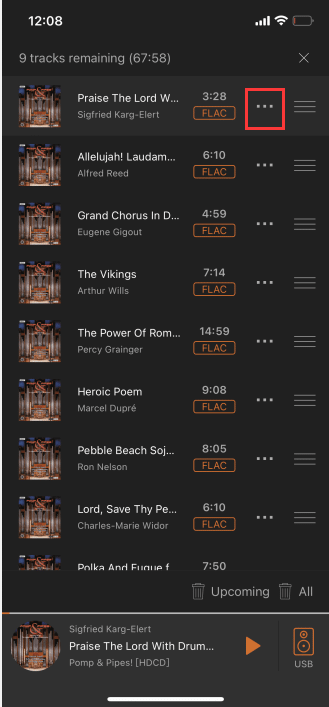
3.7.2.7.1. Play Queue Operation
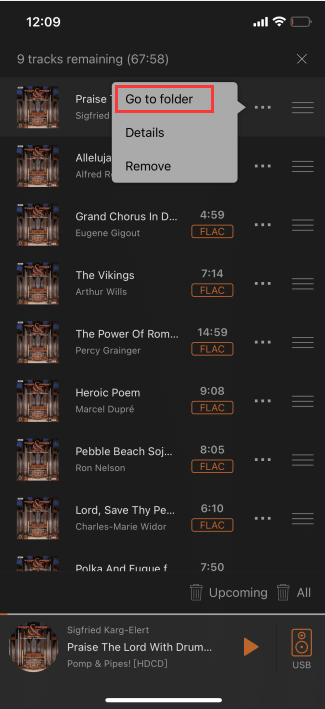
Click the "..." button on the right side of the song, a selection box will pop up, and you can operate the corresponding song.
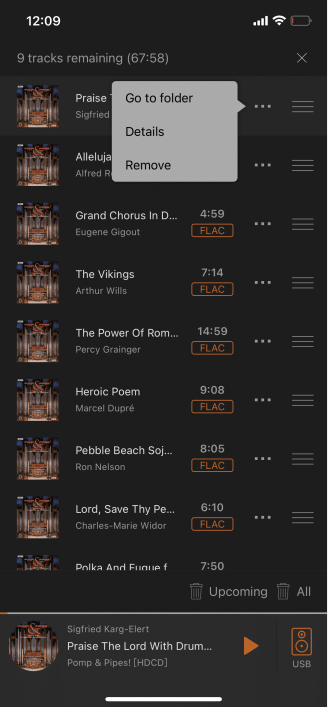
3.7.2.7.1.1. Go To Folder
Click "Go to the folder" to switch to the "Album" interface.
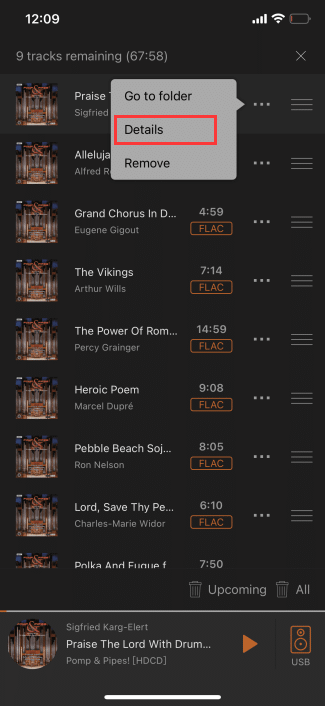
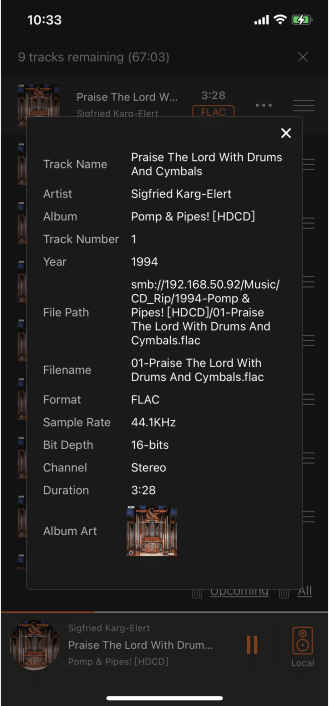
3.7.2.7.1.2. Details
Click "Details" to view the detailed information of the corresponding song.
3.7.2.7.1.3. Remove
Click "Delete" to clear the corresponding song in "Play Queue".

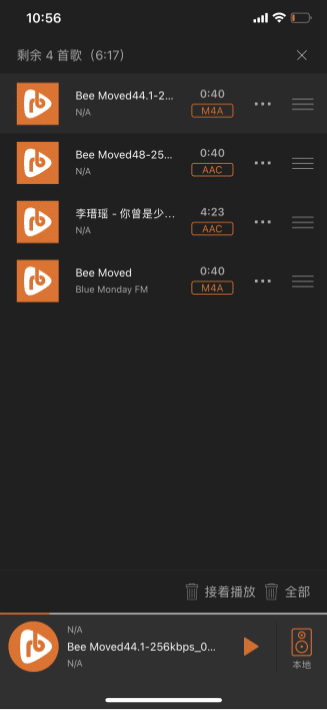
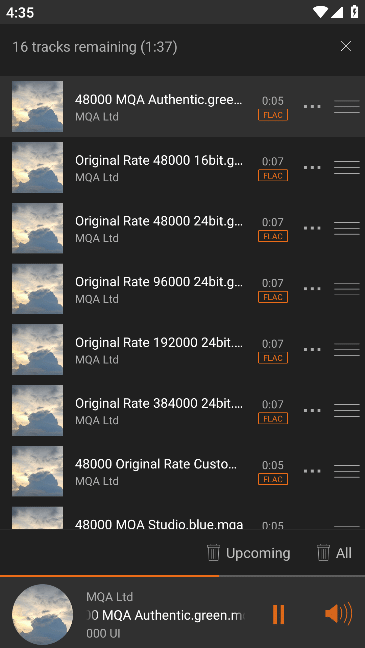
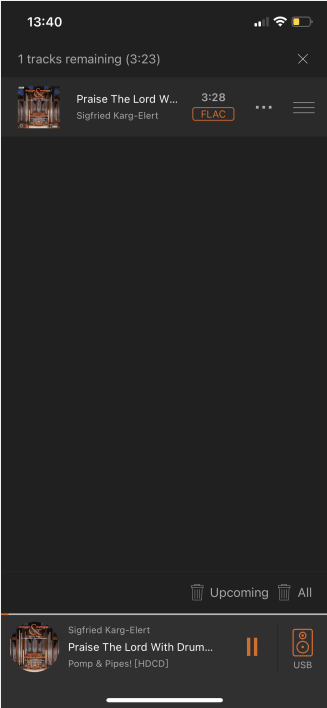
3.7.2.7.1.4. Upcoming
Click "Upcoming" to keep the currently playing song in the "Play Queue" and clear all other songs.
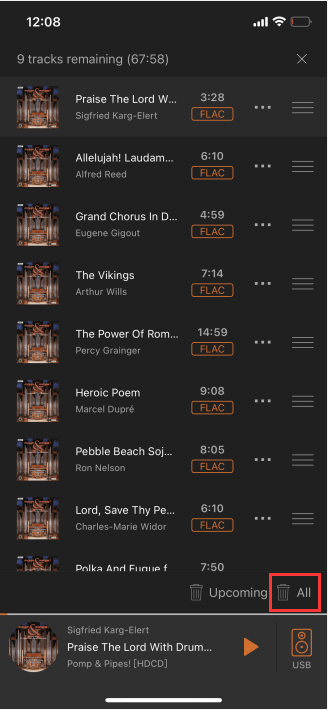
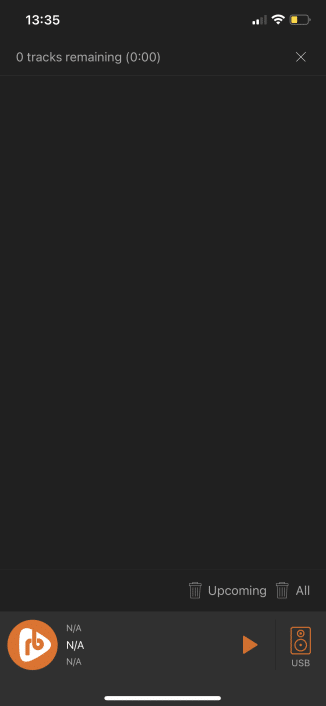
3.7.2.7.1.5. All
Click "All" to clear all songs in "Play Queue".
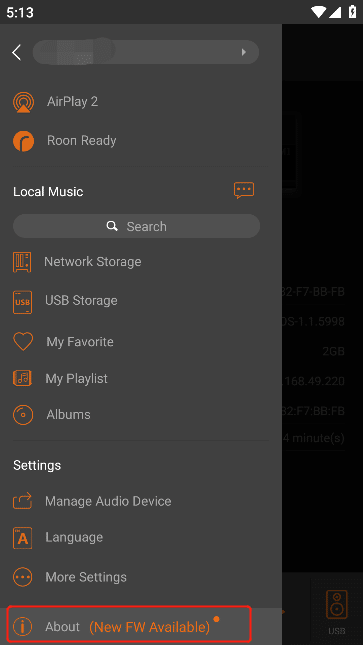
3.8. About
Click the menu button in the upper left corner to see the "About" button .

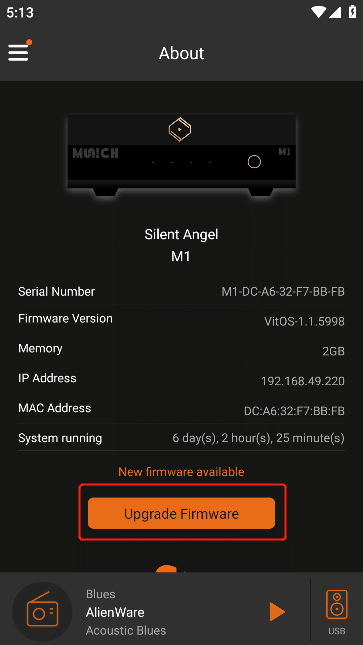
Click "About " to enter the "About" interface, where you can view the connected device information and current APP version information.
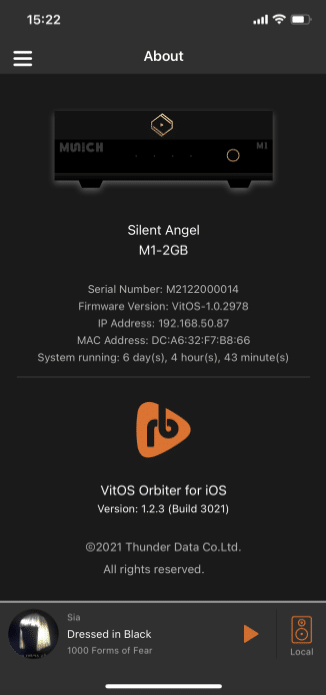
3.8.1. Firmware Update
If "New FW Available" appears after the "About" text, click to enter the "About" interface and then click "Upgrade Firmware" to wait for the firmware update to complete.